How to Recover Deleted Files from Flash Drive on a Mac
Table of Contents
Have you deleted important files from a USB flash drive on your Mac? The fact that you’re reading this article means that you’re already doing better than most in the same situation. That’s because we’ll show you how to recover deleted files from USB on your Mac, both with and without software.
Why Can Deleted Files Be Recovered from a Flash Drive on a Mac?

You might be wondering if techniques to recover deleted files from USB are too good to be true, or even a scam. But rest assured, they’re not! In fact, it’s possible to recover deleted files from a flash drive on a Mac due to the way the file deletion process works.
When you “delete” a file from your Mac’s USB drive, it doesn’t vanish into thin air. Instead, the following happens:
- First, the file gets moved to the Trash. While it’s sitting in the Trash, you can easily recover it without needing any special software.
- When you empty the Trash, the file still isn’t completely erased from your flash drive. Instead, the Mac removes the logical file system references that allow you to access and see the file the normal way. However, the actual file data remains physically written on the USB drive, and you can recover it using USB data recovery software.
- It’s only when new data gets written to the same physical location on the flash drive that the deleted file data truly becomes lost for good. At this point, it’s impossible to recover the deleted files from the USB flash drive with or without software.
As you can see, the key is to act quickly, to minimize the chances of Trash becoming empty and/or the deleted file getting overwritten.
How to Recover Files from USB Without Software
Let’s start with the simplest method to recover deleted files from a USB drive on your Mac, which doesn’t require any special software.
Retrieve Your Files from Trash
As we’ve already explained, when you delete files from your USB drive on a Mac, they’re not immediately gone—they end up in the Trash folder first. As such, that’s exactly where you should begin your attempt to recover deleted files from a USB without software:
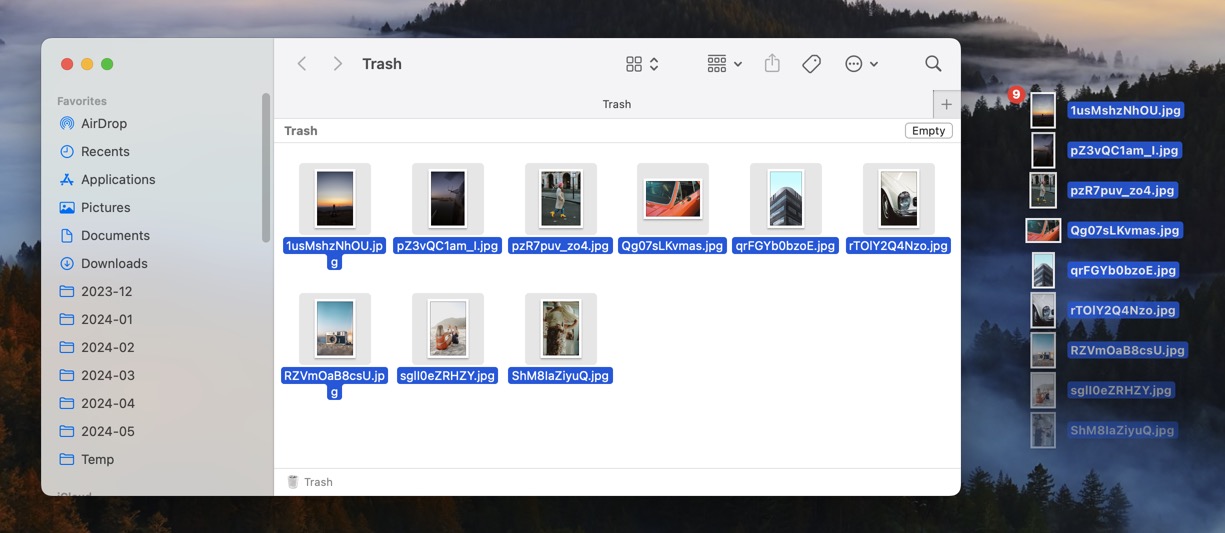
- Connect the USB drive on which the missing files were located to your Mac. This is important because each connected drive on a Mac has a hidden .Trashes folder that stores deleted files.
- Click on the Trash icon in your dock. Here, you’ll see all the files you’ve deleted, not just from your Mac’s internal hard drive, but also from any connected USB drives.

- Browse through the items to find your deleted files. If your USB drive had a lot of data, then the search bar located in the top-right corner can help you narrow down recoverable files.
- If you find your files, simply drag and drop them back to your USB drive or right-click and select “Put Back.”

If the files you need aren’t in the Trash folder, then there’s one other place to check before resorting to software: backups.
Dig Through Your Backups
When the files you’re looking for are not found in the Trash, your next step should be to thoroughly check any available backups.
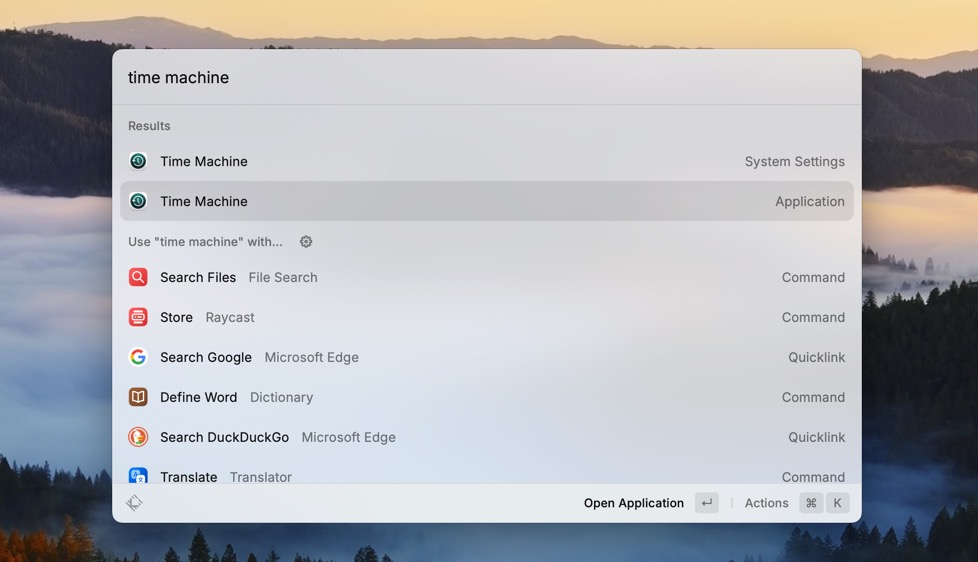
As a Mac user, you likely have Time Machine enabled to automatically back up your system drive. Even though your USB drive isn’t automatically included in Time Machine backups by default, it’s possible that files transferred from the USB to your system drive before deletion were backed up. So, fire up Time Machine using Spotlight and take a look. You might just get lucky:
- Press Command + Spacebar on your keyboard and enter “Time Machine.”
- Select the Time Machine application and press Return.
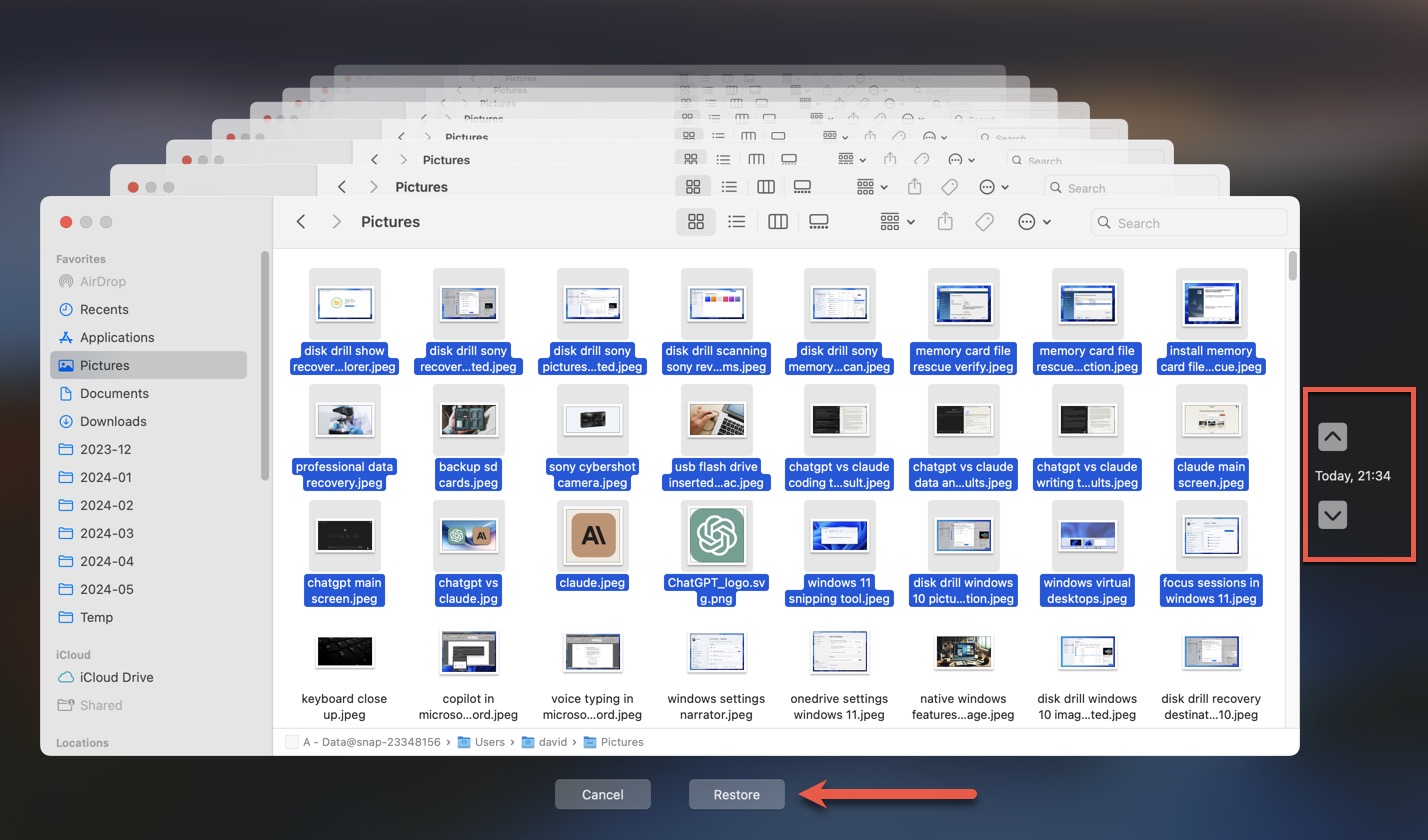
- Navigate to each location where your files were likely stored.
- Browse through the timeline on the right side of the screen to locate a backup from a time before you deleted the files from your USB drive.
- If you find the files you’re looking for, select them and click the “Restore” button at the bottom of the window.


Besides Time Machine, you should also check any manual backups (such as those on external hard drives, network-attached storage devices, and other USB flash drives) you’ve created and any cloud storage services you use (like iCloud Drive, Google Drive, Dropbox, or OneDrive).
Send the USB Drive to Professionals

Photo by Anete Lusina
If you really, really, really don’t want to give USB data recovery software a try, then you can consider professional data recovery services. These services are provided by companies that specialize in retrieving lost data from all kinds of storage devices, including USB drives.
Professional data recovery companies have advanced tools, specialized equipment, and expert knowledge, so they can deliver seemingly miraculous results, but they can be very expensive and they can’t guarantee a 100% success rate.
How to Recover Files Using USB Data Recovery Software
If you’ve had no luck finding your deleted files in the Trash or in a backup, it’s time to let USB data recovery software shine.
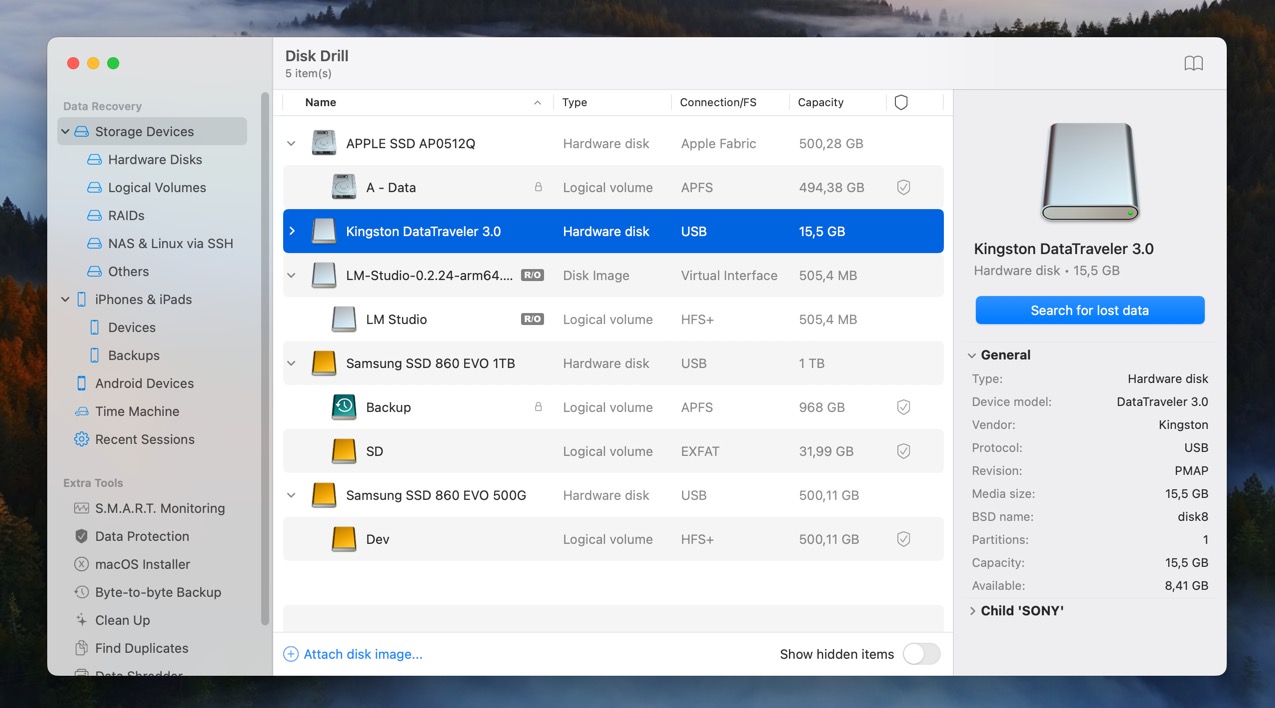
Our top pick is Disk Drill for Mac, thanks to its extensive support for over 400 file formats and all the file systems commonly used with USB flash drives (FAT, FAT32, exFAT, and others). In fact, Disk Drill can recover data even from logically damaged flash drives that appear as RAW in Disk Utility. As long as your Mac still detects the USB drive, Disk Drill can scan it for recoverable files.
On top of its impressive recovery capabilities, Disk Drill shines with its exceptional ease of use. Its modern, intuitive user interface looks like something Apple themselves designed. Even if you’ve never used data recovery software before, you’ll be able to recover deleted files from your USB with Disk Drill in just a few clicks:
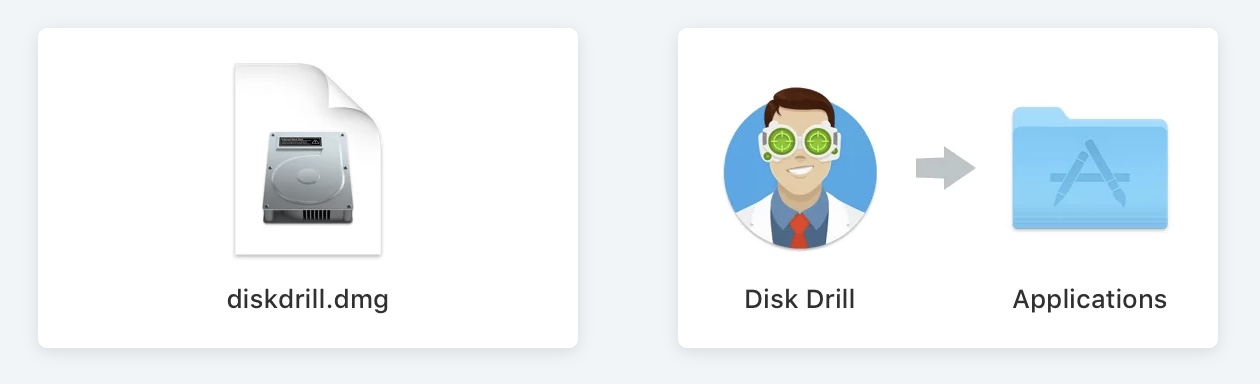
- Download and install Disk Drill on your Mac.
- Connect the USB flash drive you want to recover files from.
- Launch Disk Drill and select the USB drive from the list of available disks. Click “Search for lost data” to start scanning the drive for deleted files.
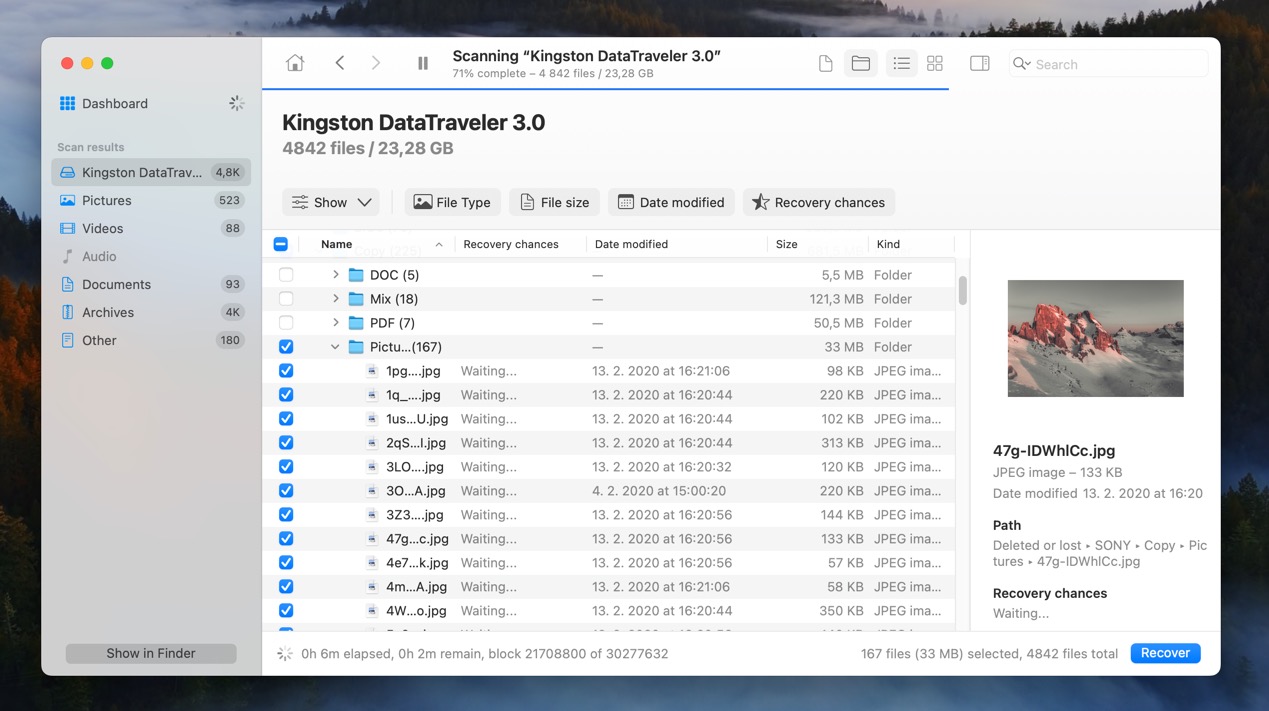
- Select the files you want to recover. If you’re having trouble locating the exact files you want to recover and don’t want to waste storage space by recovering all found files, then you can use Disk Drill’s scan result filters and search feature to zero in on specific file types, names, or sizes.
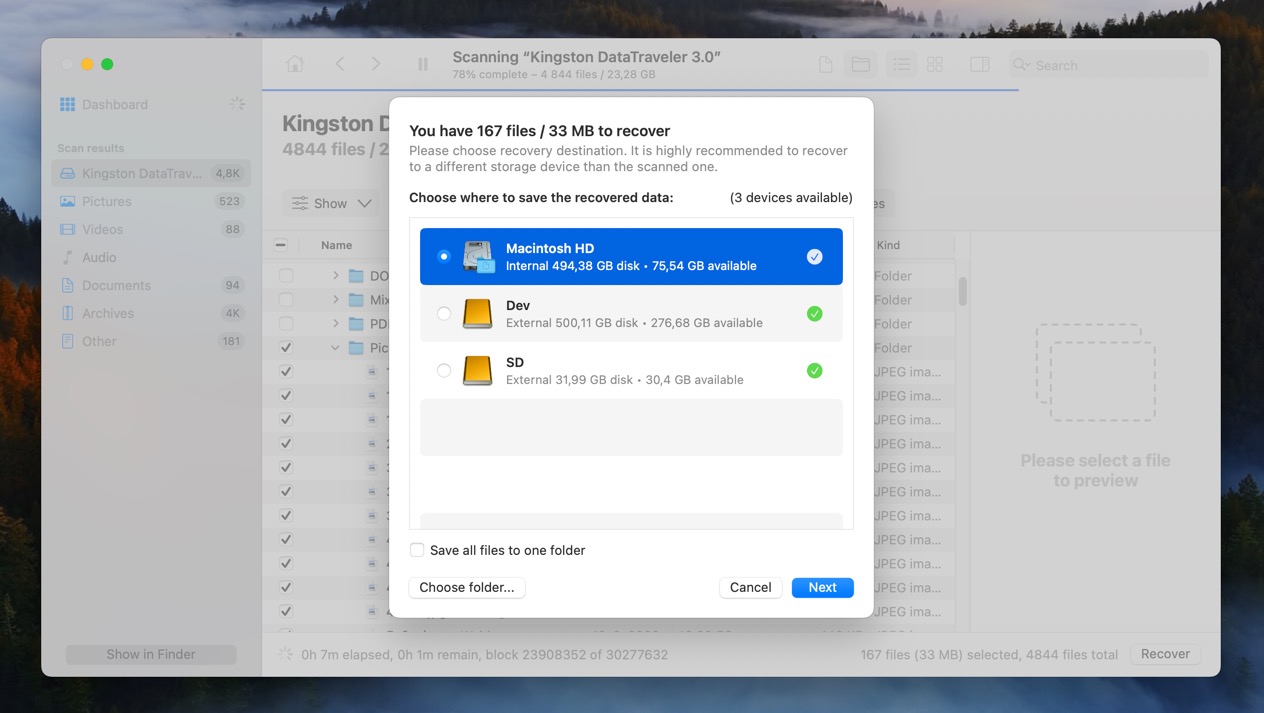
- Click “Recover” to restore the deleted files to your chosen location. Any location besides the USB flash drive you’re recovering is okay.


While Disk Drill offers unlimited previews for free (great for verifying the recoverability of your files), you’ll need to purchase a license to actually recover the files. Licenses are one-time purchases though, not subscriptions, so you only need to pay, and you can then keep using Disk Drill forever.
Conclusion
Losing important files from a USB drive can feel like a punch to the gut. But as we’ve seen, all is not lost—even when you think it is. By understanding how file deletion works on a Mac and following the steps outlined in this guide, you have a pretty good chance of successfully recovering your deleted files.
FAQ
You can recover files for free by checking the Trash on your Mac after connecting your USB drive. If the files are there, you can easily restore them by dragging them out of the Trash or using the “Put Back” option. Alternatively, you can use free USB data recovery software.
If you have a backup image of the USB drive, then you use the Restore feature of the Disk Utility app to restore the USB drive to its previous state. If not, then data recovery software like Disk Drill can be used to restore individual files from the USB drive (as long as they haven’t been overwritten).
To recover corrupted files from a USB drive on a Mac, use data recovery software that can handle corrupted or damaged files. Disk Drill is a good option, as it can recover data from logically damaged USB drives that appear as raw in Disk Utility.