How to Recover Deleted Files from an SD Card on Mac (Free Methods)
Table of Contents
SD cards are not backed up by Apple’s Time Machine, but that doesn’t mean that SD card recovery on Mac is impossible. There are several effective ways to recover data from an SD card, and we describe those that are completely free in this article.
When Can SD Card Data Be Recovered on Mac?
| Condition | Recovery Possibility |
| Deleted data exists on a different storage device or backup | High |
| Deleted data still exists on the SD card and hasn’t been overwritten | Moderate to High |
| Deleted data has been overwritten on the SD card | None |
SD card data recovery on Mac is possible when the deleted data still exists somewhere. That somewhere can be a different storage device (a backup) or even the SD card itself.
Wait, how can deleted data still be on the SD card?
The answer lies in how computers and storage devices handle file deletion. When you delete a file, the operating system doesn’t actually erase the file’s data. Instead, it marks the file as deleted and makes the space it occupies available for new data. As long as new data hasn’t been written to that space, the original data is still there and can be recovered.
This is why it’s important to stop using the SD card as soon as you realize that you’ve deleted important files. The more you use the card, the greater the chance that the deleted files will be overwritten, which would make it impossible to recover deleted files from the SD card.
Free Methods to Recover Deleted Files from SD Card
You don’t have to be a tech wiz to recover deleted files from an SD card on Mac for free. You just need to follow our step-by-step instructions.
Method 1: Check the Trash
On macOS, deleted files are first moved to the Trash. They stay there forever or until you empty the bin unless the “Remove items from the Trash after 30 days” option in Finder Settings is turned on. This gives you plenty of time to recover data from the SD card.
Here are the brief steps to recover deleted files from the SD card with the help of the Trash folder:
- Insert the SD card into your Mac’s card reader or connect it using an external card reader. You need to do this because macOS creates a hidden Trashes folder on every storage device, including SD cards. When you insert your SD card, the hidden Trashes folder is automatically included in the main Trash folder.
- Open the Trash by clicking on its icon on the Dock.
- Look for the files you want to recover and make sure they were deleted from the SD card.
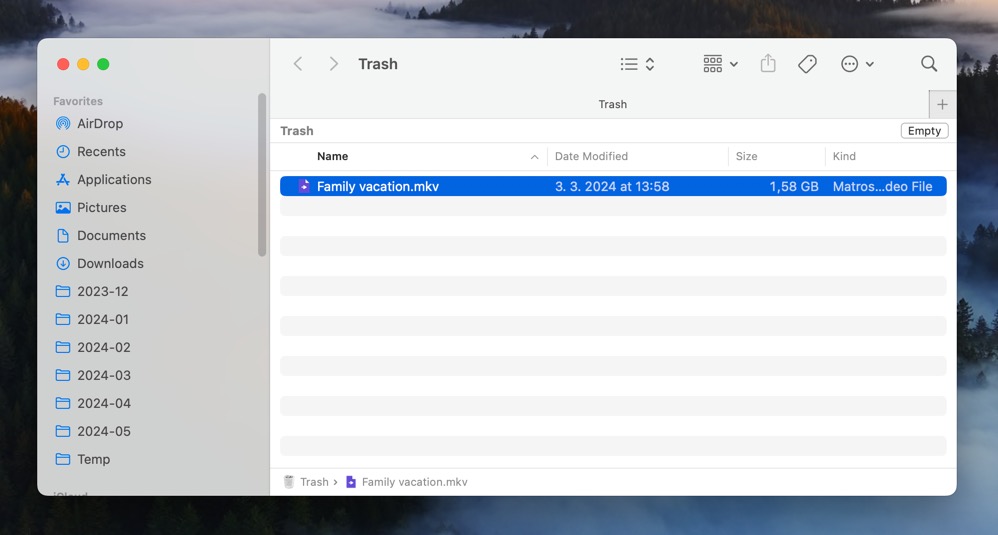
- Select the files you want to recover and drag them out of the Trash to a safe location on your Mac or back to the SD card.

If you can’t find the deleted files in the Trash or they were permanently deleted, don’t worry. There are still other free methods to recover deleted files from an SD card on Mac.
Method 2: Recover from a Backup

If you can’t find your deleted files in the Trash, the next step is to try recovering them from a backup. Here are the backup locations you should check:
- System drive
- External backup storage devices
- Cloud storage services like iCloud or Google Drive
When you recover the deleted files from a backup, we recommend you copy them to a different location on your Mac or SD card, rather than moving them. This way, you’ll still have the backup copy of the files in case something goes wrong.
If you don’t have a backup of the deleted files, or if the backup is outdated, you may need to use free SD card recovery software for Mac.
Method 3: Use PhotoRec
PhotoRec is a completely free and open-source data recovery software that can be used to recover deleted files from an SD card on Mac. It recovers files by their signatures, which means it searches for the unique binary patterns that identify a file type.
A major advantage of signature-based recovery is that it works even when the file system is severely damaged or non-existent. Unfortunately, this recovery method can recover only the deleted data itself—not metadata. This means that the original file names, folder structures, and timestamps will not be restored.
While PhotoRec doesn’t have a graphical user interface, it’s not that difficult to use. Here are the step-by-step instructions:
- Install PhotoRec using Homebrew (it’s included in the testdisk package).
- Insert the SD card into your Mac’s card reader or connect it using an external card reader.
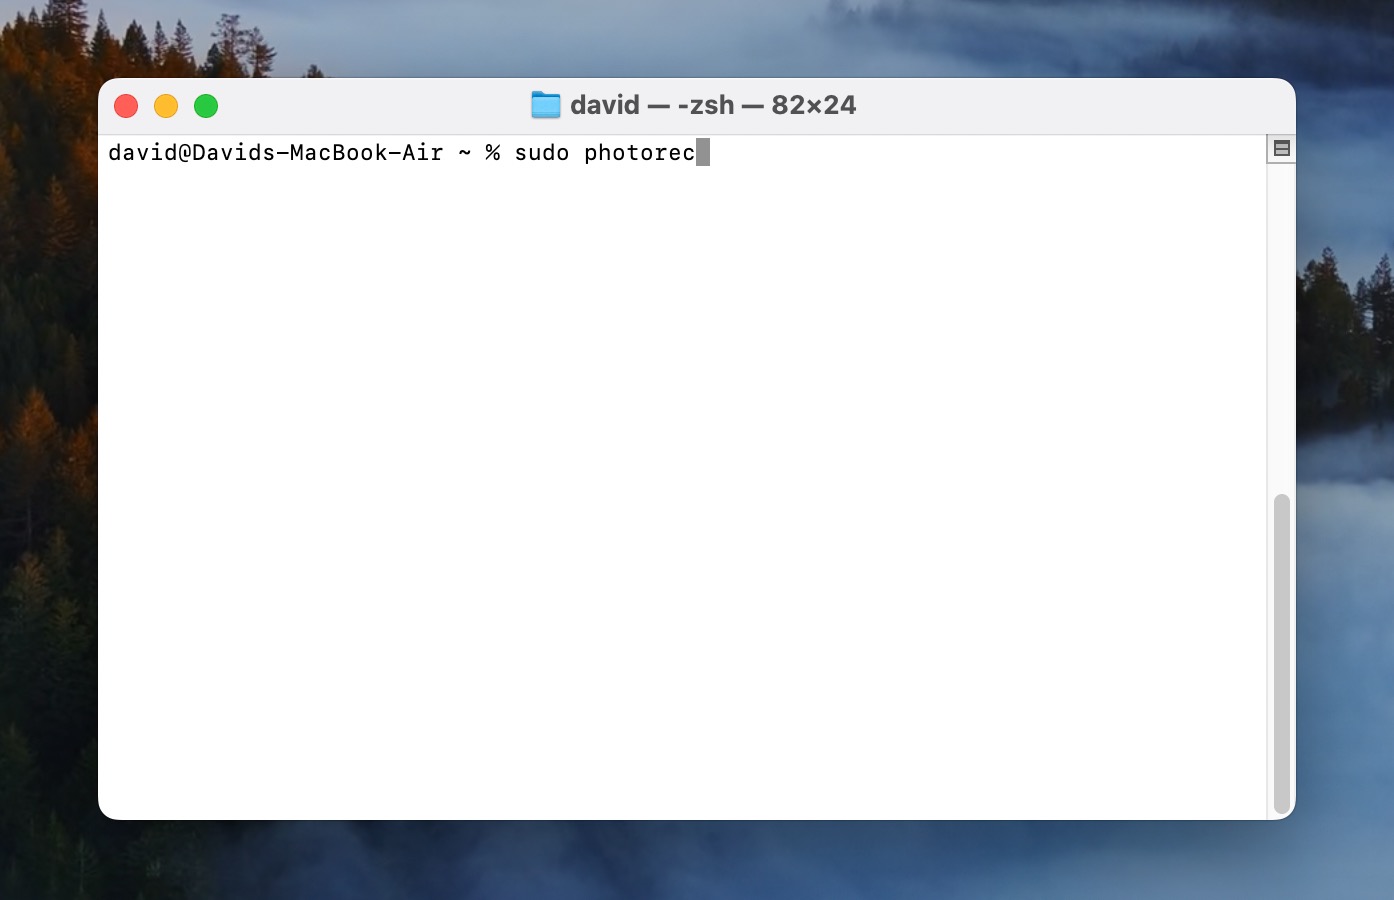
- Launch Terminal and enter “sudo photorec” to launch the data recovery software.
- Use the arrow keys to select your SD card in PhotoRec and press Enter. Then choose the partition from which you want to recover deleted files. Typically, there’s only one partition on an SD card.
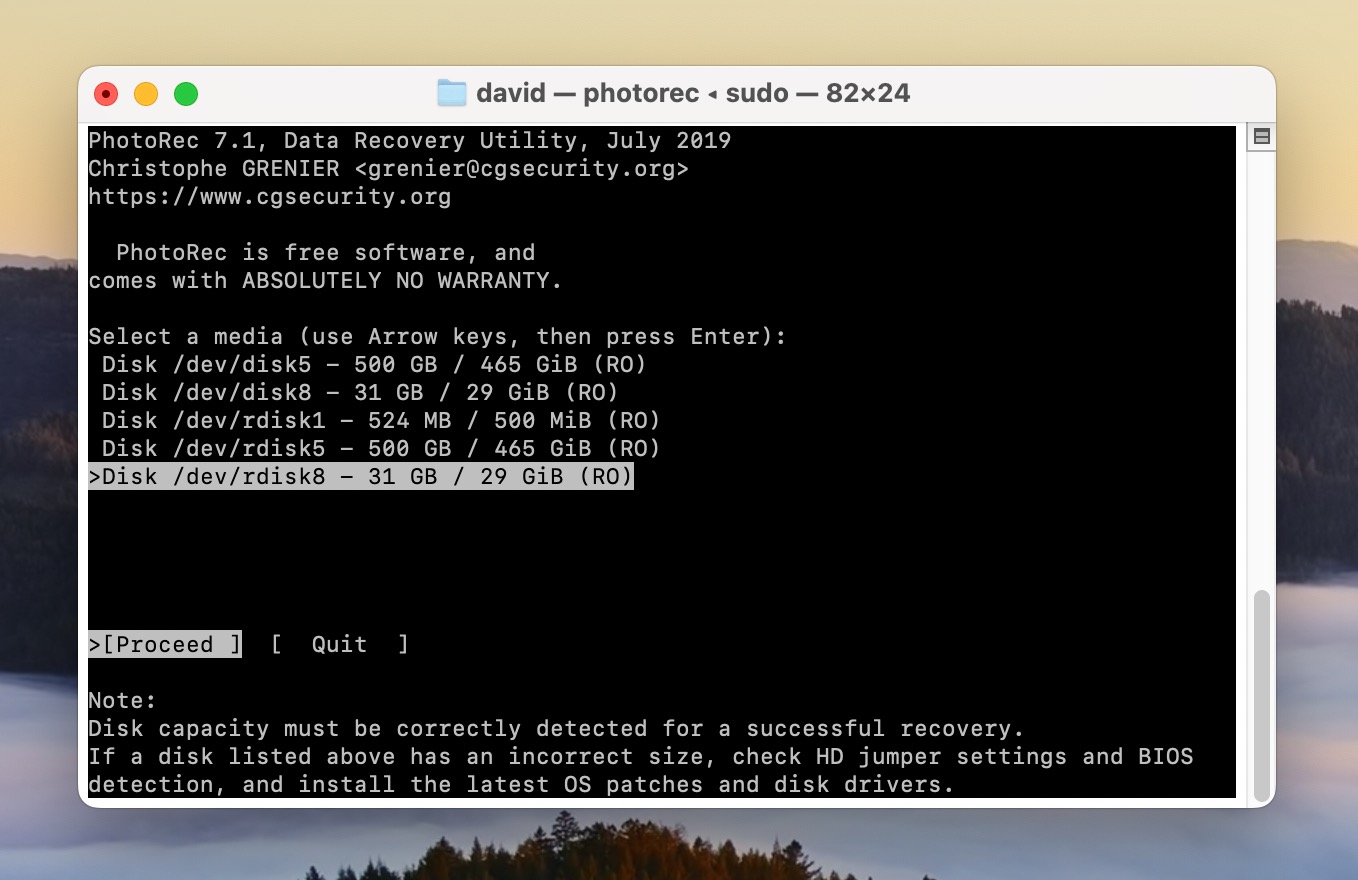
- Select “Other” when asked to specify the file system of your SD card, as SD cards usually use FAT32 or exFAT file systems.

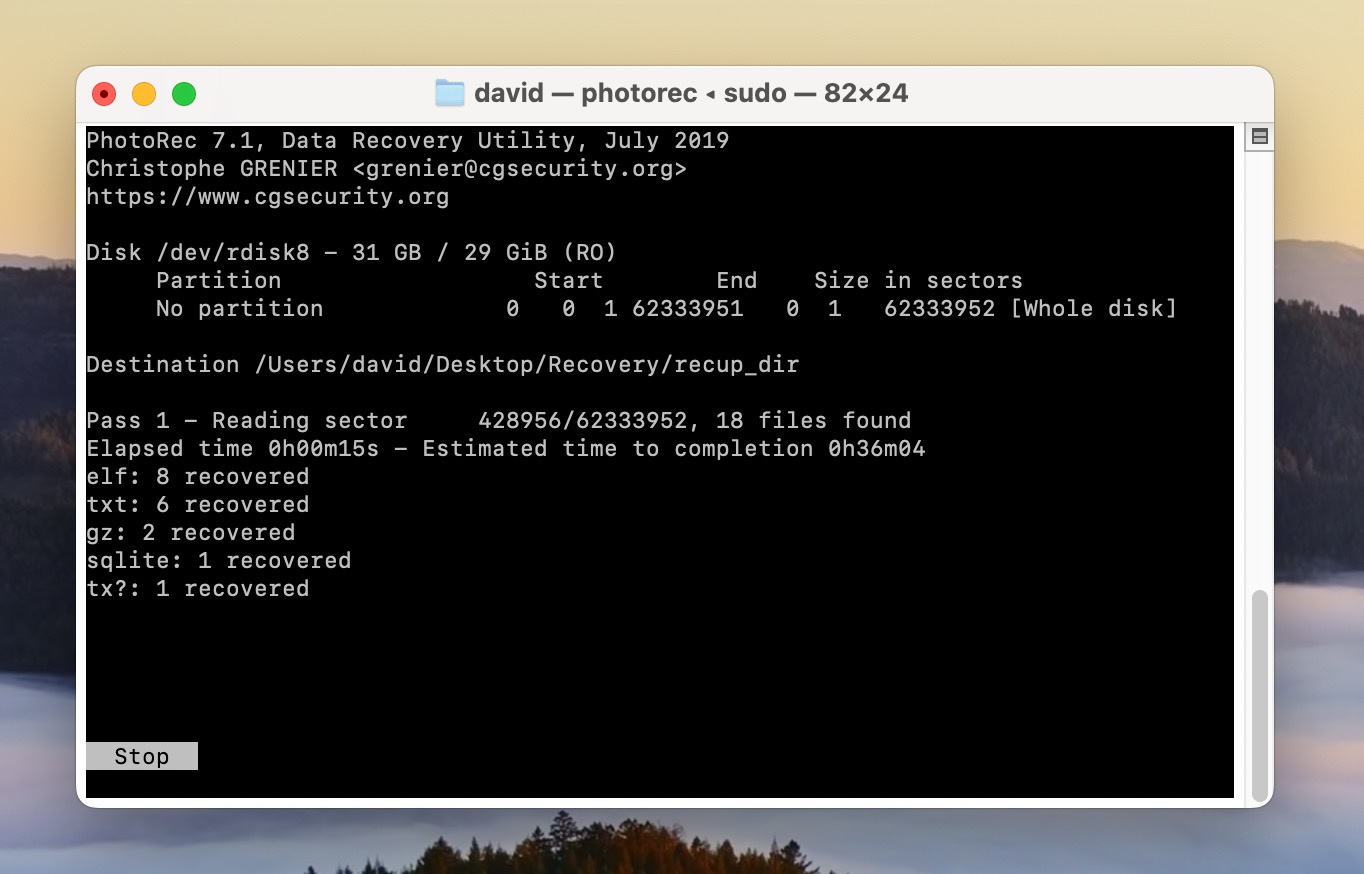
- When asked where you want to save the recovered files, choose a different storage location on your Mac to avoid overwriting the SD card data. Use the arrow keys to navigate and press “C” to confirm.
- Wait for the recovery process to finish. Once the process is complete, navigate to the recovery location you specified to review the recovered files.


If PhotoRec hasn’t helped you successfully recover your photos, or if it seems too complicated to you, then you should consider using a paid data recovery software application, like the one we describe in the next section of this article.
How to Recover Permanently Deleted Files from SD Card on Mac
If you’ve tried the free methods to recover deleted files from an SD card on Mac but haven’t had any luck, it’s time to consider using a paid data recovery software application. Our top recommendation and the best SD card recovery software for Mac we know is Disk Drill.
Disk Drill is a powerful data recovery software application that can recover deleted files from an SD card not only based on their signatures (over 400 file formats are supported) but also based on available file system information. This allows it to recover files together with their metadata and deal with situations when the SD card is unrecognized due to file system damage.
Unlike PhotoRec, Disk Drill features a user-friendly graphical interface, making it easier for regular Mac users to navigate and perform recovery tasks without needing advanced technical knowledge:
- Download and install Disk Drill for Mac from the official website.
- Insert the SD card into your Mac’s card reader or connect it using an external card reader.
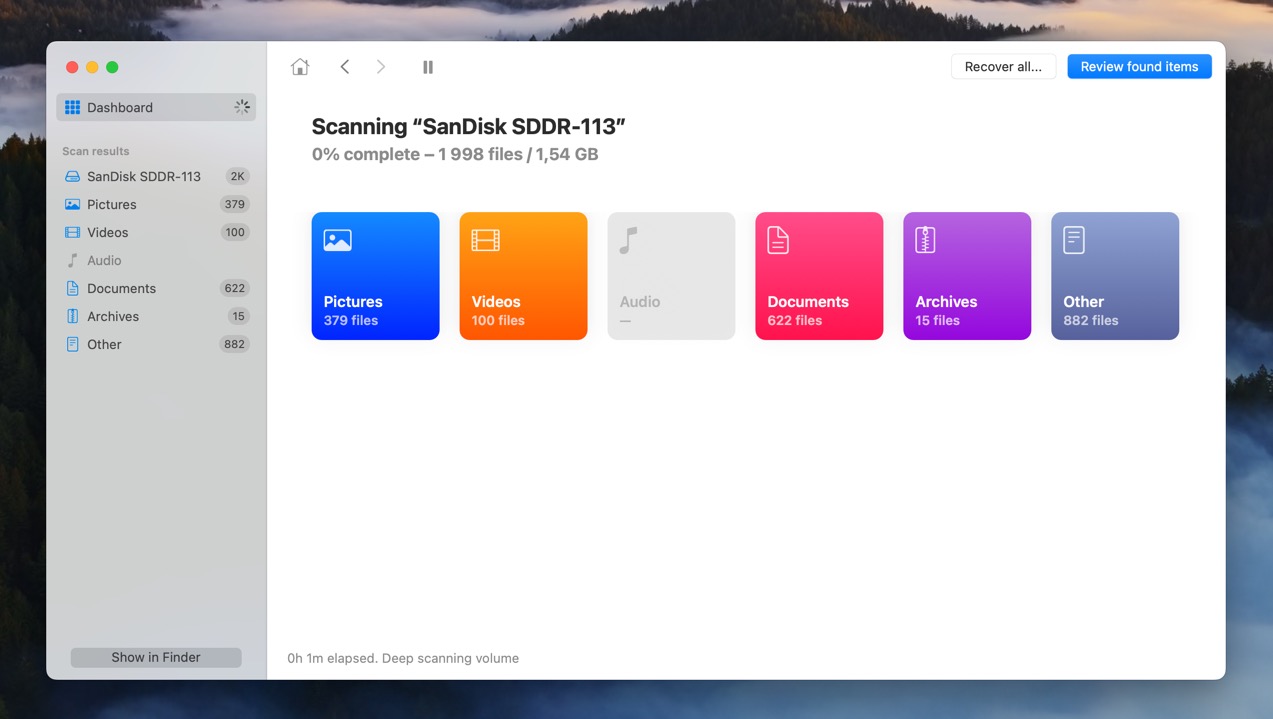
- Launch Disk Drill and select your SD card from the list of available drives. Then, click the Search for lost data button to start the scanning process.

- Wait for the scanning process to finish. This may take a while, depending on the size of your SD card and the number of deleted files.
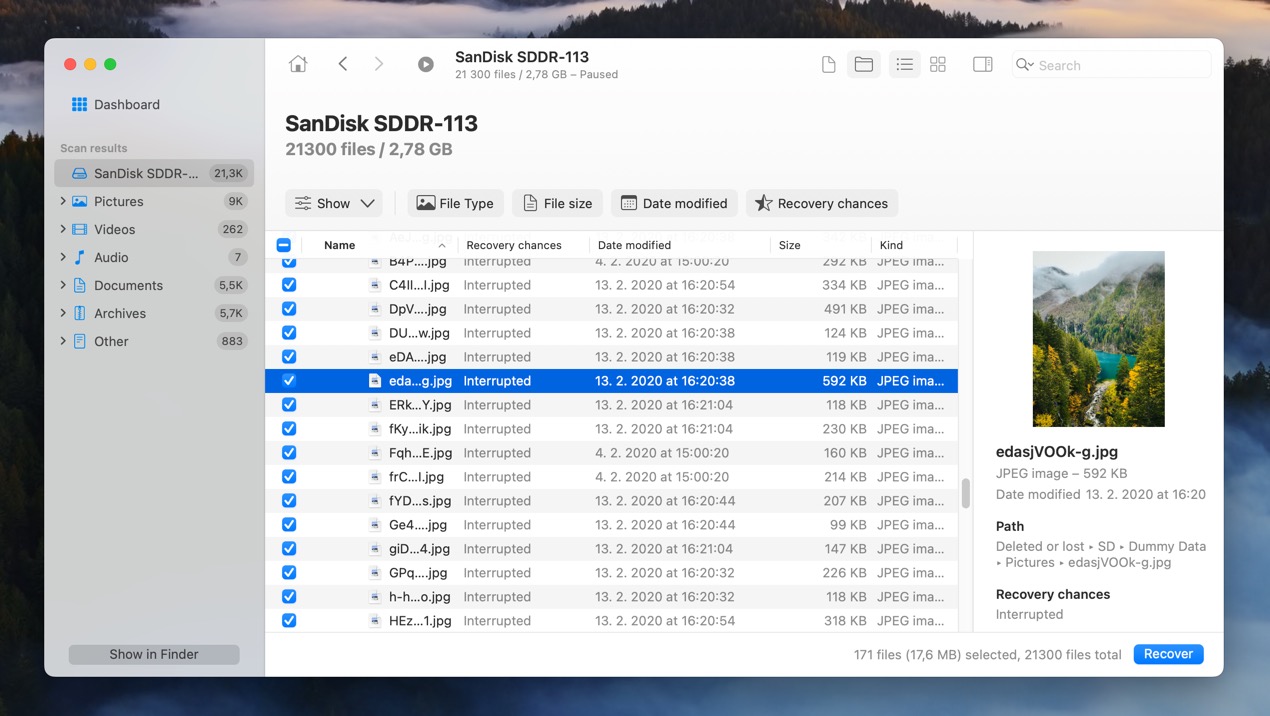
- Go through the list of recoverable files and select every single file you want to recover. You can preview recoverable files in Disk Drill, see their estimated recovery changes, and apply various filters to narrow down the list.
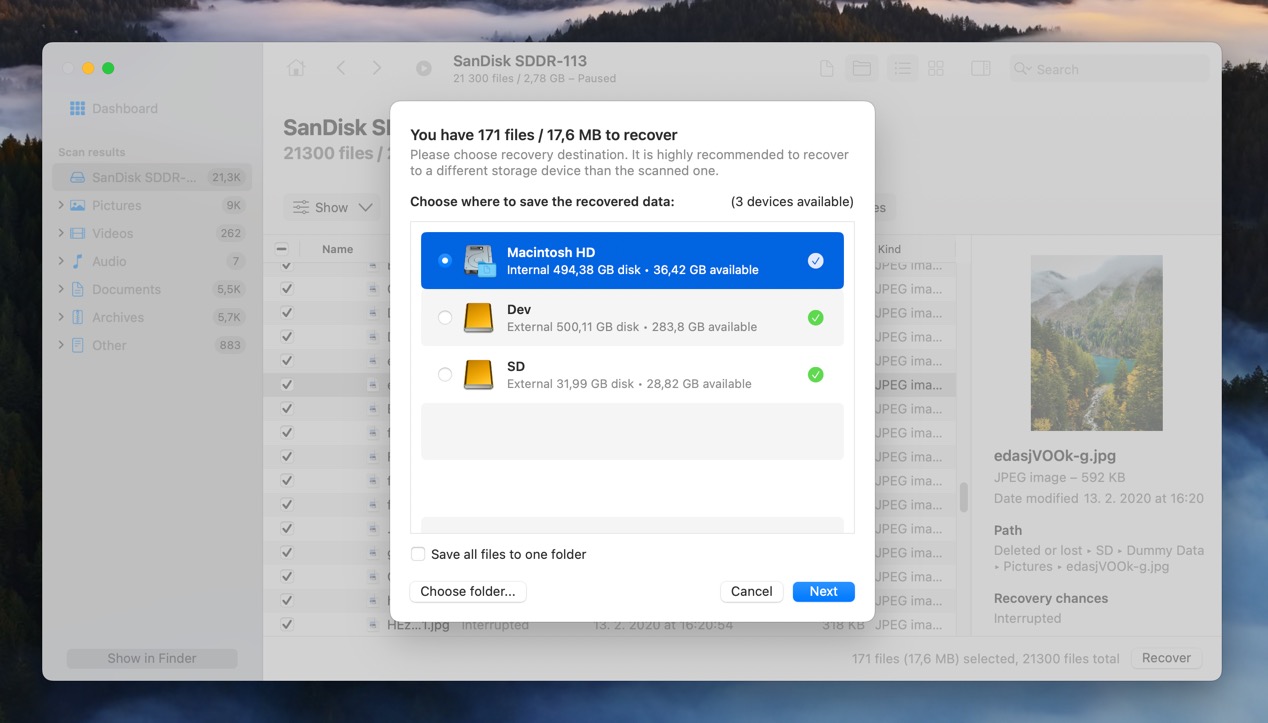
- Once you’re happy with your selection, you can click the Recover button and choose a recovery location (any other location except for the SD card you’re recovering is fine).


Disk Drill offers a free version that can preview an unlimited number of files to verify their recoverability, but it can’t recover them. To recover deleted files from an SD card using Disk Drill, you’ll need to purchase a license. The prices for Disk Drill for Mac start at $89 for a Pro license.
Conclusion
Recovering deleted files from an SD card on a Mac is possible and can be done for free using various methods, which we’ve described in detail in this article. Should free methods fail to recover your files, Disk Drill offers a powerful and user-friendly paid solution to help you restore your important data. Regardless of which recovery method you choose, the key is to act quickly because the longer you wait, the higher the chance that new data will overwrite the deleted files, making recovery impossible.