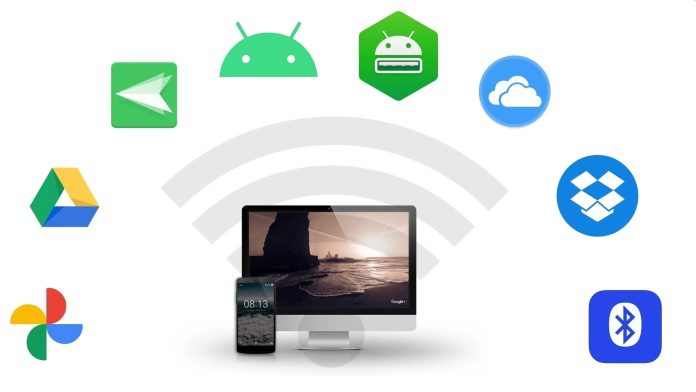
An Android connection to Mac isn’t as easy as connecting an iPhone to your computer. In this article, we’ll look at some of the best ways to connect Android to Mac, including using software like Android File Transfer and MacDroid, as well as connecting via Wi-Fi or Bluetooth, or using Cloud services.
We’ll take a look at which solutions are best and easiest, and the pros and cons of each to help you choose the best way to connect Android phone to Mac.
Table of Contents
Mac and Android Connectivity Issues
Because macOS and Android are not natively compatible (in the way that iOS and macOS are compatible), you need to think outside the box and find third-party apps to connect them in most cases.
If you try connecting Android phone to Mac without using a third-party app, you might experience connectivity issues and in the worst-case scenario, you could even lose data you’re trying to transfer, like precious photos, videos, or irreplaceable files.
There are plenty of ways to connect Android to Mac via USB or wirelessly, and we’ll take a look at some of the best.
You will be able to establish a connection between your Macbook and Android phone no matter what brand you have -Samsung, Google, OnePlus, Motorola, Xiaomi, or LG. Moreover, these solutions also work if you need to connect Android-based tablets to a Mac as well.
Method 1. USB Сonnection
Users situation:
One of the best ways to connect Android to Mac is via a wired connection or USB. While it’s best to use the original USB cable that came with your phone or tablet, you can use almost any USB cable provided it’s compatible with your device. There are specific apps that can help you with Samsung file transfer for Mac. Now, we’ll take a look at some software you can use to connect Android to Mac via USB.
Solution 1: MacDroid
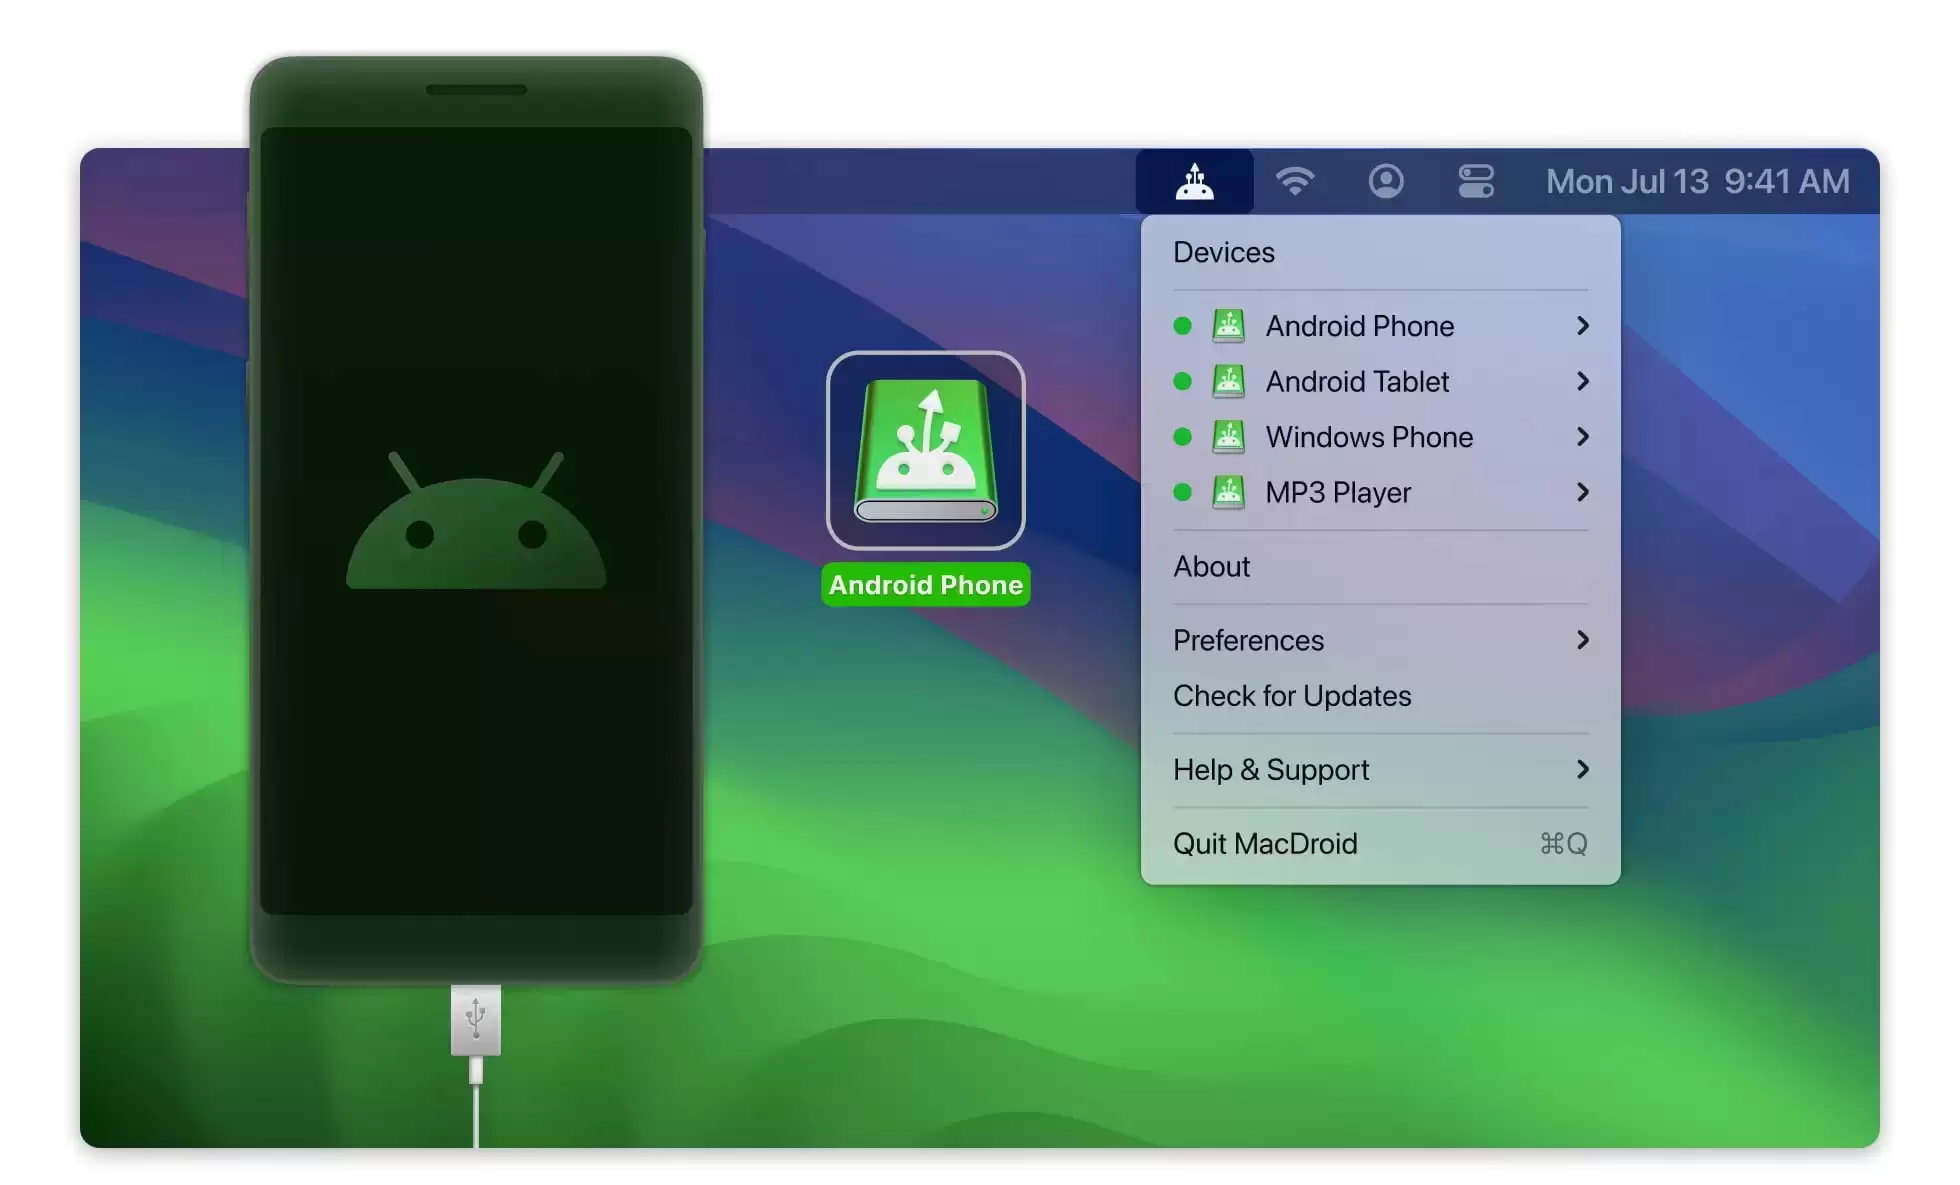
MacDroid is software designed for Mac that allows you to connect Android to Mac via USB or Wi-Fi to view and transfer files. It is compatible with macOS 10.15 or later. It also supports all Android and MTP devices and costs from $19.99 a year for a subscription, billed annually with auto-renewal.
The software allows you to mount your Android device (phone or tablet) as a disk on Mac, so you can view both internal and external storage. It also offers two operation modes: ADB mode, designed for more advanced users, and MTP mode, ideal for beginners.
- Works with all Android devices
- Supports macOS 10.15 and newer
- Affordable auto-renewing annual subscription
- Two different operation modes
- View device’s internal and external storage
- Edit files on your Mac without transferring them
- Limited free version, PRO costs $19.99 per year
- Can’t connect wirelessly, only via USB
Wondering how to connect an Android phone to a Mac via USB using MacDroid? Just follow our step-by-step instructions below.
To connect via MTP (single-threaded) mode, quick and easy for beginners:
Step 1: After downloading and installing, launch MacDroid on your Mac.
Step 2: Ensure your Android device is turned on, then connect Android to Mac using a USB cable.
Step 3: From the pop-up window that appears on your device screen, select File transfer.
Step 4: In MacDroid, open the Devices menu and select your phone from the list on the left-hand side.
Step 5: Choose MTP mode.
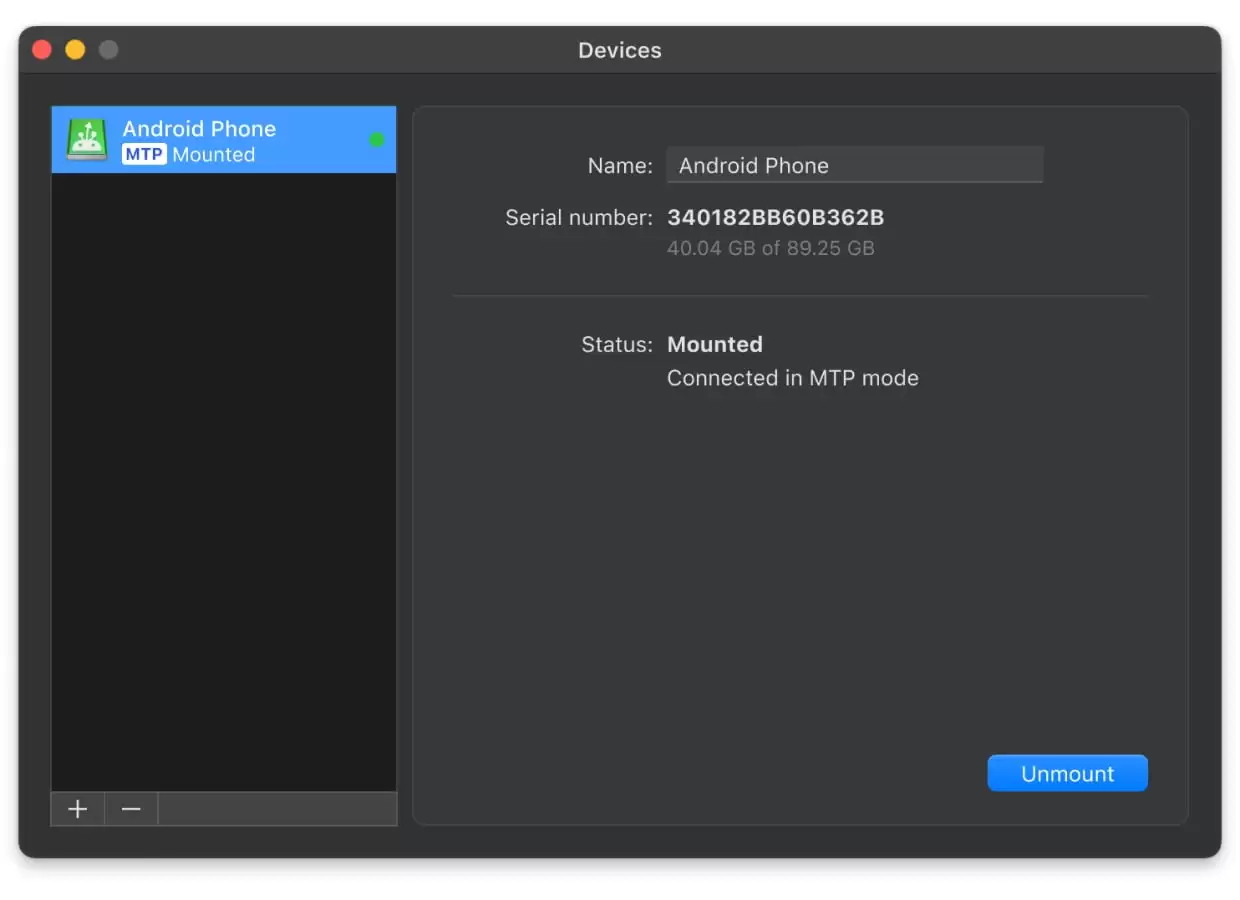
Step 6: Click Mount (at the bottom right).
Step 7: Then select Android Phone > Phone to see all files and folders on your phone. You can also select Card to see files on your phone’s external SD card.
To connect Android to Mac via ADB (multi-threaded) mode, for more advanced users:
Step 1: Download and install the app on your Mac computer.
Step 2: Launch MacDroid.
Step 3: Connect your Android device to your Mac using a USB cable.
Step 4: In the app, open the Devices menu and select ADB mode.
Step 5: On your Android device, check the Always allow this computer box, then tap OK.
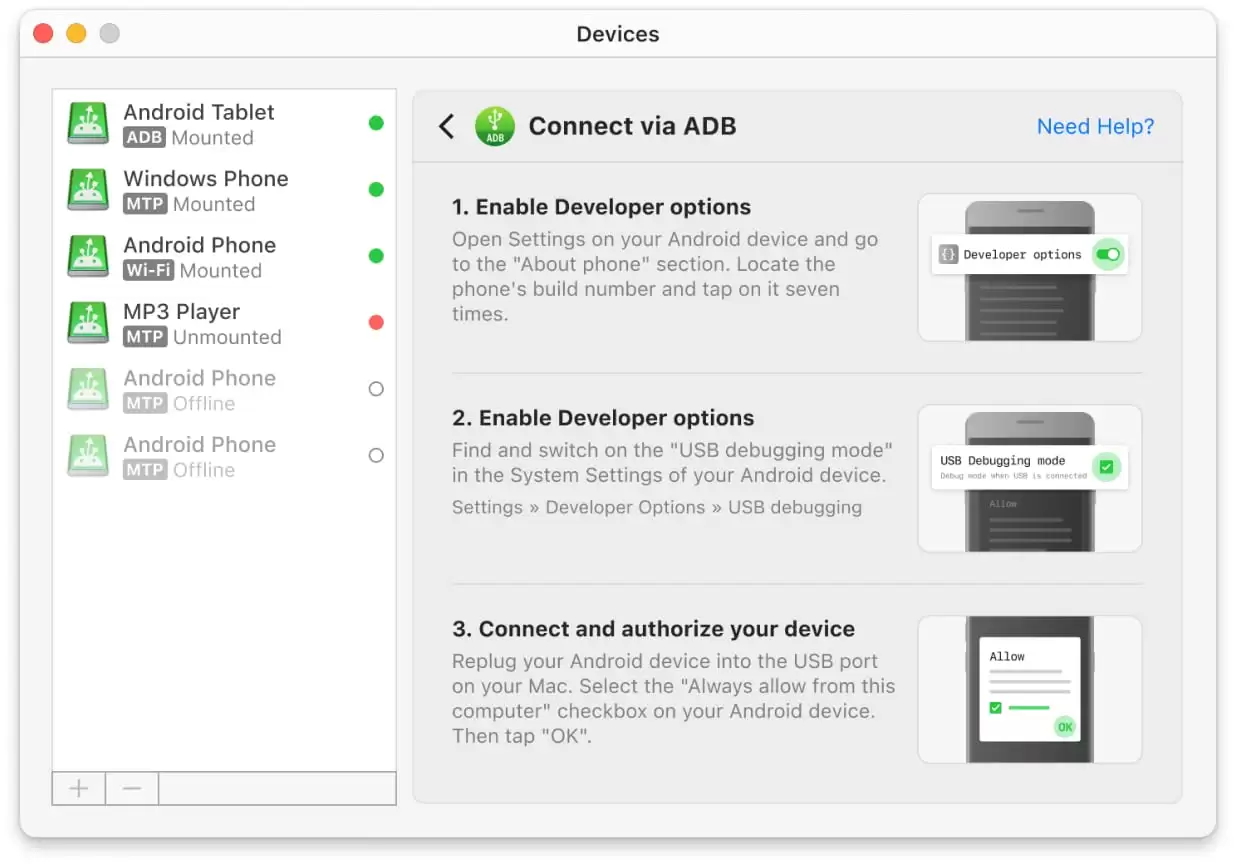
Step 6: Select your Android device from the list in MacDroid, click Mount.
Step 7: Select Android Phone > Storage to view and transfer files.
Download: MacDroid on the Mac App Store
Solution 2: Android File Transfer
Android File Transfer is a free app for Android devices. It supports macOS 10.7 and higher and makes it easy to connect Android phone to Mac and view and transfer files between any Android device and Mac computer (and vice versa).
It’s completely free to download, but it has received criticism for being unreliable, failing to connect to devices, and frequently crashing, so the user needs to fix Android File Transfer. There are also some security concerns where users have reported the app installs malware when you download and install it on your Mac.
- Completely free to download
- Works with macOS 10.7 and higher
- Designed by Android
- Tricky to get support if you get stuck
- Often fails to connect to Android device
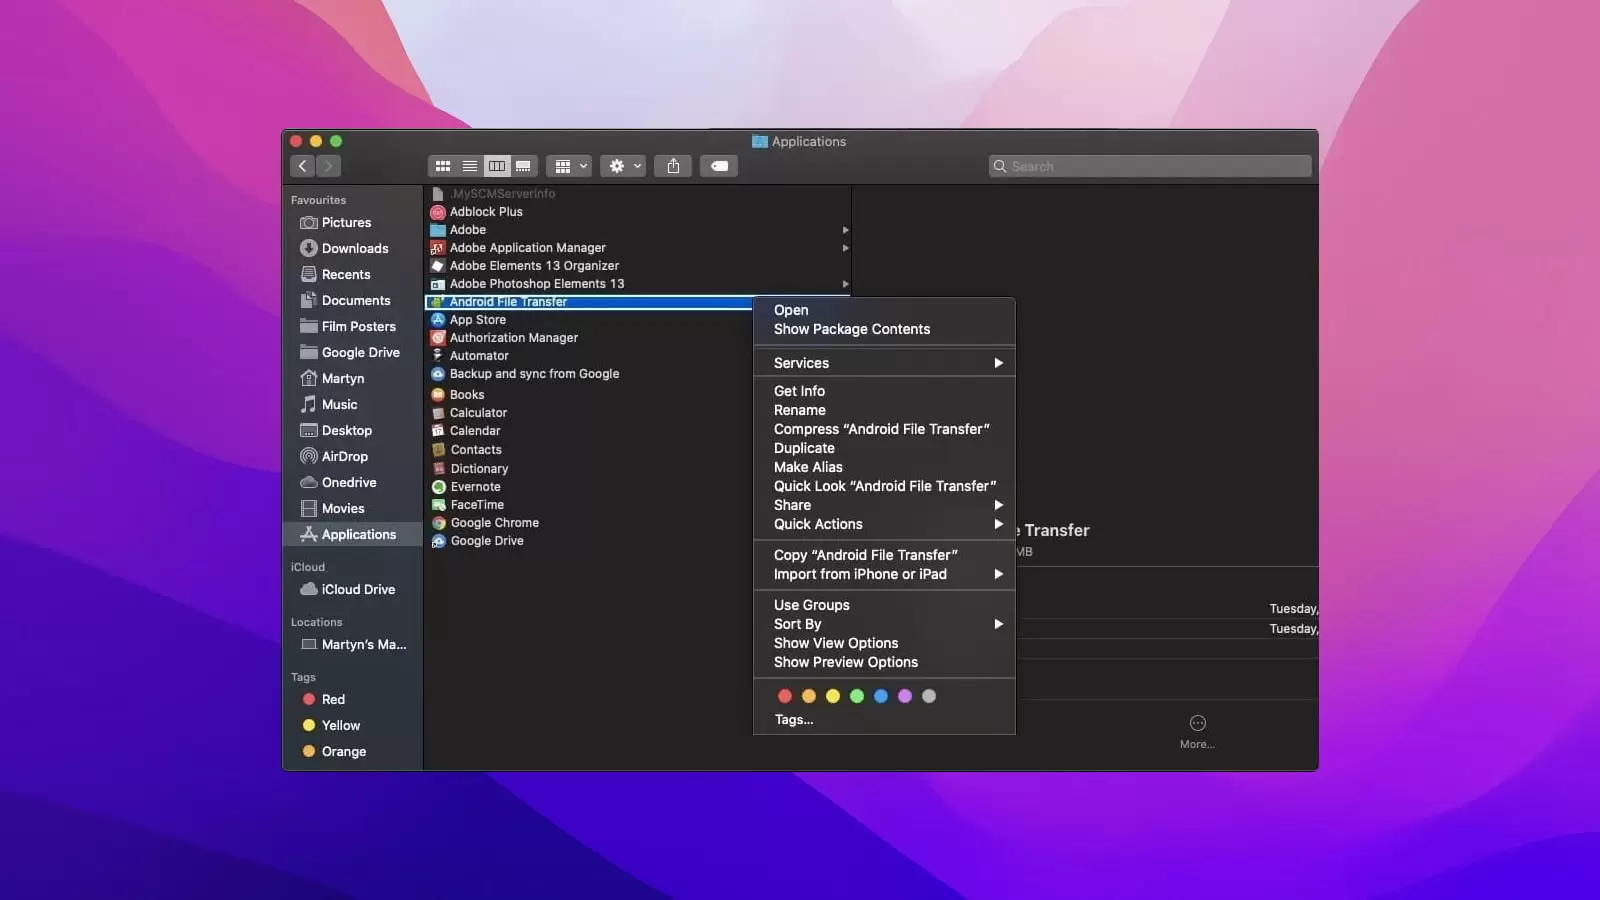
Here’s how to connect Android to Mac using Android File Transfer – just follow these step-by-step instructions:
Step 1: Download Android File Transfer on your Mac.
Step 2: Open the AndroidFileTransfer.dmg file and drag it to Applications.
Step 3: Now, use a USB cable to connect your Android phone or tablet to your Mac.
Step 4: Make sure your device is switched on.
Step 5: Double-click Android File Transfer on your Mac.
You should now be able to view all the files and folders on your Android device on your Mac as if it were just another drive. You can also delete, modify, or copy/transfer files.
Download: Android File Transfer
Method 2. Wireless Сonnection
Users situation:
If you don’t want to connect Android to MacBook via Android USB connect, what about wireless connection? There are several different ways to connect your phone or tablet to your Mac wirelessly – let’s look at a couple of the best ways.
Solution 1: Bluetooth
One of the best ways for Android connect to Mac is via Bluetooth. It’s free, easy to do, and takes just a couple of minutes to set up. Make sure your Android phone or tablet is near your Mac while you’re doing this, as Bluetooth can easily disconnect if you’re out of range.
- Free to connect
- Easy to do
- No software to download or install
- No support available if something goes wrong
- Transferring large amount of data/multiple files could be slow
- Has limited range, so you’ll need to keep your Android device near your Mac
Here are the step-by-step instructions to follow to connect Android phone to Mac via Bluetooth:
Step 1: Ensure Bluetooth is turned on for both devices.
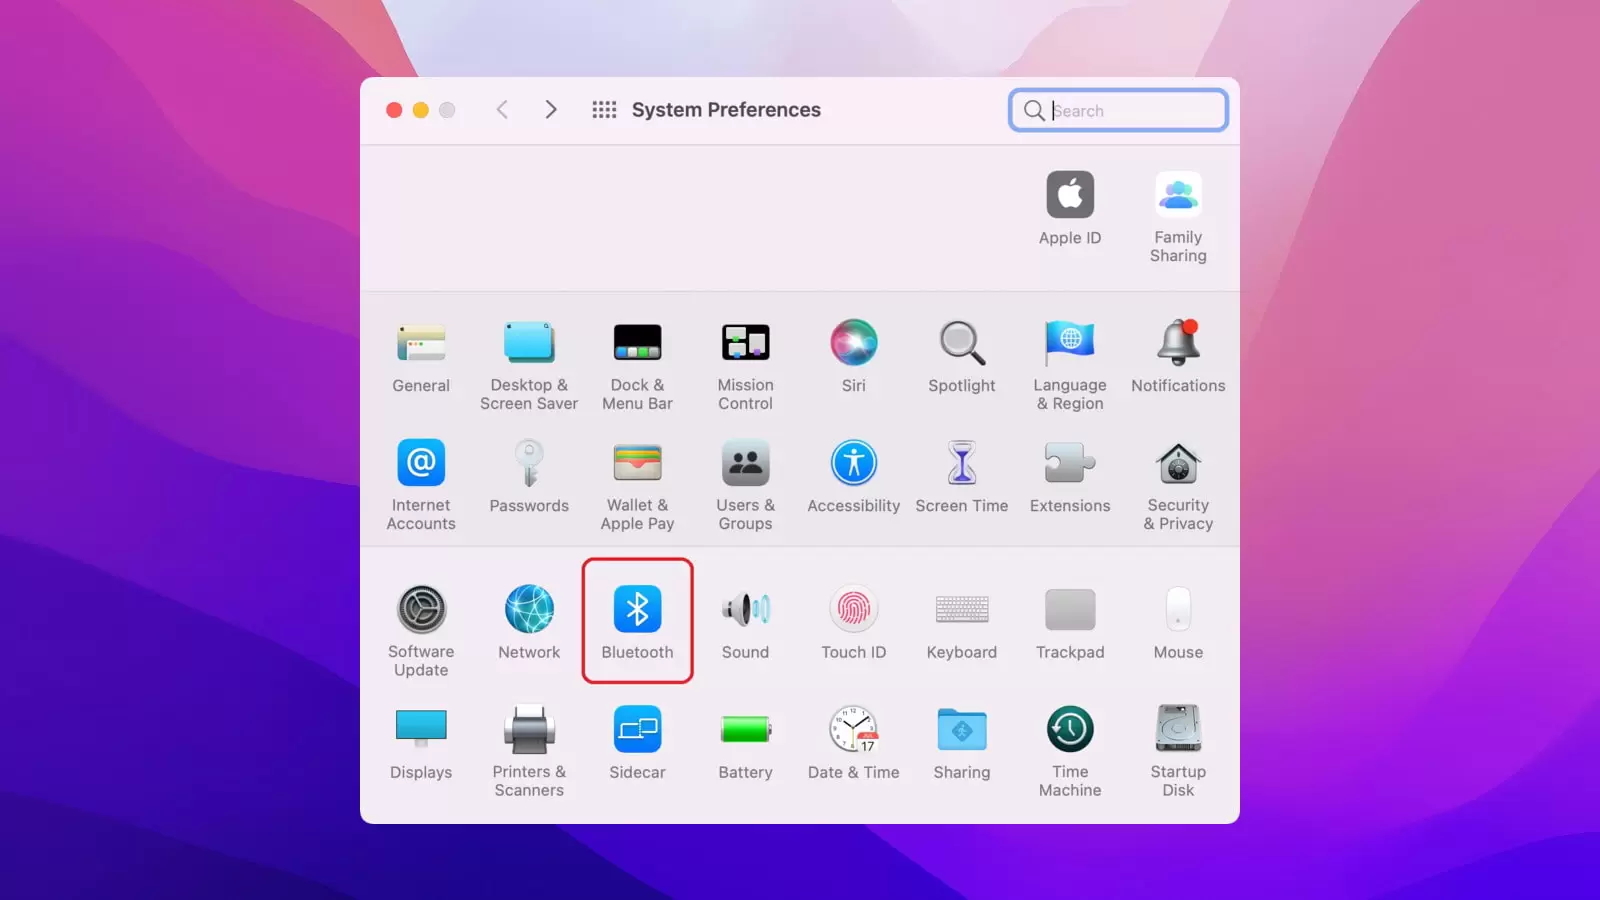
Step 2: On Mac, go to System Preferences > Bluetooth. Ensure Bluetooth is on, and you should see “Now discoverable as” and your device name.
Step 3: On your Android device go to Settings > Bluetooth and ensure it is toggled on.
Step 4: You should see your Mac listed.
Step 5: Check the pairing codes match then click Pair on both devices.
Step 6: To send files from Android to Mac, go to System Preferences > Sharing and ensure the box next to Bluetooth Sharing is checked.
Step 7: Click the Share icon on your Android device.
Step 8: Select the files you wish to share.
Solution 2: Android to Mac via Wi-Fi
This method is suitable for users who don’t have a USB cable at hand, but have access to stable Wi-Fi. It can also be convenient when you are looking for quick sync. However, without a third-party app you won’t be able to connect an Android device to a Macbook, so let’s consider one of the popular options – Airdroid.
Airdroid
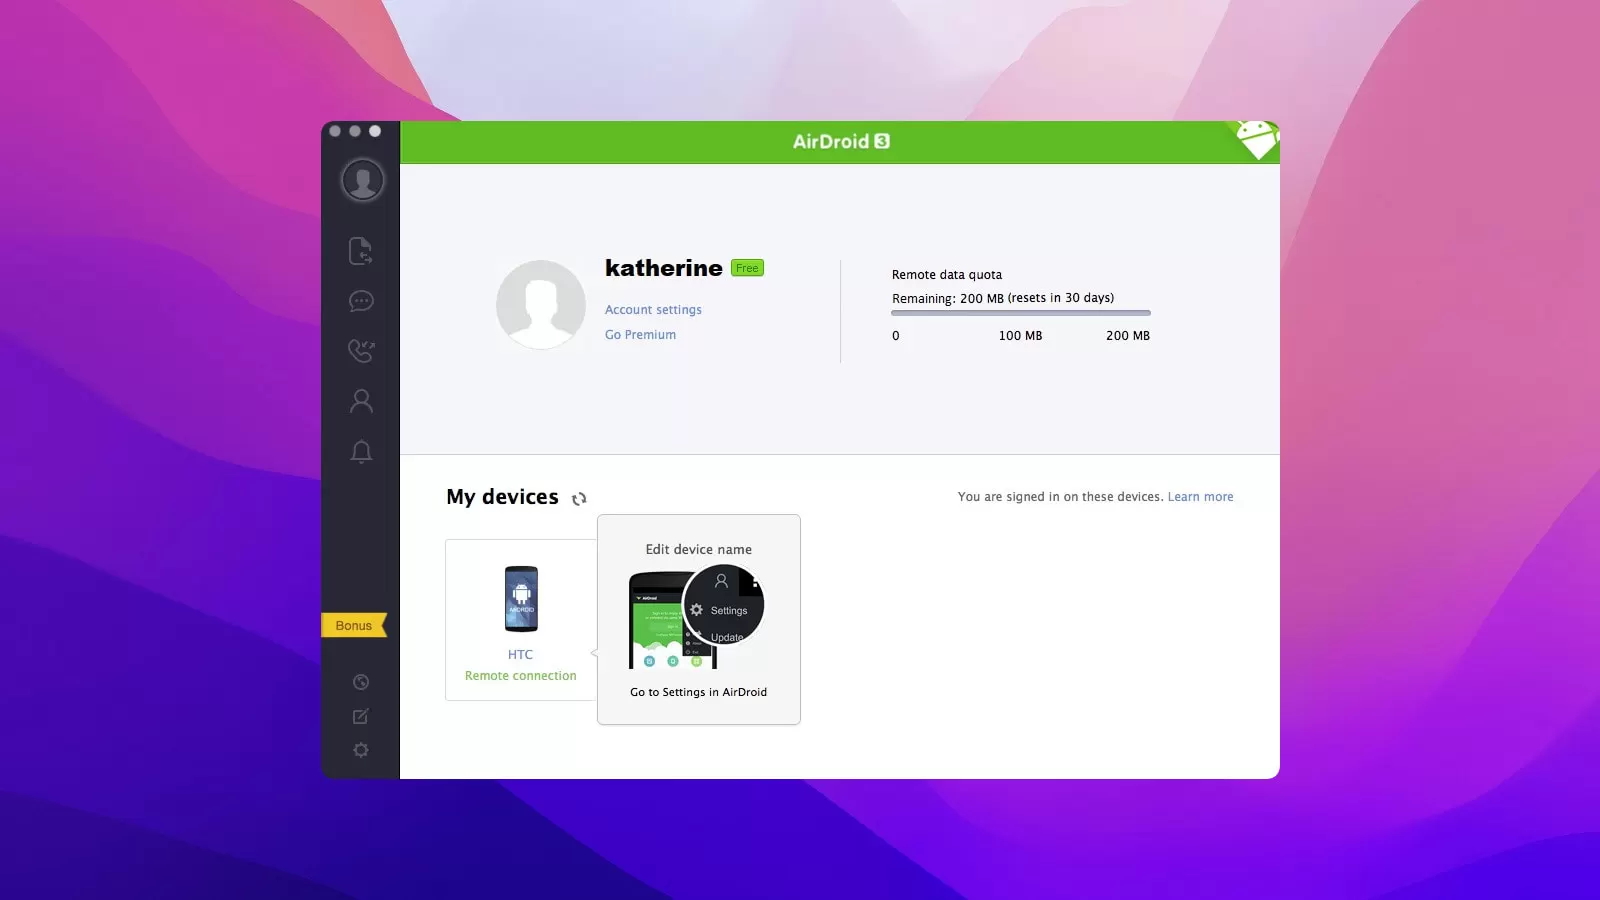
Another great way to connect Android phone to Mac without Android USB computer connection is using AirDroid. AirDroid is an Android app that also has a web version.
You can choose between the free version, which lets Android connect to computer for up to two Android devices and places a cap on file sizes and the amount of data you can transfer a month, or access premium features and remove all caps from $2.50 per month.
With this Android File Transfer alternative you can connect Android to Mac and transfer files, remote control your Android device, mirror your phone screen on Mac, and even manage SMS and notifications on your Mac.
- Free or premium version
- Android app or web version
- Developers responsive to feedback and support requests
- As well as file transfer enjoy features like mirroring, remote control, and SMS/notification management on your Mac
- Can be buggy
- Sometimes fails to connect
- QR code sign-in doesn’t always work
Here’s how to connect Android phone to Mac wirelessly using AirDroid:
Step 1: Download and install the AirDroid app on your Android device.
Step 2: On your Mac, go to AirDroid.com.
Step 3: Create a free account and sign in using the QR code, your email, or your Facebook, Google, or Twitter account.
Step 4: Your device should now be connected to your Mac wirelessly using AirDroid, and you should be able to view and transfer files and manage your device from your Mac.
Solution 3: MacDroid via Wi-Fi
As we mentioned before, MacDroid has a Wi-Fi file transfer mode, which eliminates the need to have a USB cable with you. With MacDroid, you can easily access your Android content from your Mac with just a stable internet connection, making file management easy and efficient.
Follow these simple steps:
Step 1: Run the app and select “Connect via Wi-Fi”.
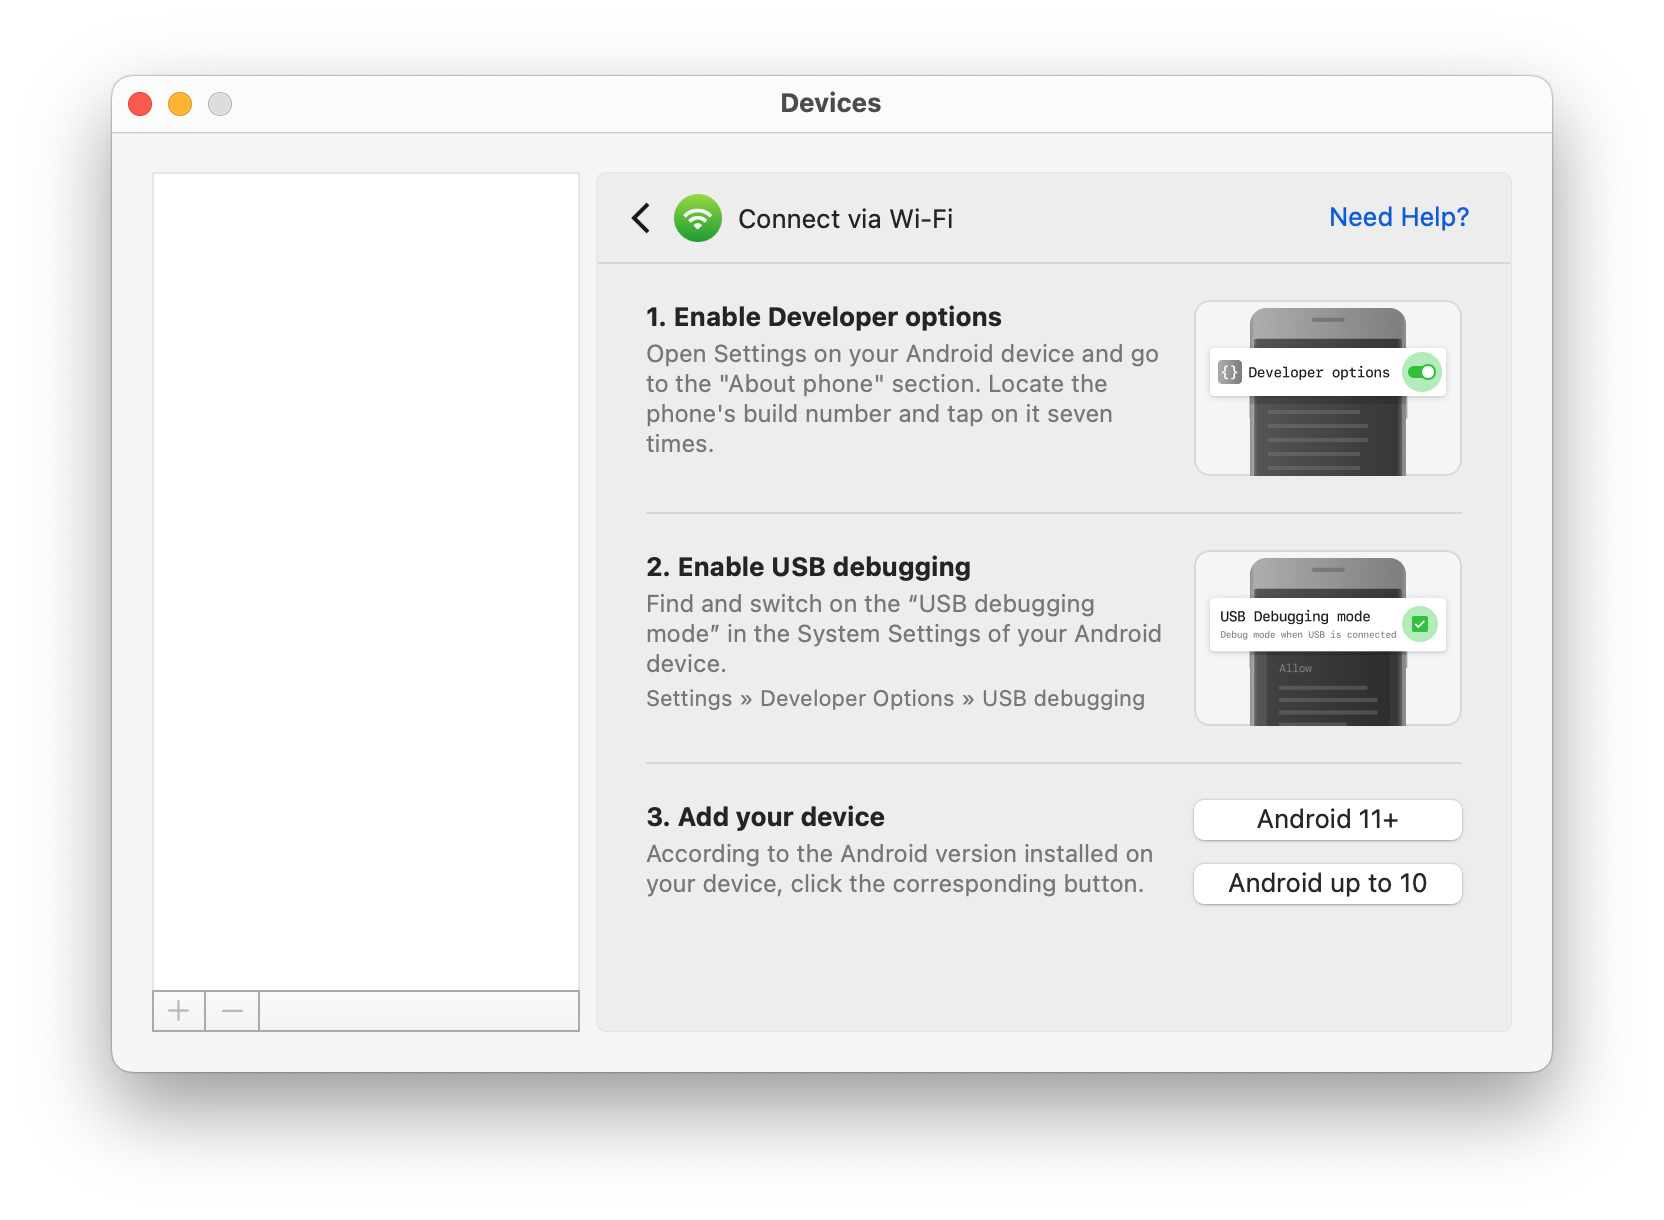
Step 2: Enable the Developer option on your Android device.
Step 3: If you have Android version 11 and higher , you can choose three ways you can connect your Android device to a Mac via Wi-Fi:
- pair via QR code
- pair via pairing code
- manual pairing
Step 4: To pair via QR code, enable Wireless debugging on your device.
Step 5: Open the Wireless debugging setting and tap the Pair device with QR code option.
Step 6: Select the Pair via QR code option in MacDroid.
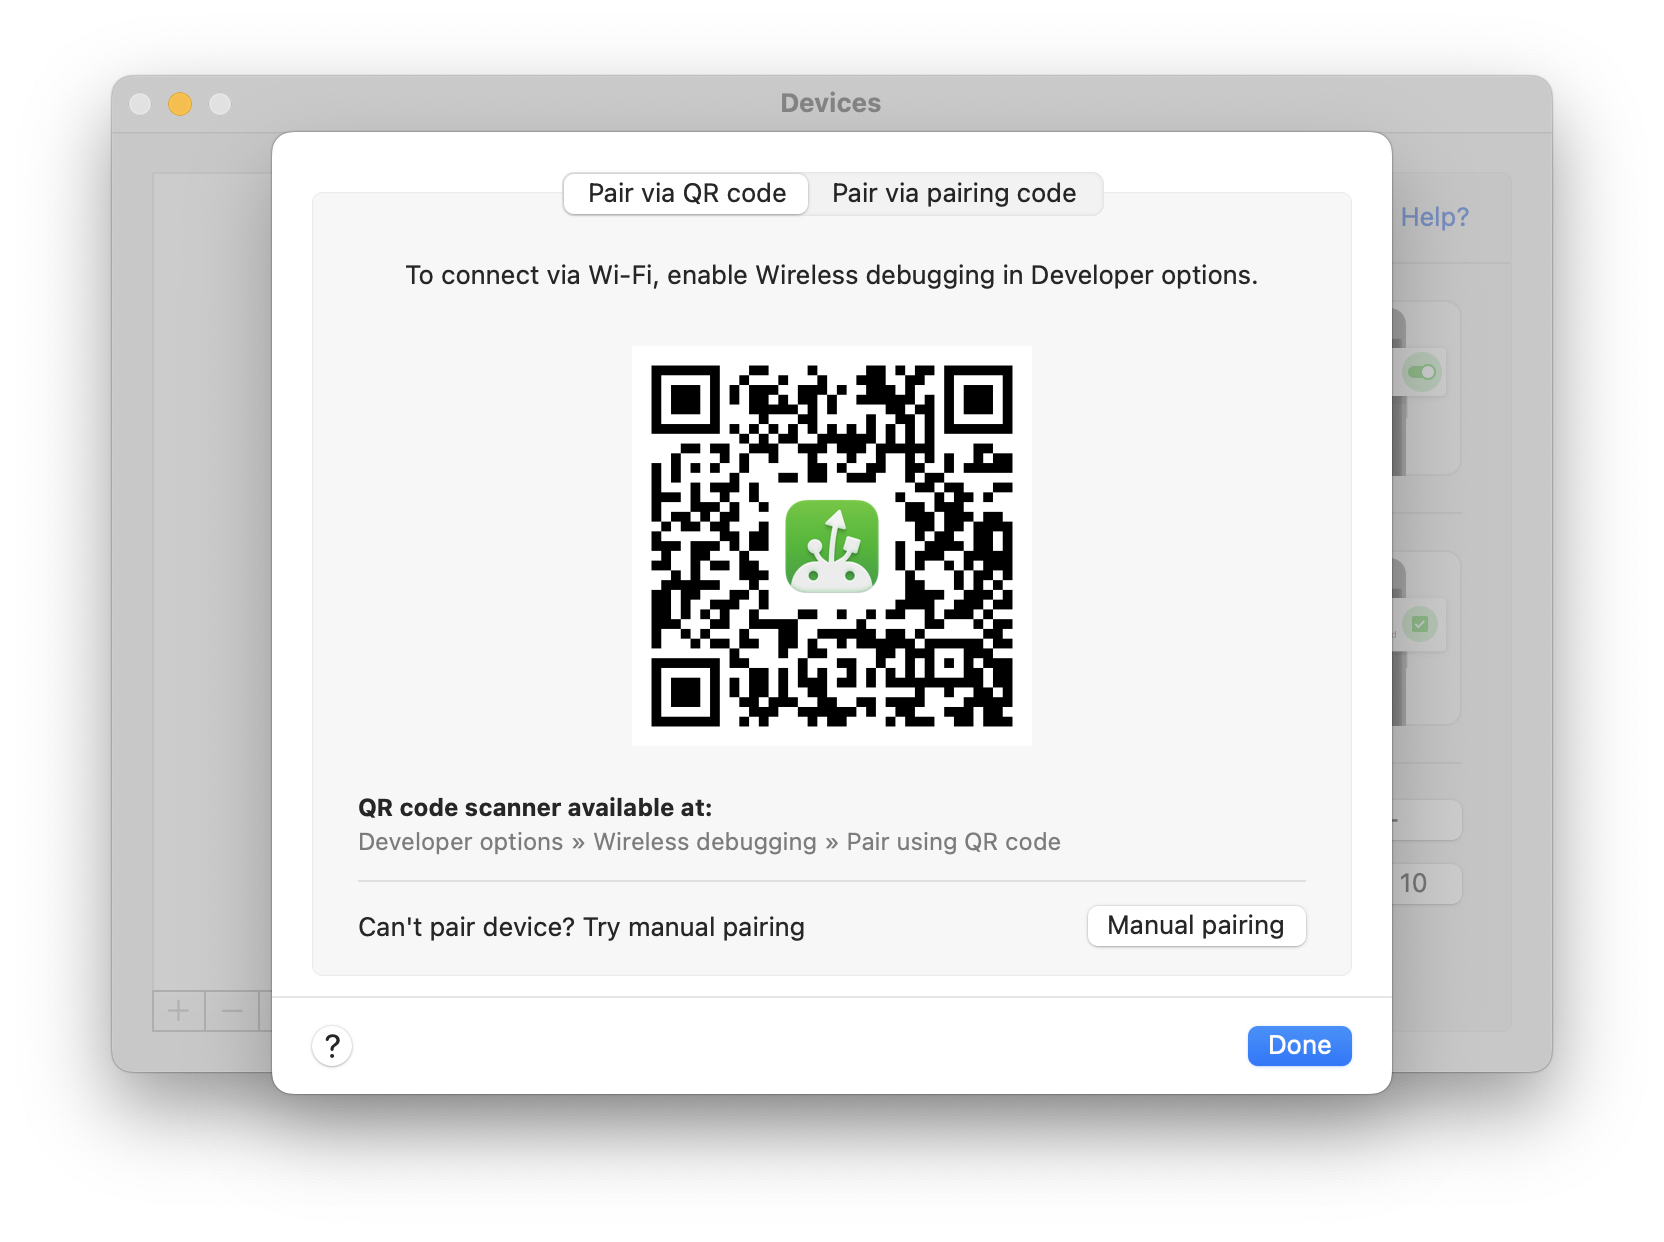
Step 7: Scan the code that appears on your Mac and wait for connection.
If your device supports Android version 10 and below, then proceed in this way:
Step 1: Find the IP address your device is connected to (Settings -> Connections -> Wi-Fi).
Step 2: Copy and paste this address into the corresponding field in MacDroid.
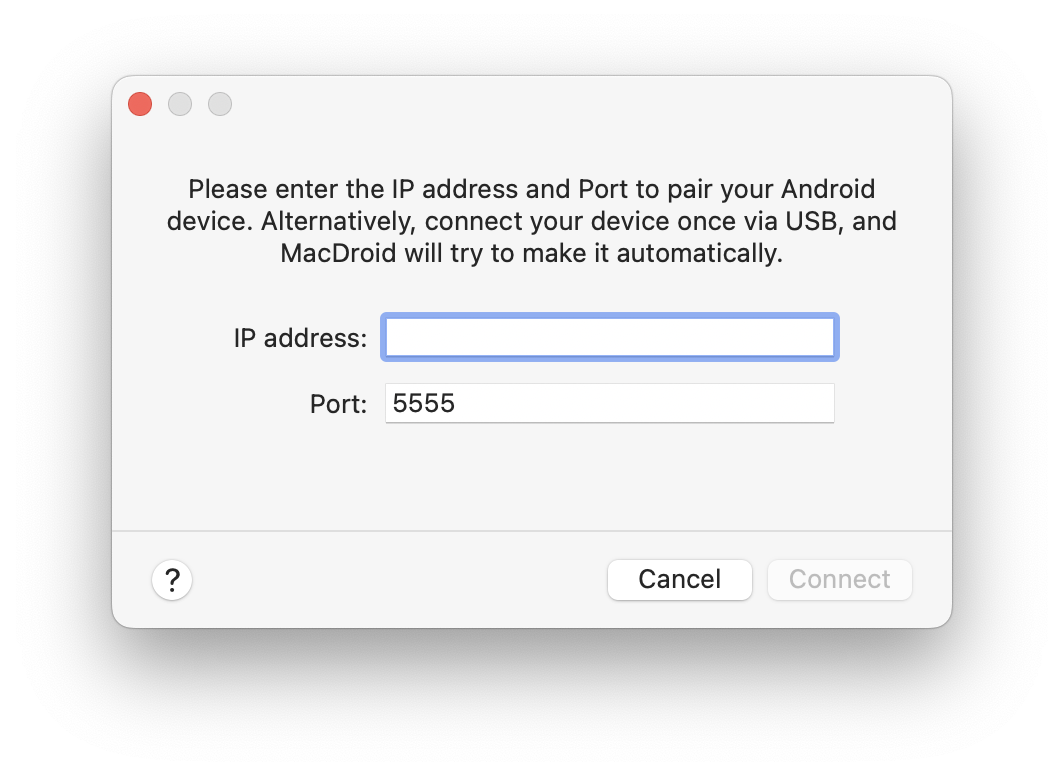
Step 3: Click the “Connect” button.
Method 3. Cloud Services
Don’t want to download additional software or use any of the above methods for Android connect to computer? There is another way. You can connect Android to Mac with the help of cloud services.
The most popular ones:
Dropbox
- Supported OS: Cross-platform
- Free storage limit: 2 GB
- Web version: yes
OneDrive
- Supported OS: Windows, macOS, Android, iOS
- Free storage limit: 5 GB
- Web version: yes
Google Drive
- Supported OS: Microsoft Windows, Mac OS X, Android, iOS
- Free storage limit: 15 GB
- Web version: yes
Amazon Drive
- Supported OS: macOS, Windows, Linux
- Free storage limit: 5 GB
- Web version: yes
pCloud
- Supported OS: macOS, Windows
- Free storage limit: 10 GB
- Web version: yes
The way to connect your devices using cloud services is quick and easy to do, although you’ll need to set up an account with one of these cloud storage providers if you don’t already have one.
If you’re transferring or storing files that contain sensitive material (e.g. transferring photos from Android to Mac), you may want to use one of the other methods in this article, as your files will be available in the cloud. Only you can view them, but there is the risk others could access them if your account is hacked.
- Easy to set up
- Doesn’t use space on your Mac hard drive
- Can backup your phone to the cloud without using storage on your Mac
- Free depending on how much storage you have in your cloud account/what you’re transferring
- Can be slow to connect and transfer files
- Not great for extremely personal or sensitive files as they’re stored in the cloud
- You’ll have to pay if you’re backing up a lot of data as most cloud providers only provide limited storage for free
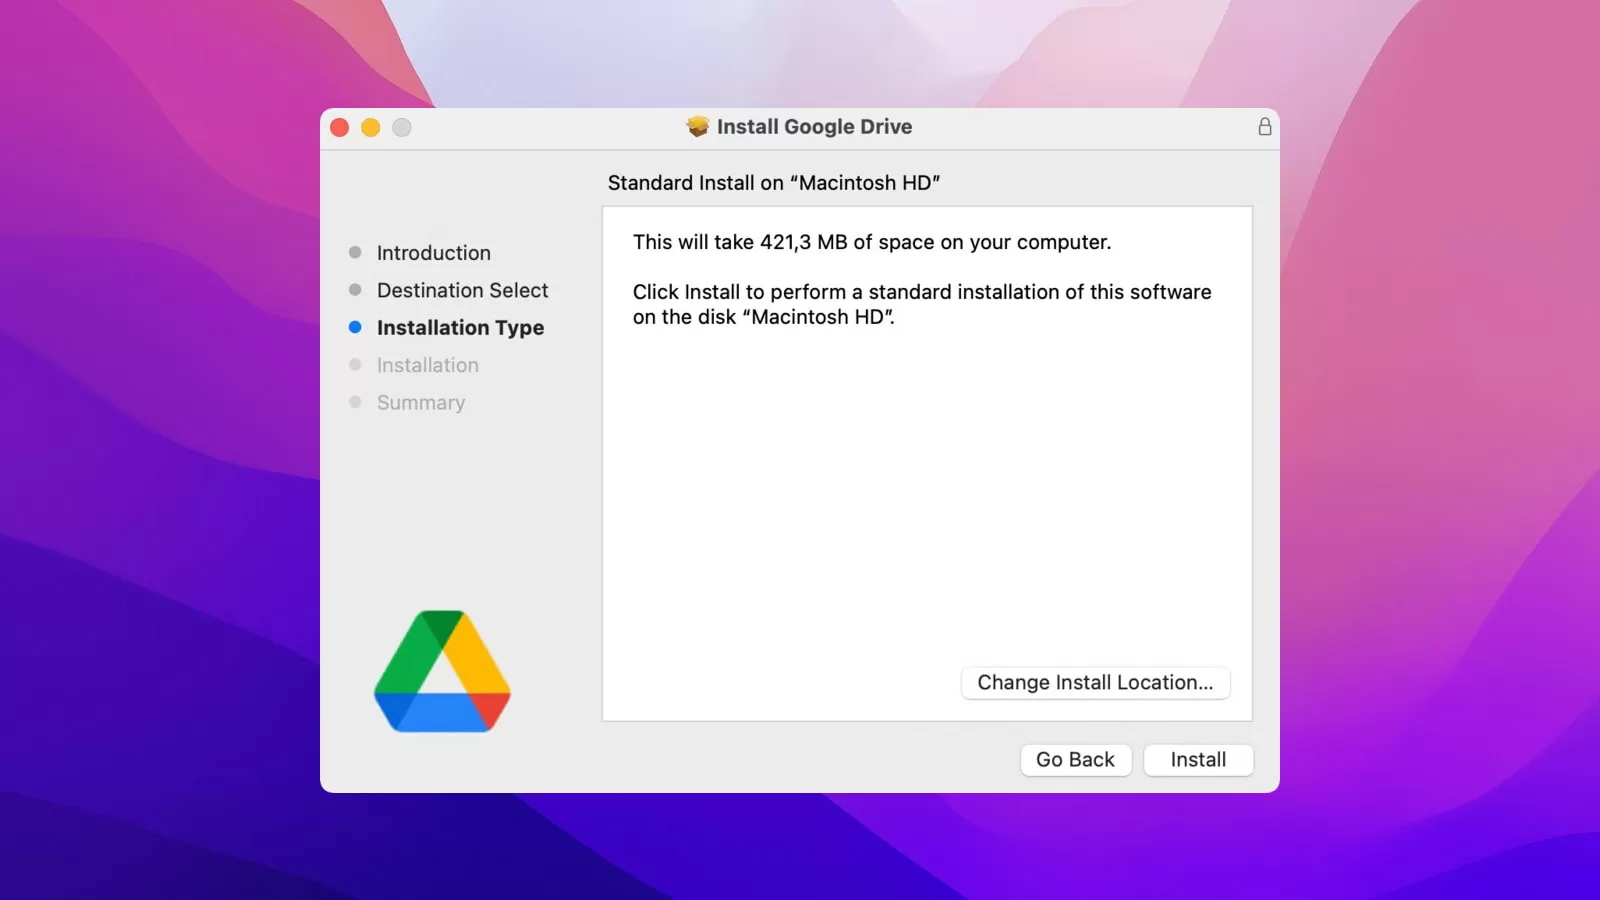
If you’re wondering how to connect Android to Mac using cloud services, just follow these handy step-by-step instructions. For this example, we’ll use Google Drive, but you can also find instructions for using Dropbox and OneDrive:
Step 1: First, go to drive.google.com on your Mac and log in or set up an account.
Step 2: Download and install the Google Drive app on your Android phone or tablet.
Step 3: Sign into your Google Drive account in the app on your device.
Step 4: Tap the Plus symbol.
Step 5: Tap Upload, then navigate to the files you want to upload.
Step 6: You’ll be able to view uploaded files in My Drive until they are moved.
It may take some time for files to transfer if you’re transferring multiple or large files.
Conclusion
We hope this article has helped you to see it doesn’t have to be complicated creating an Android connection to Mac. We hope it’s also helped you to explore the various different methods to connect Android to Mac and to choose the right one for your needs.
Everybody is different, and while some may prefer to connect via Bluetooth, others might prefer using software like MacDroid and a wired USB connection, so it’s important to choose the best method for you.
FAQ
File transfer between your devices might not be available in case your USB cable (or USB port) is damaged. Also, make sure that you have enabled file transfer mode on your phone and updated operating systems on your Android and Mac.
If you want to transfer large files and save storage space on your computer, cloud services are the way for you. Almost all of them are cross-platform and you can use them on any device. We have described the steps you should take when transferring files above.
MTP connection or Media Transfer Protocol connection is a single-operation mode that makes it easy to connect Android to MacBook and view and transfer files from your Android device to your Mac.
ADB connection or Android Debug Bridge connection is a multi-operation mode designed for more advanced users. It’s faster and offers multiple simultaneous connections, with more options that you can customize, but it’s not great for beginners.
You can connect Android phone to Mac wirelessly using Bluetooth and following our step-by-step guide above. Alternatively, you can download an app like AirDroid and use Wi-Fi to connect your Android phone and Mac and transfer or view files.

