
First and foremost, let’s answer the three basic questions regarding FTP: “What does it mean?”, “How is it used?” and last but not least “Is using FTP on Mac possible?”. Jumping straight into the answer, FTP is an abbreviation of the term File Transfer Protocol, and it is most commonly used for hosting and transferring files between one computer and another, thus providing a nice alternative for storage media.
The benefit of FTP is that it is faster than options such as HTTP, a system which is mainly intended for sending and receiving text and images, not data files, and is also built in and readily available on Mac computers.
Now that we have the basics out of the way, the next question we’re looking to answer is how to setup FTP on Mac. If you already know how to do this, check out the best FTP clients for Mac.
Table of Contents
How to use FTP on macOS
The process of setting up FTP on Mac couldn’t really be easier. Mac computers have a built-in FTP server which users can easily use to allow others access to specific files and documents. Just follow these steps and you’ll be on your way to sharing and accessing files through FTP!
Step 1. Click the “System Preferences”.
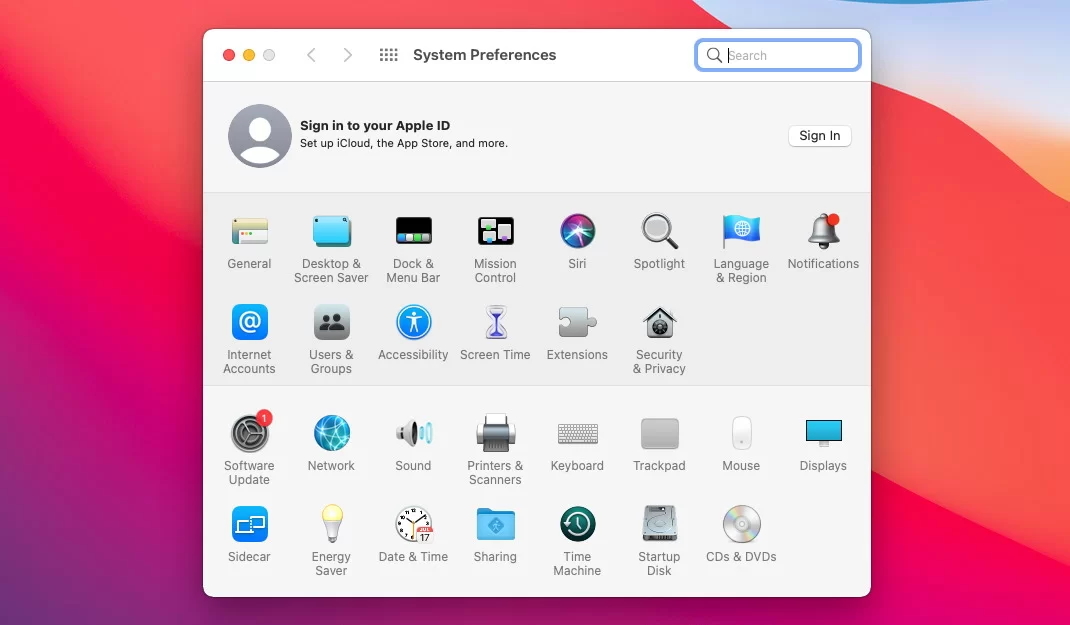
Step 2. Select “Sharing”.
Step 3. Click the “File Sharing” box and then “Options”.
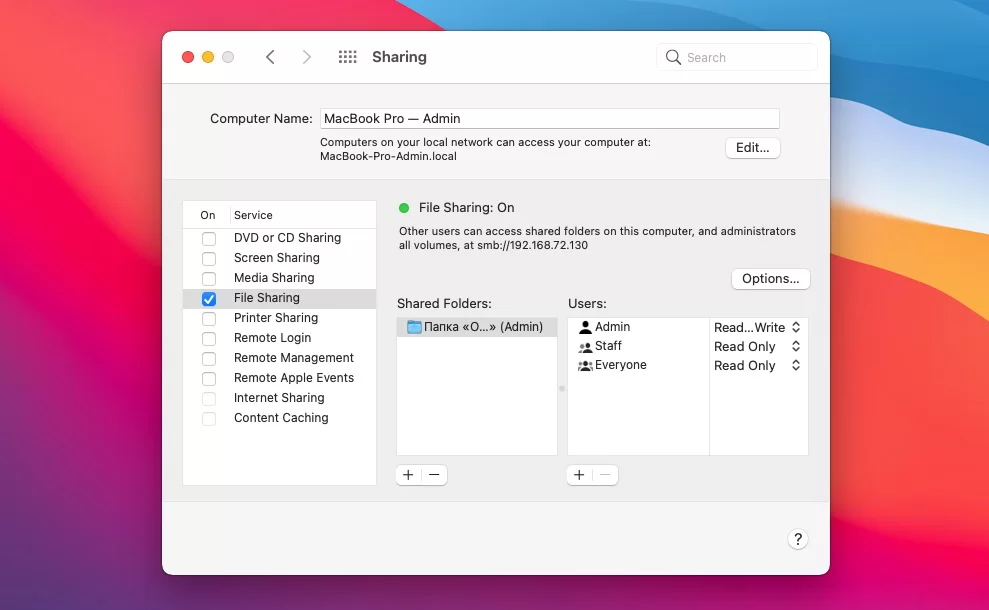
Step 4. Select “Share Files and Folders Using FTP”.
Now that you’ve done this, other computers will be able to copy and share files from you, but what if you want to access someone else’s files through the File Transfer Protocol for Mac? Get ready for another set of 4 easy steps below:
Step 1. First you will need to open the “Finder Menu”.
Step 2. Click on “Go”.
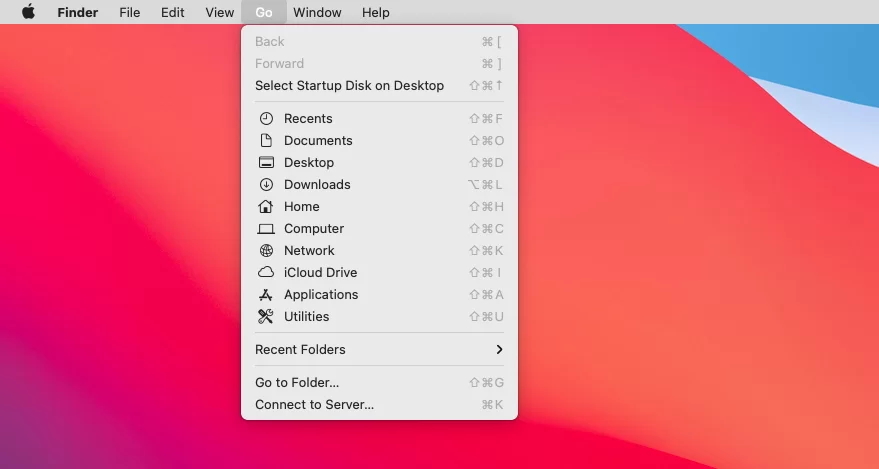
Step 3. Select “Connect to Server”.
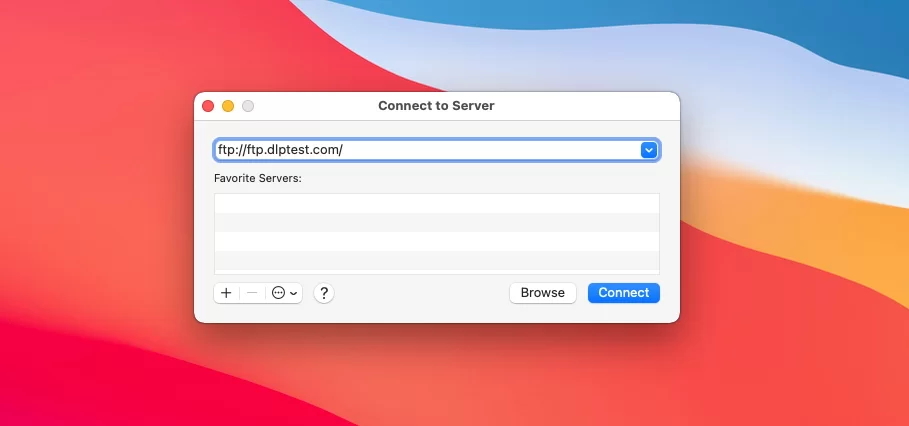
Step 4. Fill out the name and password you were given for the server you’re trying to access.
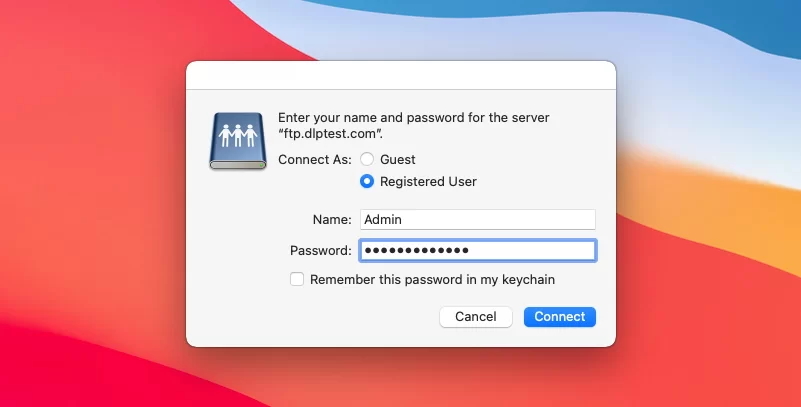
As easy as it is to use, you’ll need to keep in mind that the Mac FTP client built in to your computer does have certain downsides, as it can only be used to download files, security is next to non-existent, and if you somehow come across a username or password containing the “@” symbol, the server will plain out refuse to connect.
But is there somehow an even easier way to access FTP on Mac? Why, yes there is!
How to FTP on Mac via browser
Step 1. Open your Safari browser.
Step 2. Type in the host server’s IP address, starting with the “ftp://” prefix.
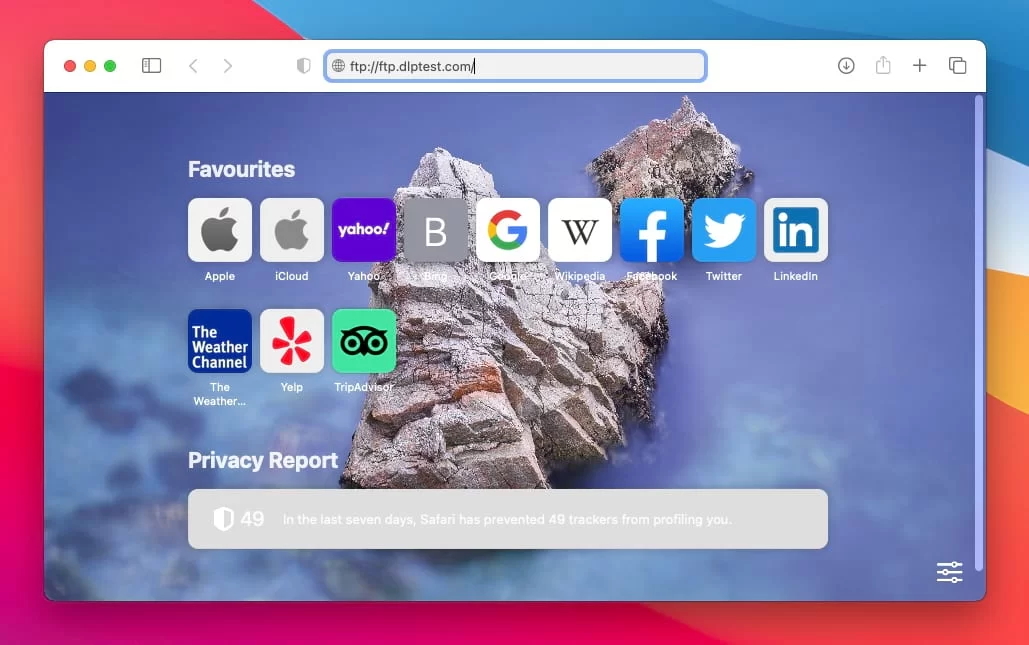
Step 3. Add the username and password and hit the “Connect” button.
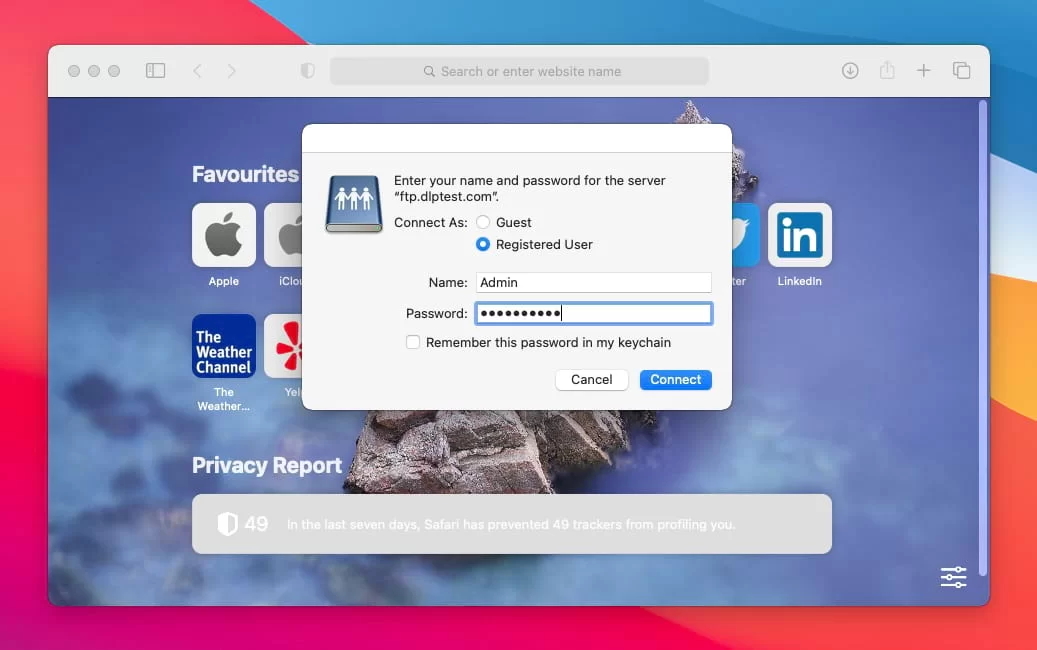
Note: Same as before, if the “@” symbol is present in the username or password, the connection will fail.
How to access FTP on Mac using Terminal

If you’re feeling more tech-y, you can connect to FTP Mac via a command-line interface in Terminal. To do this, open the Applications folder, and open Terminal within the Utilities folder. You should now see a window that shows your computer’s name and the folder you’re in as well as your user ID. You can now use a few easy commands to access the File Transfer Protocol.
First, you’ll want to type in “ftp:// ip-address” where ip-address should be replaced with the IP address of the FTP server you want to access. As with the built-in option, you’ll need to input the username and password. Once you’re connected, you can begin working on the server using the below commands.
- ls: will list all the files and folders in the folder you’re currently in on the FTP server.
- cd: will change the folder you’re in. Type “cd” followed by the name of the folder you want to move to.
- get: will download a single file. Type “get” followed by the name of the file you want to download from the server
- put: will upload a single file. Type “put” followed by the name of the file you want to upload to the server.
- quit: will quit your connection to the FTP server.
Is FTP connection secure?
We need to first establish the fact that FTP wasn’t really designed to be secure. It’s a very basic protocol to retrieve and upload files but given its reliance on clear-text password and usernames and lack of encryption, your data is very easy to attack by anyone with know-how and malicious intent.
There are some ways to make your FTP server on Mac safer, however. Over the years, an encrypted connections have been created and are now more widely used, such as Transport Layer Security, Secure File Transfer Protocol or Secure Socket Layer, but these also add to the level of difficulty to use.
How to make FTP connection secure using third-party FTP clients
For a more streamlined FTP file transfer Mac experience, a lot of people and businesses have begun using third-party FTP clients which improve efficiency, safety, and ease-of-use. Third-party clients are an out-of-the-box solution that helps you download, upload, and manage files through a high-quality interface which is also more secure.
Services such as CloudMounter, CyberDuck, FileZilla, ClassicFTP, and Commander One have been developed to ensure, with various degrees of success, that you are not losing files, risking security breaches or other such problems, easily and effectively.
1. The most popular FTP client for Mac – Commander One
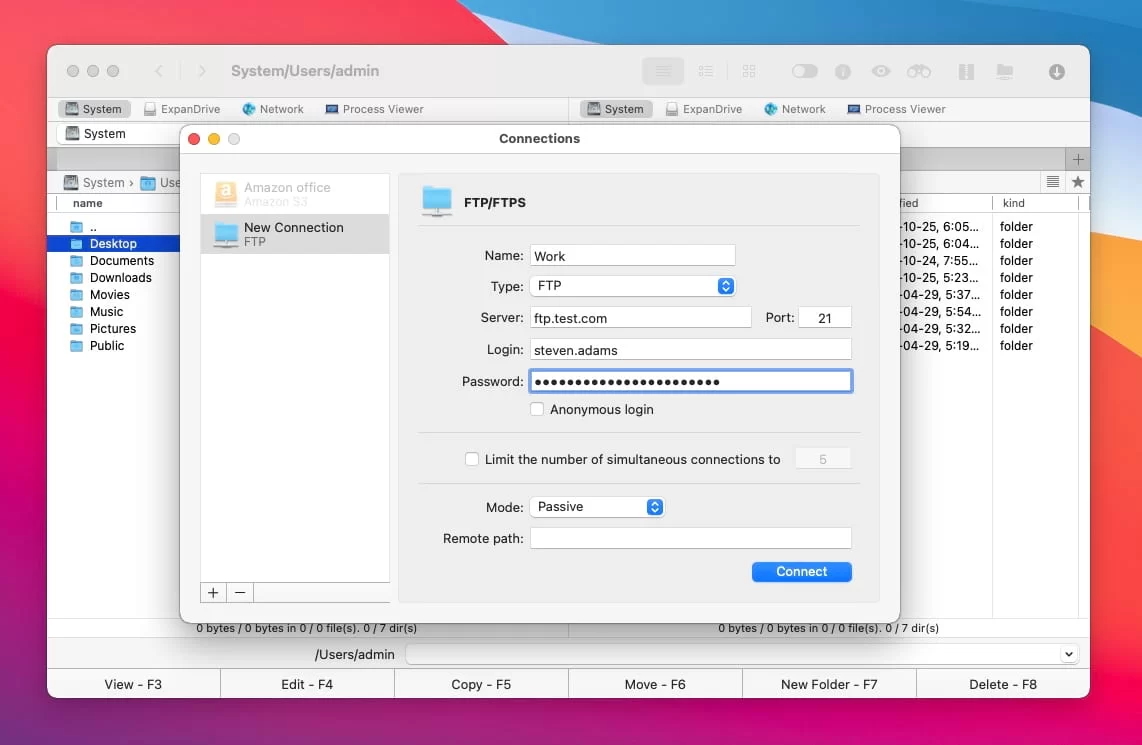
The earlier mentioned Commander One client is one of the most popular and easy to use FTP/SFTP/FTPS clients for Mac. Using this app can help you access FTP on Mac and manage files on a server just as you would on your own local computer storage.
You can move, edit, copy, or delete files as you please, with the added benefits of being able to work with archives, access iOS devices, view and manage processes and many others. To make things even better, Commander One also has a great user interface featuring dual panes which show they gave some thought to the UI/UX part of things.
- Has a built-in in FTP/SFTP/FTPS client
- Supports multiple tabs
- Supports Cloud Computing Services
- Encrypts online connections
- Supports hotkey setup
- Supports connections with cloud services such as Google Drive, One Drive
- Lacks folder comparison feature
- Lacks multiple files rename feature
- Lacks directory synchronization feature
2. Cross-platform solution – CloudMounter
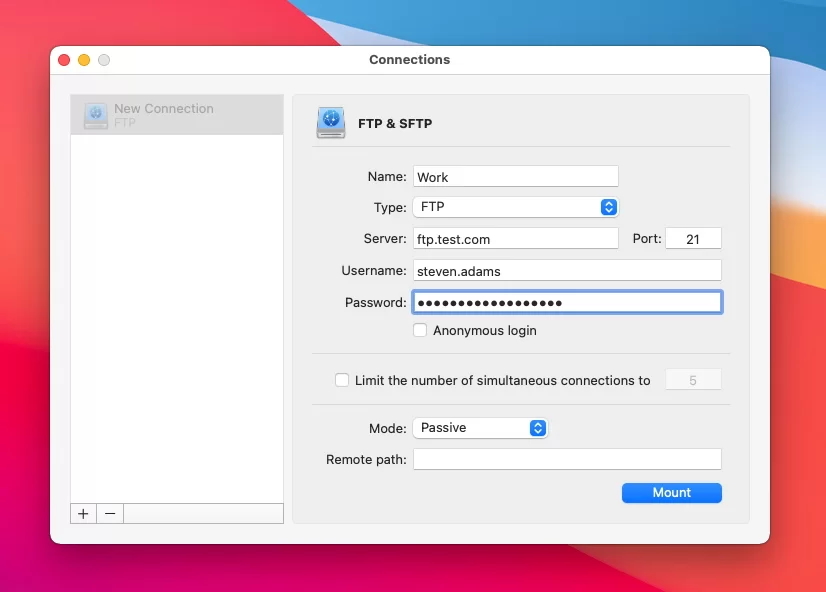
If you’re looking to take your FTP Transfer Mac experience to the next level, make sure to check out CloudMounter. A third-party application developed to allow you to manage several cloud services at once, making it as easy to do as if they were your own additional hard drives. It supports popular cloud services such as Google Drive, Amazon S3, One Drive, and Dropbox.
Even better, FTP servers and all their alternatives are connected as locations on your network. All of this is, of course, covered by a great encryption system which, for security reasons, you can choose to only allow access to them from CloudMounter.
- Try before you buy, CloudMounter offers a free trial
- With a few missing features, you can also get a free version
- Once you’re convinced, you only have to pay once and it’s yours
- Little to no training or usage manuals offered
- Does not support use on mobile devices
Download: CloudMounter
Conclusion
Connecting to an FTP server is very simple and there are several ways to do it. Many of them are relevant for all popular operating systems. But it all depends on the goal because the functionality of some programs is very limited.
FAQ
[/sc]
You will need to know a few basic commands, the IP-address of the server you wish to access, as well as the username and password. Use the prefix “ftp://” followed by the IP-address and then follow the prompts.
There are a lot of FTP clients for Mac on market: Commander One, FileZilla, Cyberduck etc., and which is the best depends on your needs and expectations. Nowadays, the most popular is Commander One, as we mentioned in the article.
FTP clients can help user easily transfer files between two computers, or between a computer and a server.
If you have the password and username needed for authorization to an FTP server, all you need to do is access the server and input the necessary commands. Or, for an easier time, you can use third-party programs.
First, go to “System Preferences” and select “Sharing”. Then enable “File Sharing” and click “Options”. Once done, select “Sharing files and folders using FTP”.
If your Mac can’t find a server, try the following:
- Go to Finder > Settings and make sure “Connected Servers” is checked.
- Check if the computer or server is accessible.
- Check your network connection .


