My USB flash drive suddenly became unreadable on my Mac. It worked fine before, but now it’s not showing up or giving errors. Need it to access important files. Any step-by-step help would be appreciated!
Why does this happen? One day the USB drive works, the next it doesn’t. Apple’s fault? Maybe. Anyway, try this:
- Plug it in.
- Open Disk Utility (Applications > Utilities > Disk Utility).
- Find your USB drive in the list.
- Click ‘First Aid’ – it might fix the errors.
If it still doesn’t work, use Terminal to check if it shows up:
- Open Terminal (Applications > Utilities > Terminal).
- Type
diskutil listand hit enter. Can you see it there? If yes, it’s not completely dead.
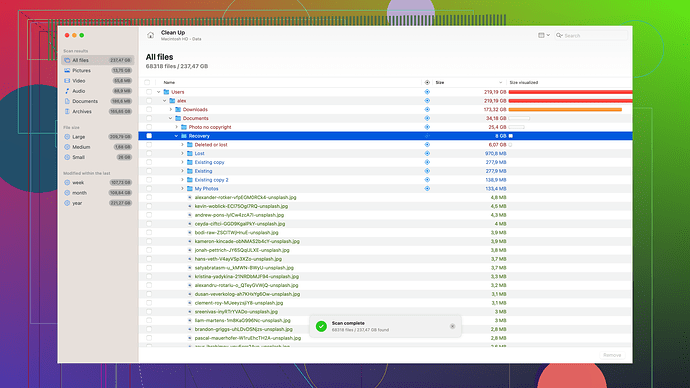
You could try Disk Drill for Mac. It’s decent but beware: Free version’s limited and it constantly pushes you to upgrade. Costs not worth if it’s a one-time recovery. Be skeptical of magic solutions.
First thing I’d check is whether the USB is recognized in Disk Utility. Open it up from Applications > Utilities and see if your drive shows up there. If it’s listed, try running First Aid on it—it might be able to fix some minor issues.
If Disk Utility couldn’t help you out, you might want to think about using a specialized tool. You could try Disk Drill for Mac, which has helped a lot of folks with similar problems. It’s a pretty solid application for data recovery. You can find some handy tutorials on their channel for more info: Data Recovery Videos on Youtube @cleverfiles.
Before you go all in with third-party software, though, you should also check to make sure the problem isn’t with the USB port or cable. Try a different port or even a different computer, just to be sure it’s not a hardware issue. If it’s still not showing up or giving errors, then Disk Drill would be the way to go.
But be cautious—if your data is super important and you’re worried about making things worse, consider consulting a professional data recovery service. Those can be expensive, but sometimes it’s worth it to avoid the potential of losing critical files.
Good luck!
Sounds like your USB flash drive has run into some trouble. Below is a step-by-step guide to help you fix that unreadable USB drive on your Mac.
Step 1: Check the USB Port and Cable
- Sometimes the port or cable can be faulty. Try connecting the USB flash drive to different USB ports on your Mac.
- Use another reliable USB cable if your flash drive uses one.
Step 2: Check Disk Utility
- Head over to “Applications” > “Utilities” > “Disk Utility.”
- See if your USB flash drive appears in the left-hand menu of the Disk Utility window.
- If it does appear, click on it and then hit “Mount.” This might solve the problem if the drive was simply unmounted.
Step 3: First Aid in Disk Utility
- Still in Disk Utility, with your USB drive selected, click “First Aid.” This will run diagnostics and repair processes.
- Follow the prompts to “Run” and allow it to complete the process. It’ll check and repair the disk if possible.
Step 4: Use Terminal
- Open the “Terminal” application from “Applications” > “Utilities.”
- Type
diskutil listto identify the disk number of your USB drive. - Use
diskutil mountDisk /dev/diskX(replaceXwith the disk number) to attempt to mount the drive.
Step 5: Fsck Command
- If the drive still isn’t working, try using the fsck command. In Terminal, type
sudo fsck_hfs -fy /dev/diskX(replaceXagain with your disk number).
Step 6: Check System Information
- Go to “Apple Menu” > “About This Mac” > “System Report.”
- Click on “USB” under “Hardware” and see if the flash drive appears under the USB devices list. This helps verify hardware detection.
Step 7: Use Disk Drill for Mac
- If the above methods don’t work, consider using a data recovery tool like Disk Drill for Mac. This software can help recover important files from a problematic drive.
- Download and install Disk Drill from the link provided.
- Open the program, select the USB drive, and then choose “Recover.” Follow the prompts to scan for lost or corrupt files and recover them safely.
Step 8: Reformat the USB Drive
- If you’ve managed to back up your data with Disk Drill or another method, you can reformat the USB drive to make it usable again.
- Within Disk Utility, select your USB drive, click “Erase,” choose a format (like “MS-DOS (FAT)” for cross-platform use), and then click “Erase.”
Step 9: Update macOS and USB Drivers
- Ensure your macOS is up to date. Often, updates can resolve system or compatibility issues.
- Go to “Apple Menu” > “System Preferences” > “Software Update.”
Step 10: Other Options
- If none of the above work, you might consider professional data recovery services, especially if the data is extremely important.
There you go! Hopefully, one of these steps will get your USB flash drive working again on your Mac. Let us know how it goes or if you hit any snags along the way. Good luck!
