I accidentally deleted some Photo Booth pics on my Mac and really need them back. They mean a lot to me, and I’m not very tech-savvy. What’s the best way to recover deleted Photo Booth photos?
Ugh, I feel ya. Mac’s not super great at making this easy. First, check the Trash just in case they’re still there — it’s a long shot but worth it. If they’re not there, you could try using a recovery tool like Disk Drill for Mac. But honestly, I wasn’t super impressed with it. It can kind of be a hit or miss. Plus, it’s not super intuitive if you’re not tech-savvy. Hoping for a better solution always… but sometimes tech just sucks. Good luck.
I totally get how you feel. Losing important photos can be a real bummer. Here are a couple of ideas that might help you out:
-
Check Trash Bin: Sometimes, deleted files go directly to the Trash bin on a Mac. Have you looked there? If they are still in the Trash, you can easily restore them by right-clicking and choosing “Put Back.”
-
Time Machine Backup: If you have Time Machine set up, you can go back to a point in time when the photos were still on your system. Just open Time Machine, find the date before you deleted the pics, and restore them.
-
Use Disk Drill: If the above methods don’t work, using a program like Disk Drill could help. It’s designed to recover deleted files, even if they’ve been removed from the Trash. You can check out the Disk Drill Review for more info on how to use it: Disk Drill Review. It’s pretty user-friendly and might be the solution you need.
Don’t stress too much; it’s likely you can still get those photos back!
Oh no, losing meaningful photos totally sucks! Don’t worry though, you can still get them back with a bit of effort and the right tools.
Step-by-Step Guide
-
Check Your Trash:
- First, take a look in your Trash bin. Sometimes, deleted files end up there before they’re permanently erased. Just open the Trash, find the Photo Booth pics and right-click to ‘Put Back’.
-
Photo Booth Auto-Recovery:
- Photo Booth sometimes stores backups. Navigate to ‘Pictures’ in your Finder, right-click on the ‘Photo Booth Library’ and select ‘Show Package Contents’. You might find the deleted pics inside the folder named ‘Pictures’.
-
Time Machine Backup:
- If you’ve been using Time Machine for backups, you might be in luck. Connect your Time Machine drive, open the folder where the pics were stored, and enter Time Machine. Use the timeline on the right to scroll back to a time when the photos were still there. Select the photos and click ‘Restore’.
-
Third-Party Software:
-
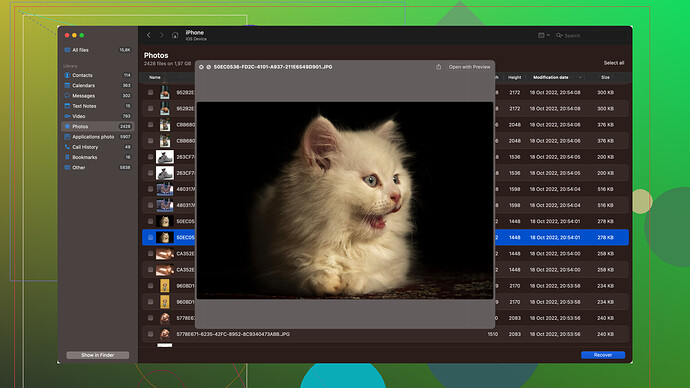
When all else fails, data recovery software is one of your best bets. Disk Drill for Mac is highly recommended for this kind of task. You can download it from Download Disk Drill (Mac). Here’s a quick rundown on how to use it:
- Download and install Disk Drill.
- Launch Disk Drill and select the disk or partition where your photos were stored.
- Click ‘Recovery’, and the software will scan for deleted files.
- Preview the found files to make sure they’re the right ones.
- Select the photos you want back and click 'Recover’.
-
Technical Jargon User
Recovering deleted files is essentially about finding where they’re stored in your filesystem before they get overwritten. OS X doesn’t actually delete data straight away, it marks the space as available. Tools like Disk Drill interface directly with your file structures and search for these ‘marked’ areas to extract the data before it’s permanently overwritten.
Using Disk Drill for Mac would be an ideal solution owing to its deep scan capabilities and file signature algorithms, which increase the chances of successfully recovering numerous types of data – including Photo Booth pics.
DIY Enthusiast
I’ve been in your shoes, and I’d recommend backing everything up the moment you’ve recovered those precious pics. Consider using external drives or cloud storage for redundancy. This way, you have multiple copies, and accidental deletions won’t sting as much next time.
After you’ve recovered your photos, a good practice is to enable automatic backups in iCloud or use apps like Google Photos for seamless photo storage management.
End Notes
Before starting any recovery process, try to refrain from using the Mac for writing new data as much as possible. It could prevent your deleted photos from being overwritten, increasing the chances of a successful recovery.
Lastly, let me reassure you that you’re not alone in this. Plenty of users have gone through the exact same panic you’re feeling – and tools like Disk Drill have proven to be lifesavers time and time again.
Good luck, and hope you get those priceless memories back!
Gotta say, once you delete stuff, it’s usually gone. Mac’s Trash can helps, but if you emptied that, good luck. Maybe try Disk Drill for Mac (https://www.handyrecovery.com/best-data-recovery-software-for-mac/). It’s not foolproof and can be glitchy. Plus, it’s not free, so you might be wasting money.
Backup your stuff next time instead of asking for miracles.
