How to Restore Files from Time Machine Backup on a Mac
Table of Contents
The most valuable piece of advice any computer owner will hear is this — back up your data regularly.
Losing your data is terrifying. And nothing’s more disheartening than learning all the hard work you’ve put into a project was wiped out in an instant.
Backing up your data lets you avoid that heartbreak in most cases. And for Mac users in particular, restoring your backed up data is especially simple, thanks to Time Machine.
This guide explains the easiest and most effective ways of restoring data from Time Machine.
How to Restore from Time Machine on a Mac: 4 Methods
Time Machine is a native backup system on Mac computers. This built-in system automatically backs up your personal data, system settings, and other valuable files.
Although some of these backup files are saved locally on your machine (called Local Snapshots), these save files are deleted every 24 hours. As a result, many users choose to back up their data through an external hard drive. This allows for backups that stretch back further than just a single day.
Since Time Machine is an app native to your Mac, it’s also especially easy to use this feature to restore your data.
Below we discuss the four best methods for doing so.
1. Restore Deleted Files or Revert to an Old Version of a Document Using Time Machine
Whether you want to revert an older version of a document or bring back a file that’s gone missing entirely, Time Machine makes restoring your data simple.
Just follow the steps below.
To restore deleted files or revert to an old version of a document using Time Machine:
- Start by opening the locations your file was or currently is in. Then start Time Machine by clicking the icon in the menu bar. If you don’t see the icon, open Time Machine preferences through System Preferences and click “Show Time Machine in menu bar”.

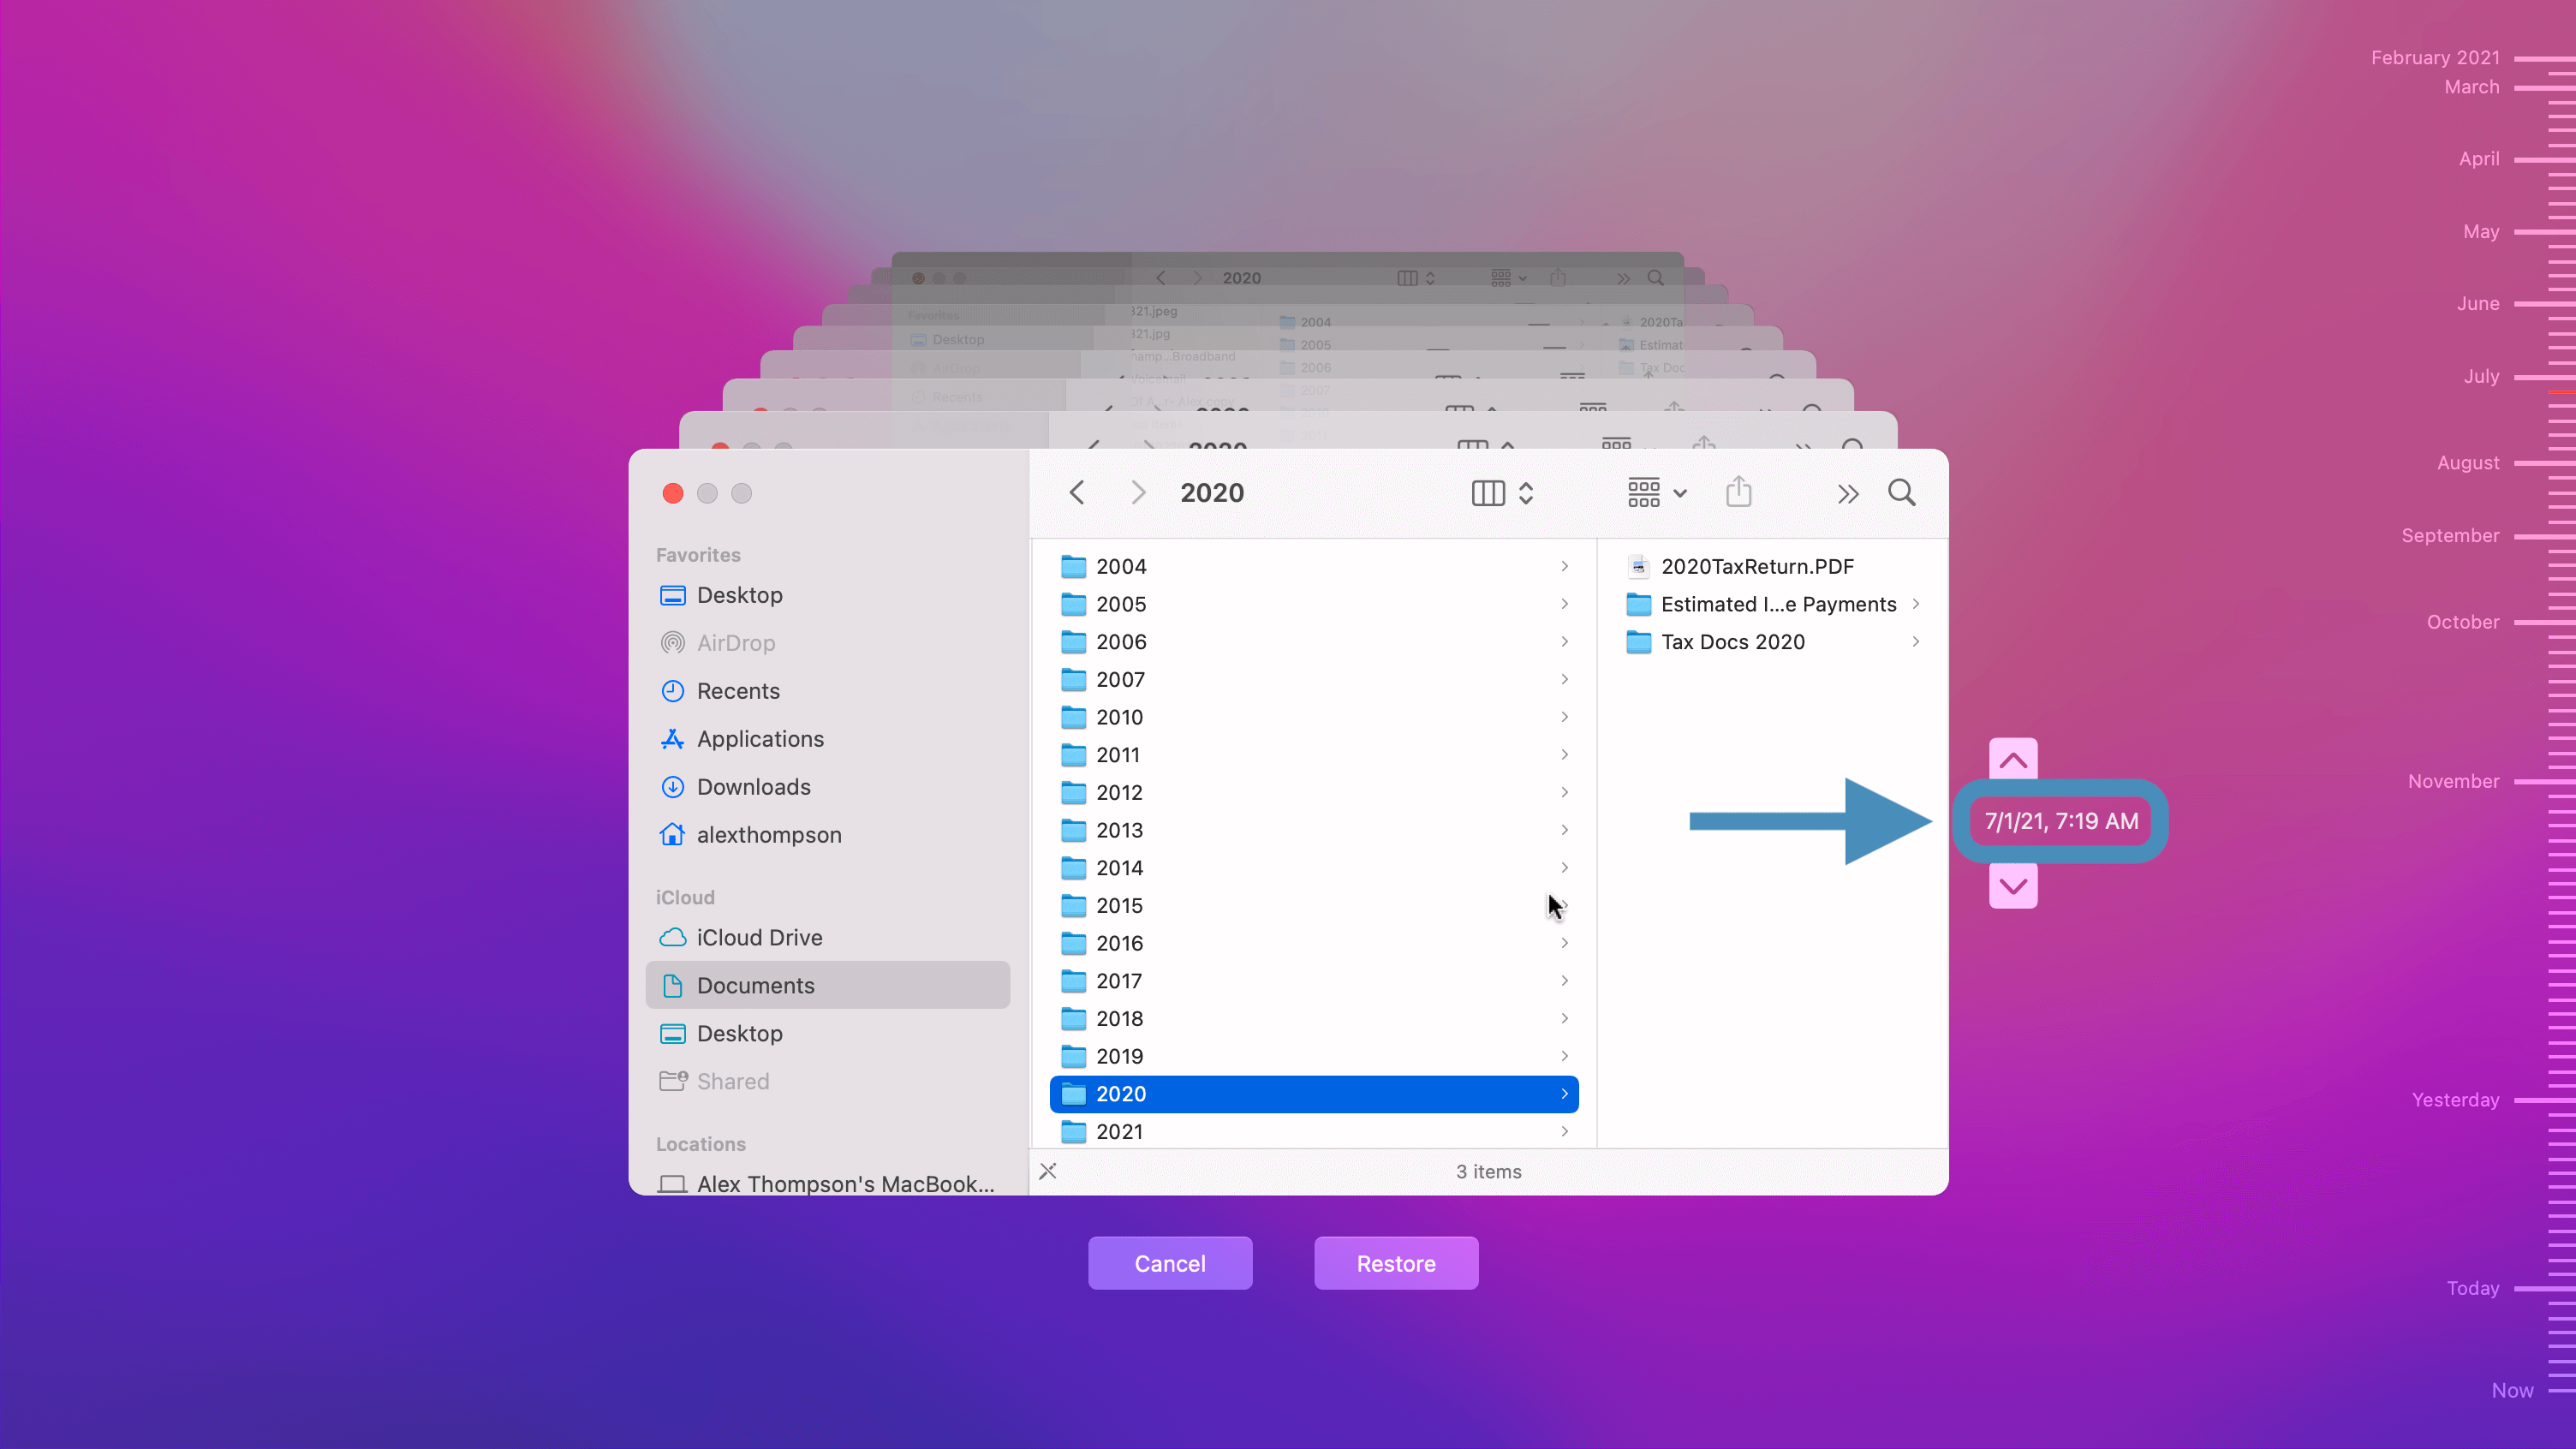
- Once opened, you can navigate through your Time Machine backups using the arrows or the timeline to the right of the screen.
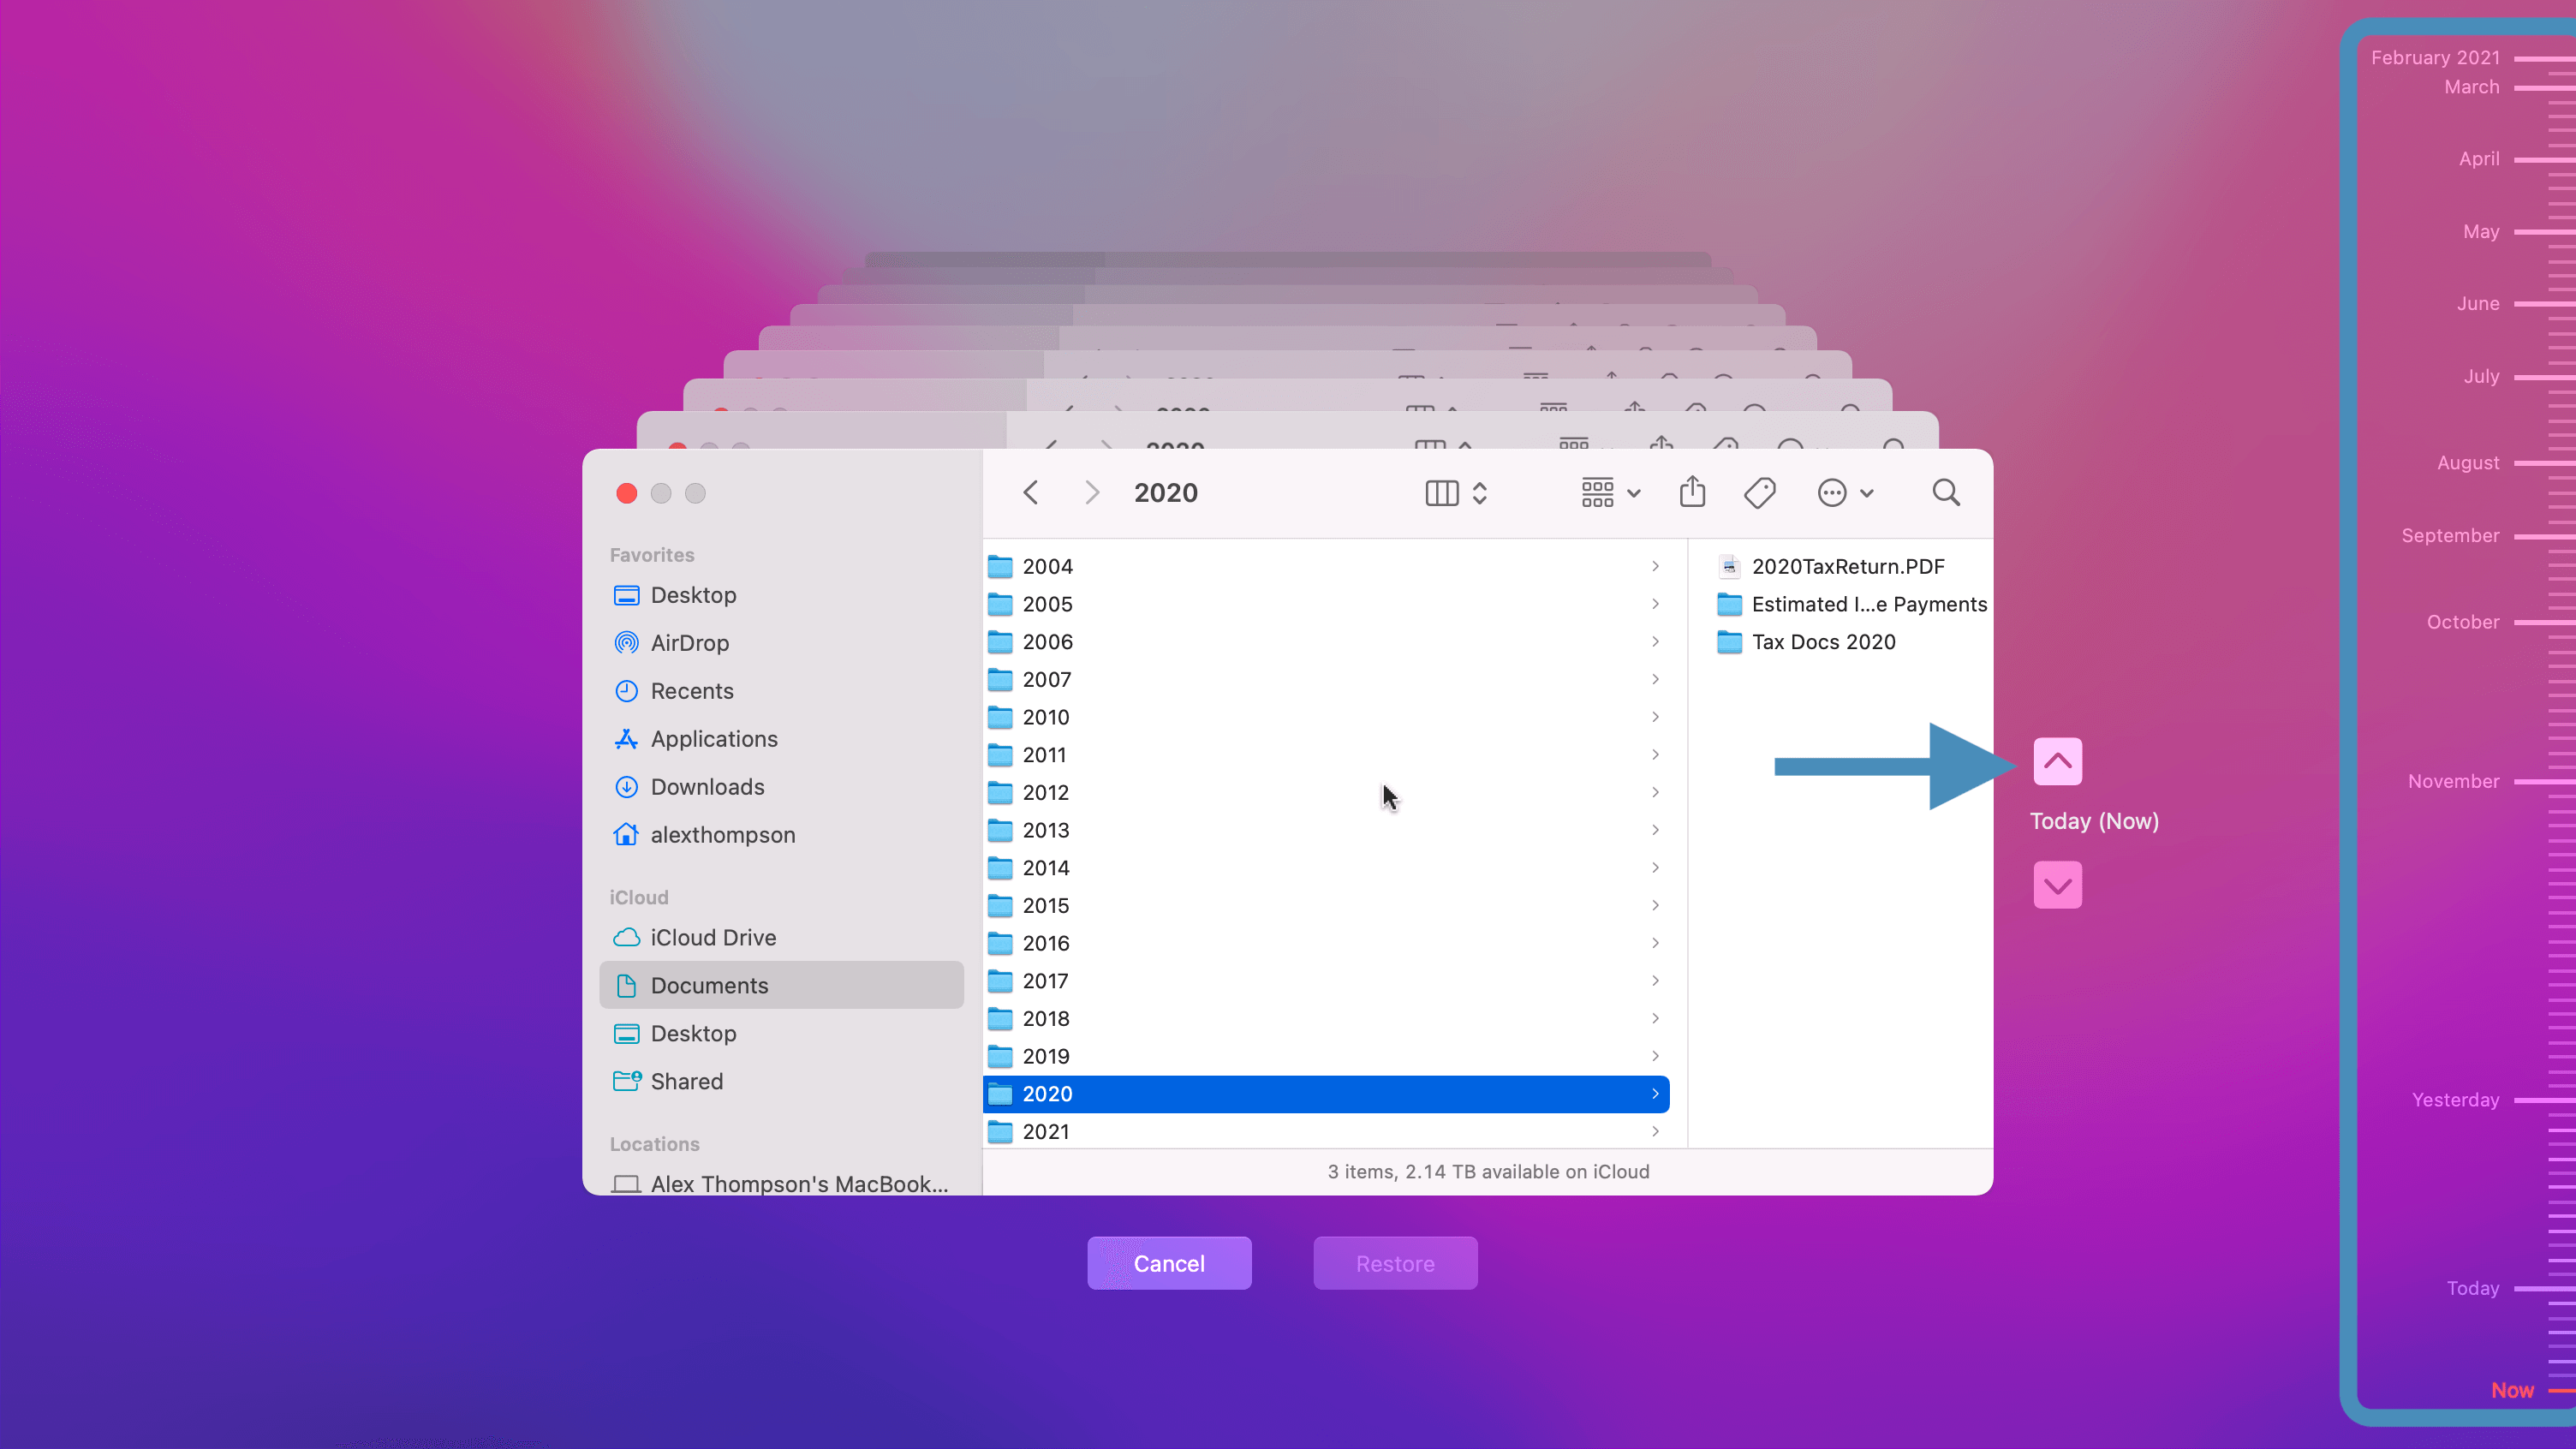
- Locate the backup you’d like to restore the file from.
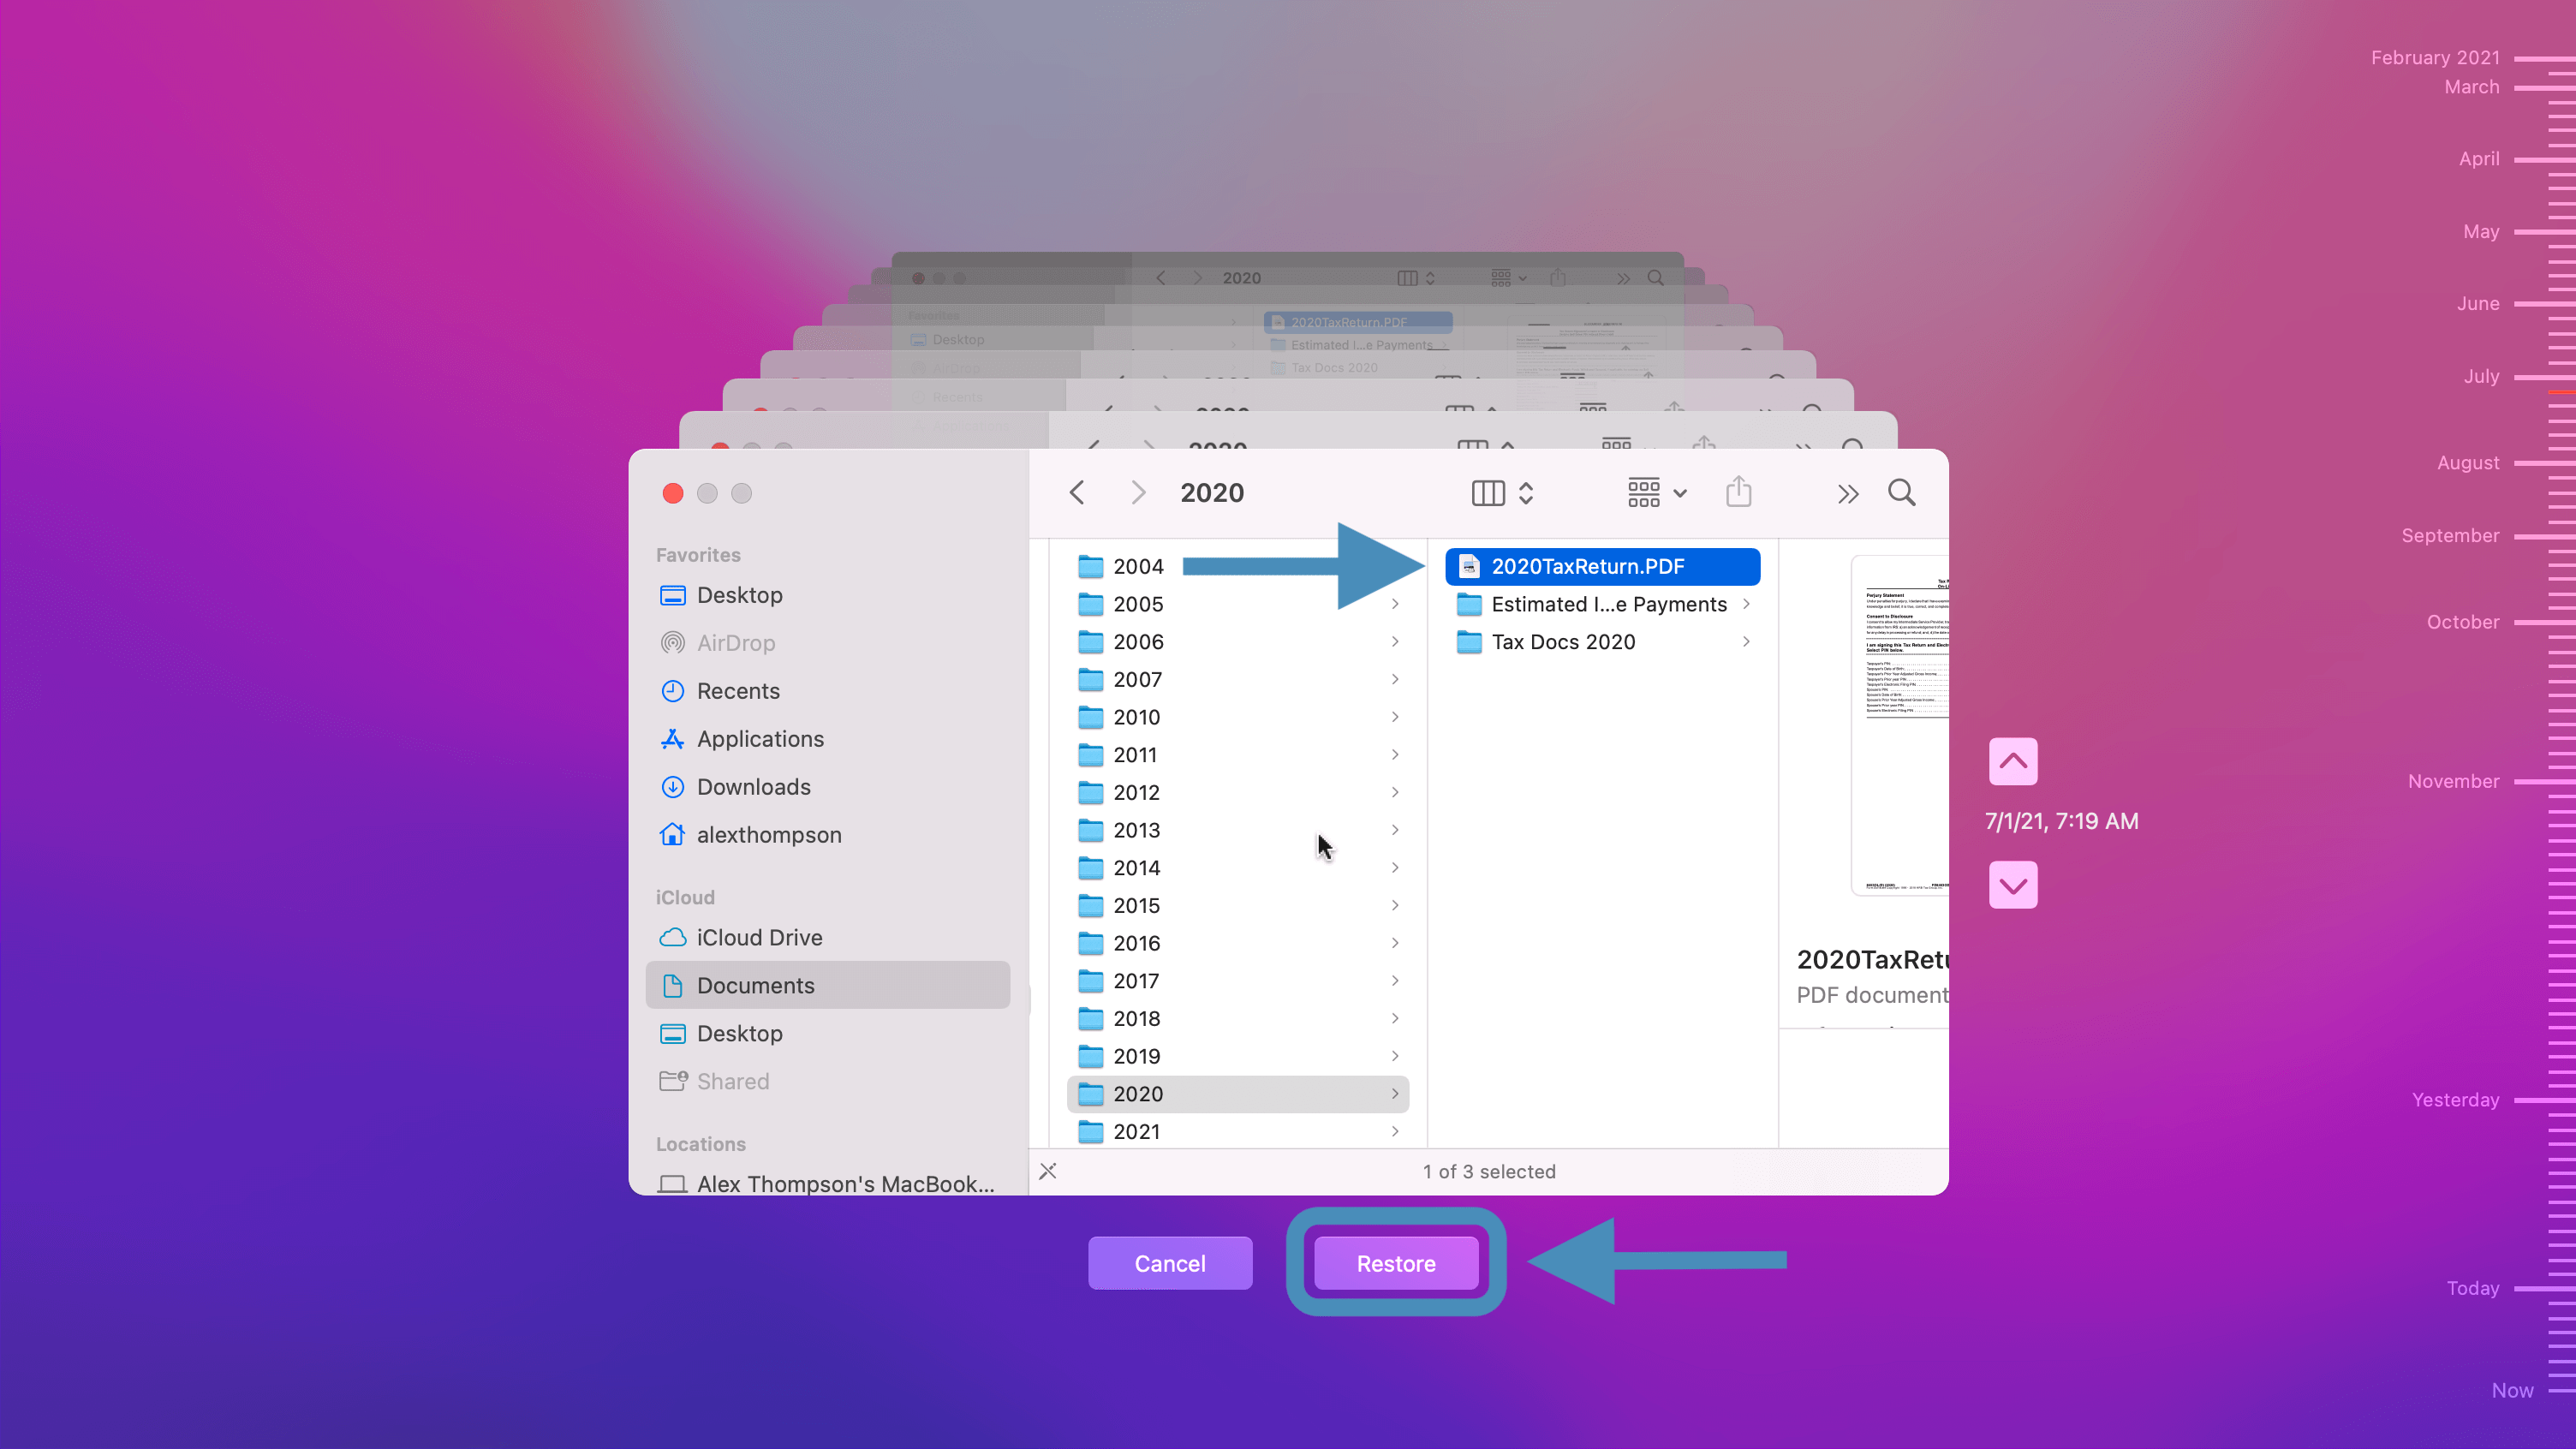
- Select the file, ensure it’s the correct version in the preview window to the right, and click Restore.
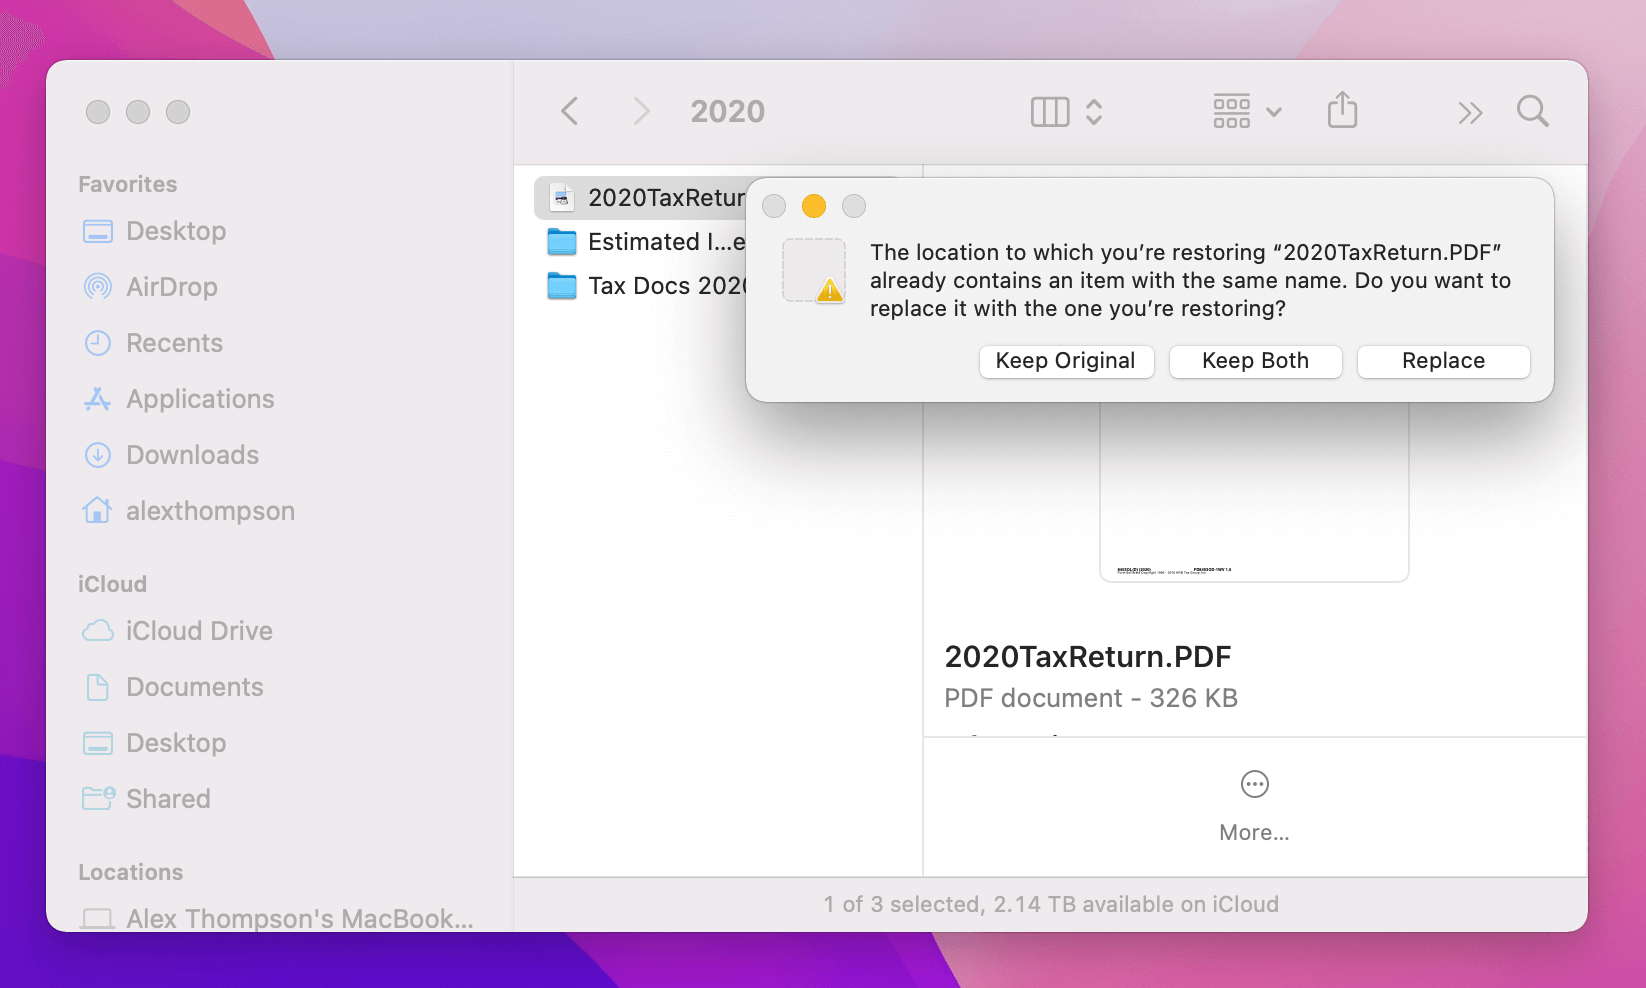
- If the file has the same name as the current version, you’ll be asked if you’d like to replace the original, keep the original, or keep both. We recommend keeping both so you can be sure you have the right version.

2. Start Up Your Mac from a Time Machine Backup
The Time Machine App and Migration Assistant make it easy to restore your lost data. But if you’re experiencing major issues, the solution may be to boot from a Time Machine backup.
Again, the process here isn’t too complicated.
To start up your Mac from a Time Machine backup:
- First be sure the disc storing your Time Machine backups is connected to your machine. Then shut down your Mac.
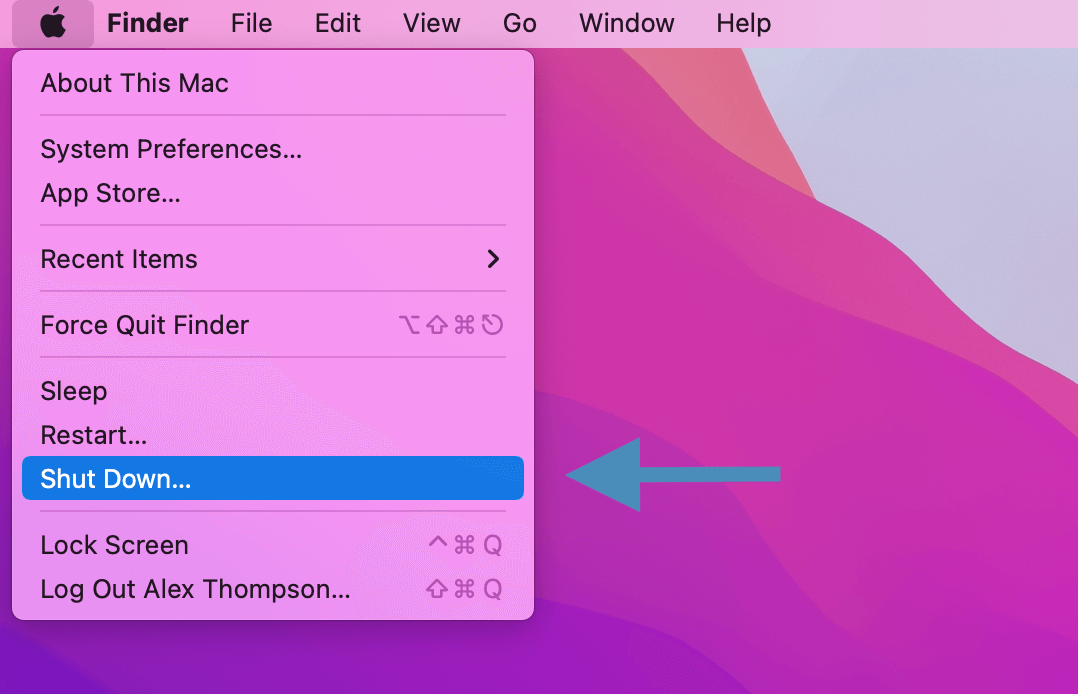
- Now you’ll need to restart your Mac in recovery mode. Hold Command + R and restart your Mac while keeping the keys held down.
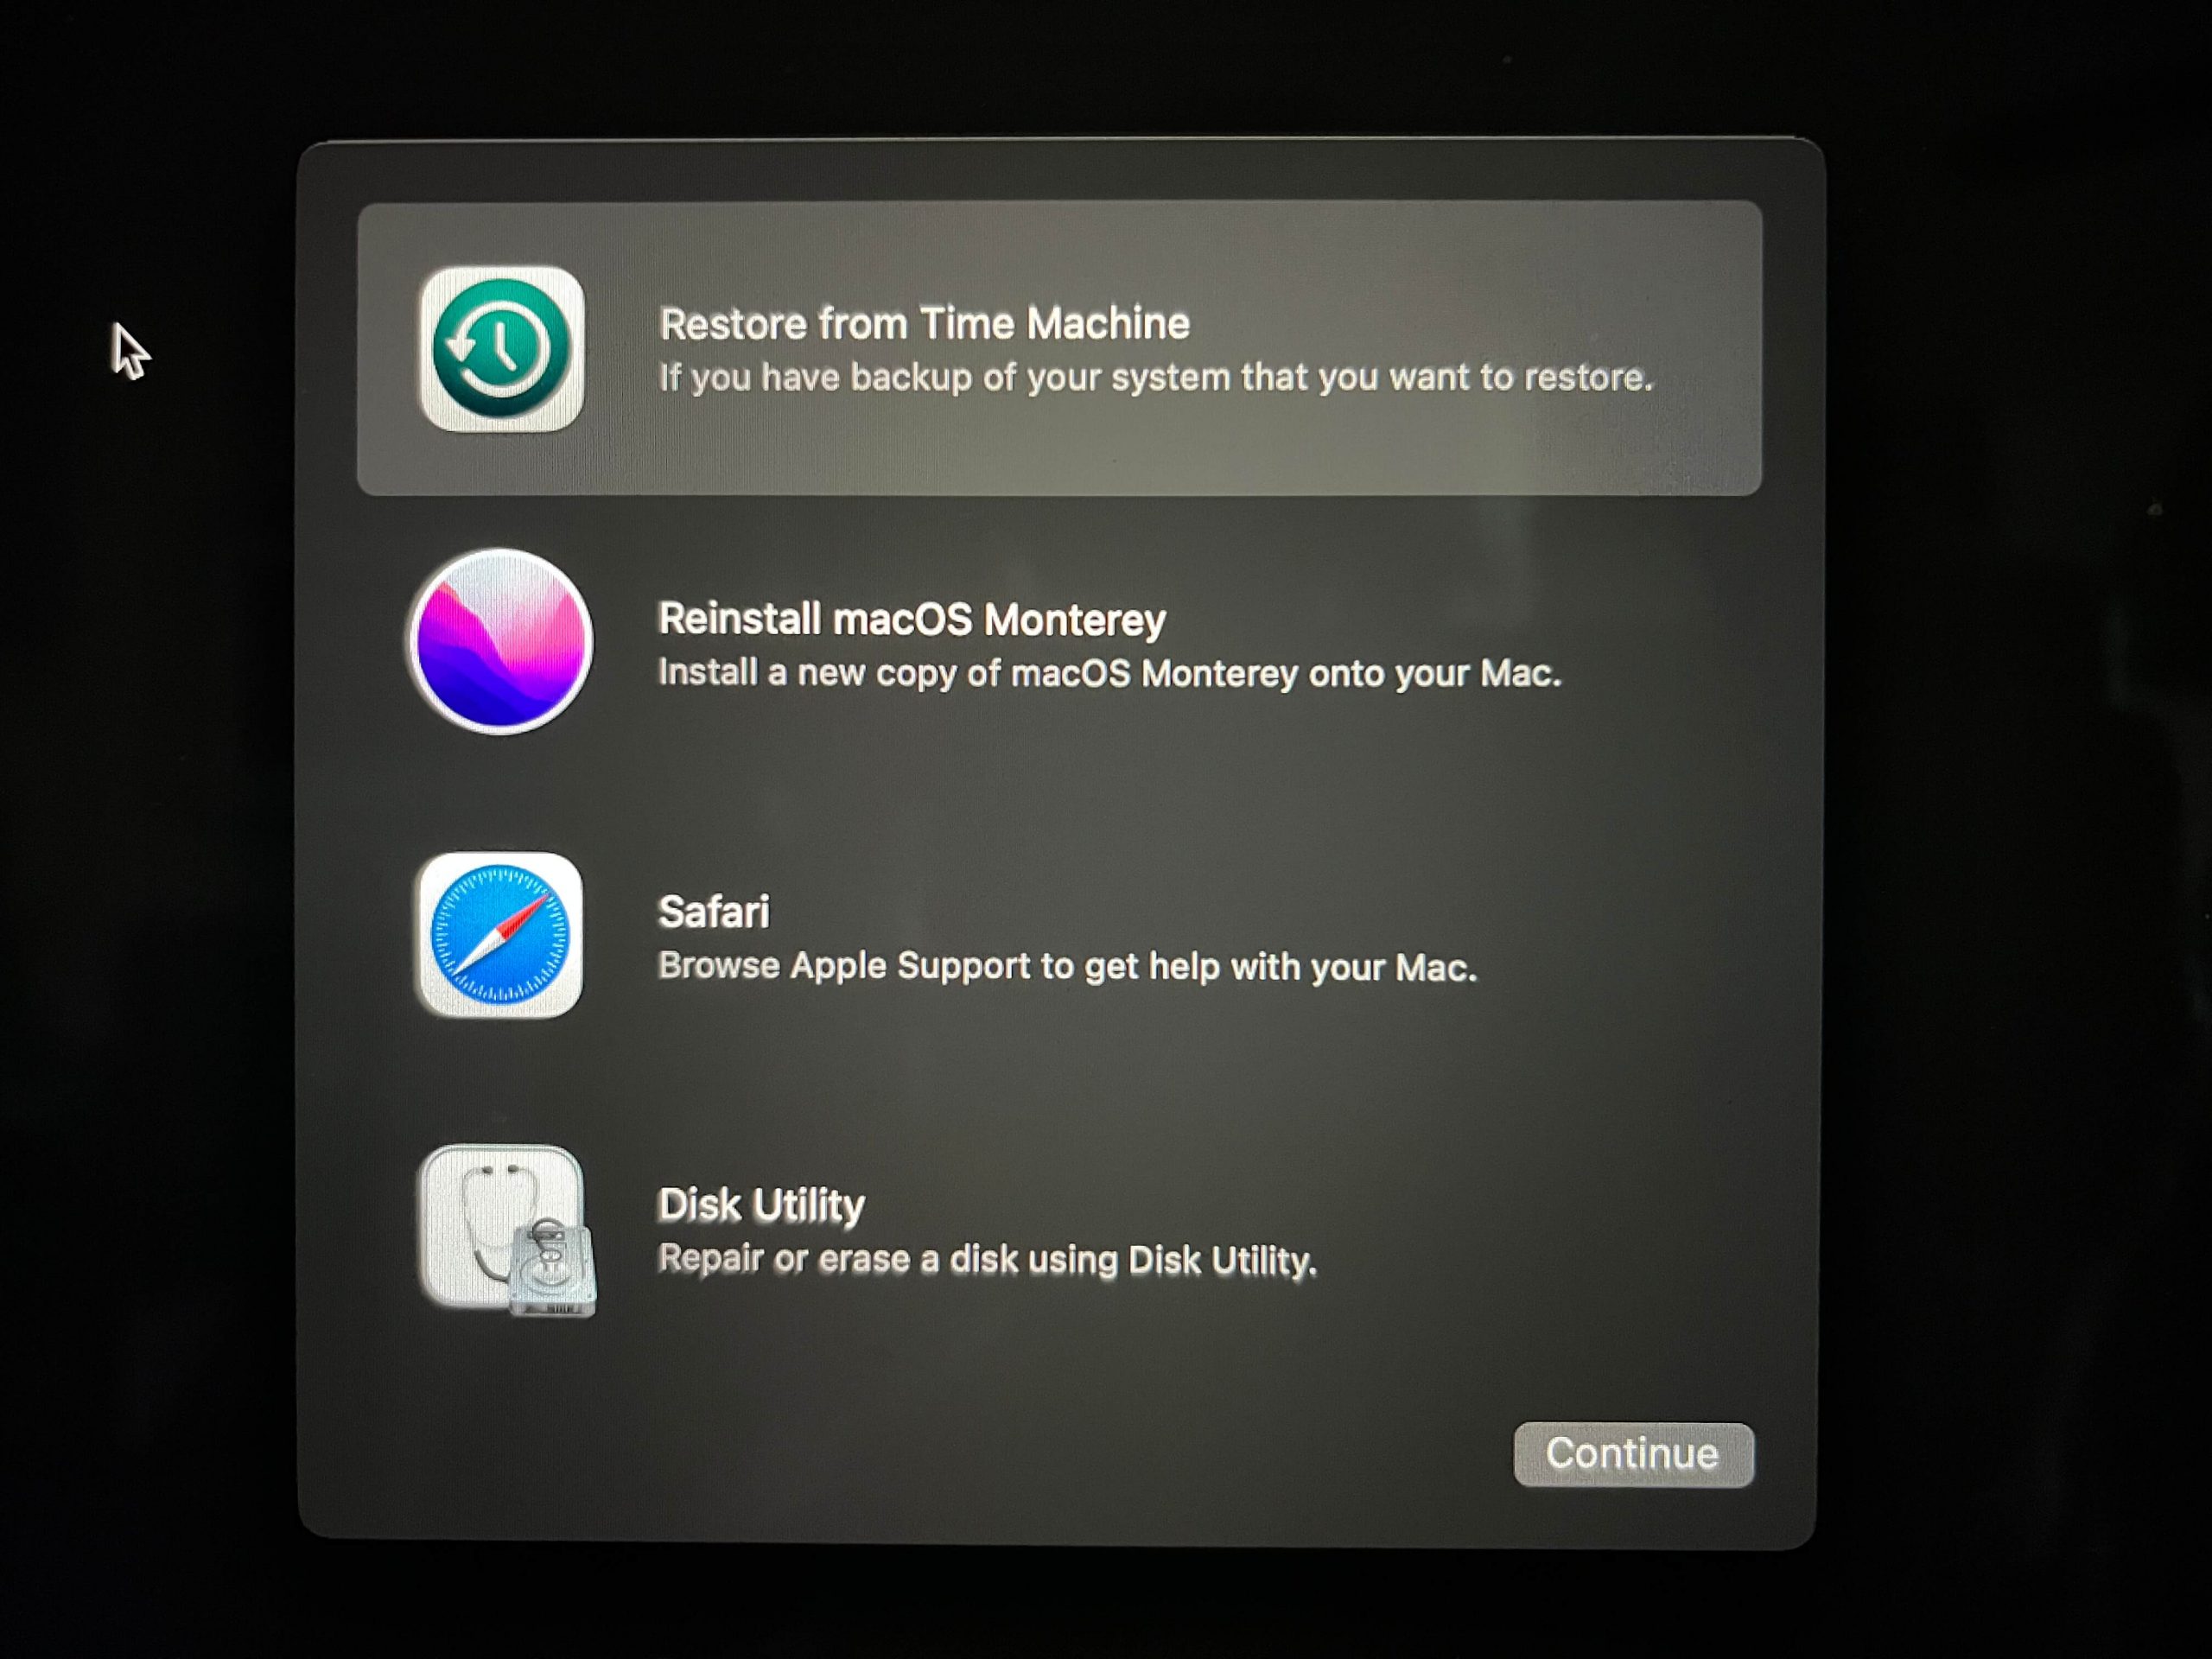 You should eventually see a screen similar to the one below. Select “Restore from Time Machine” and click Continue.
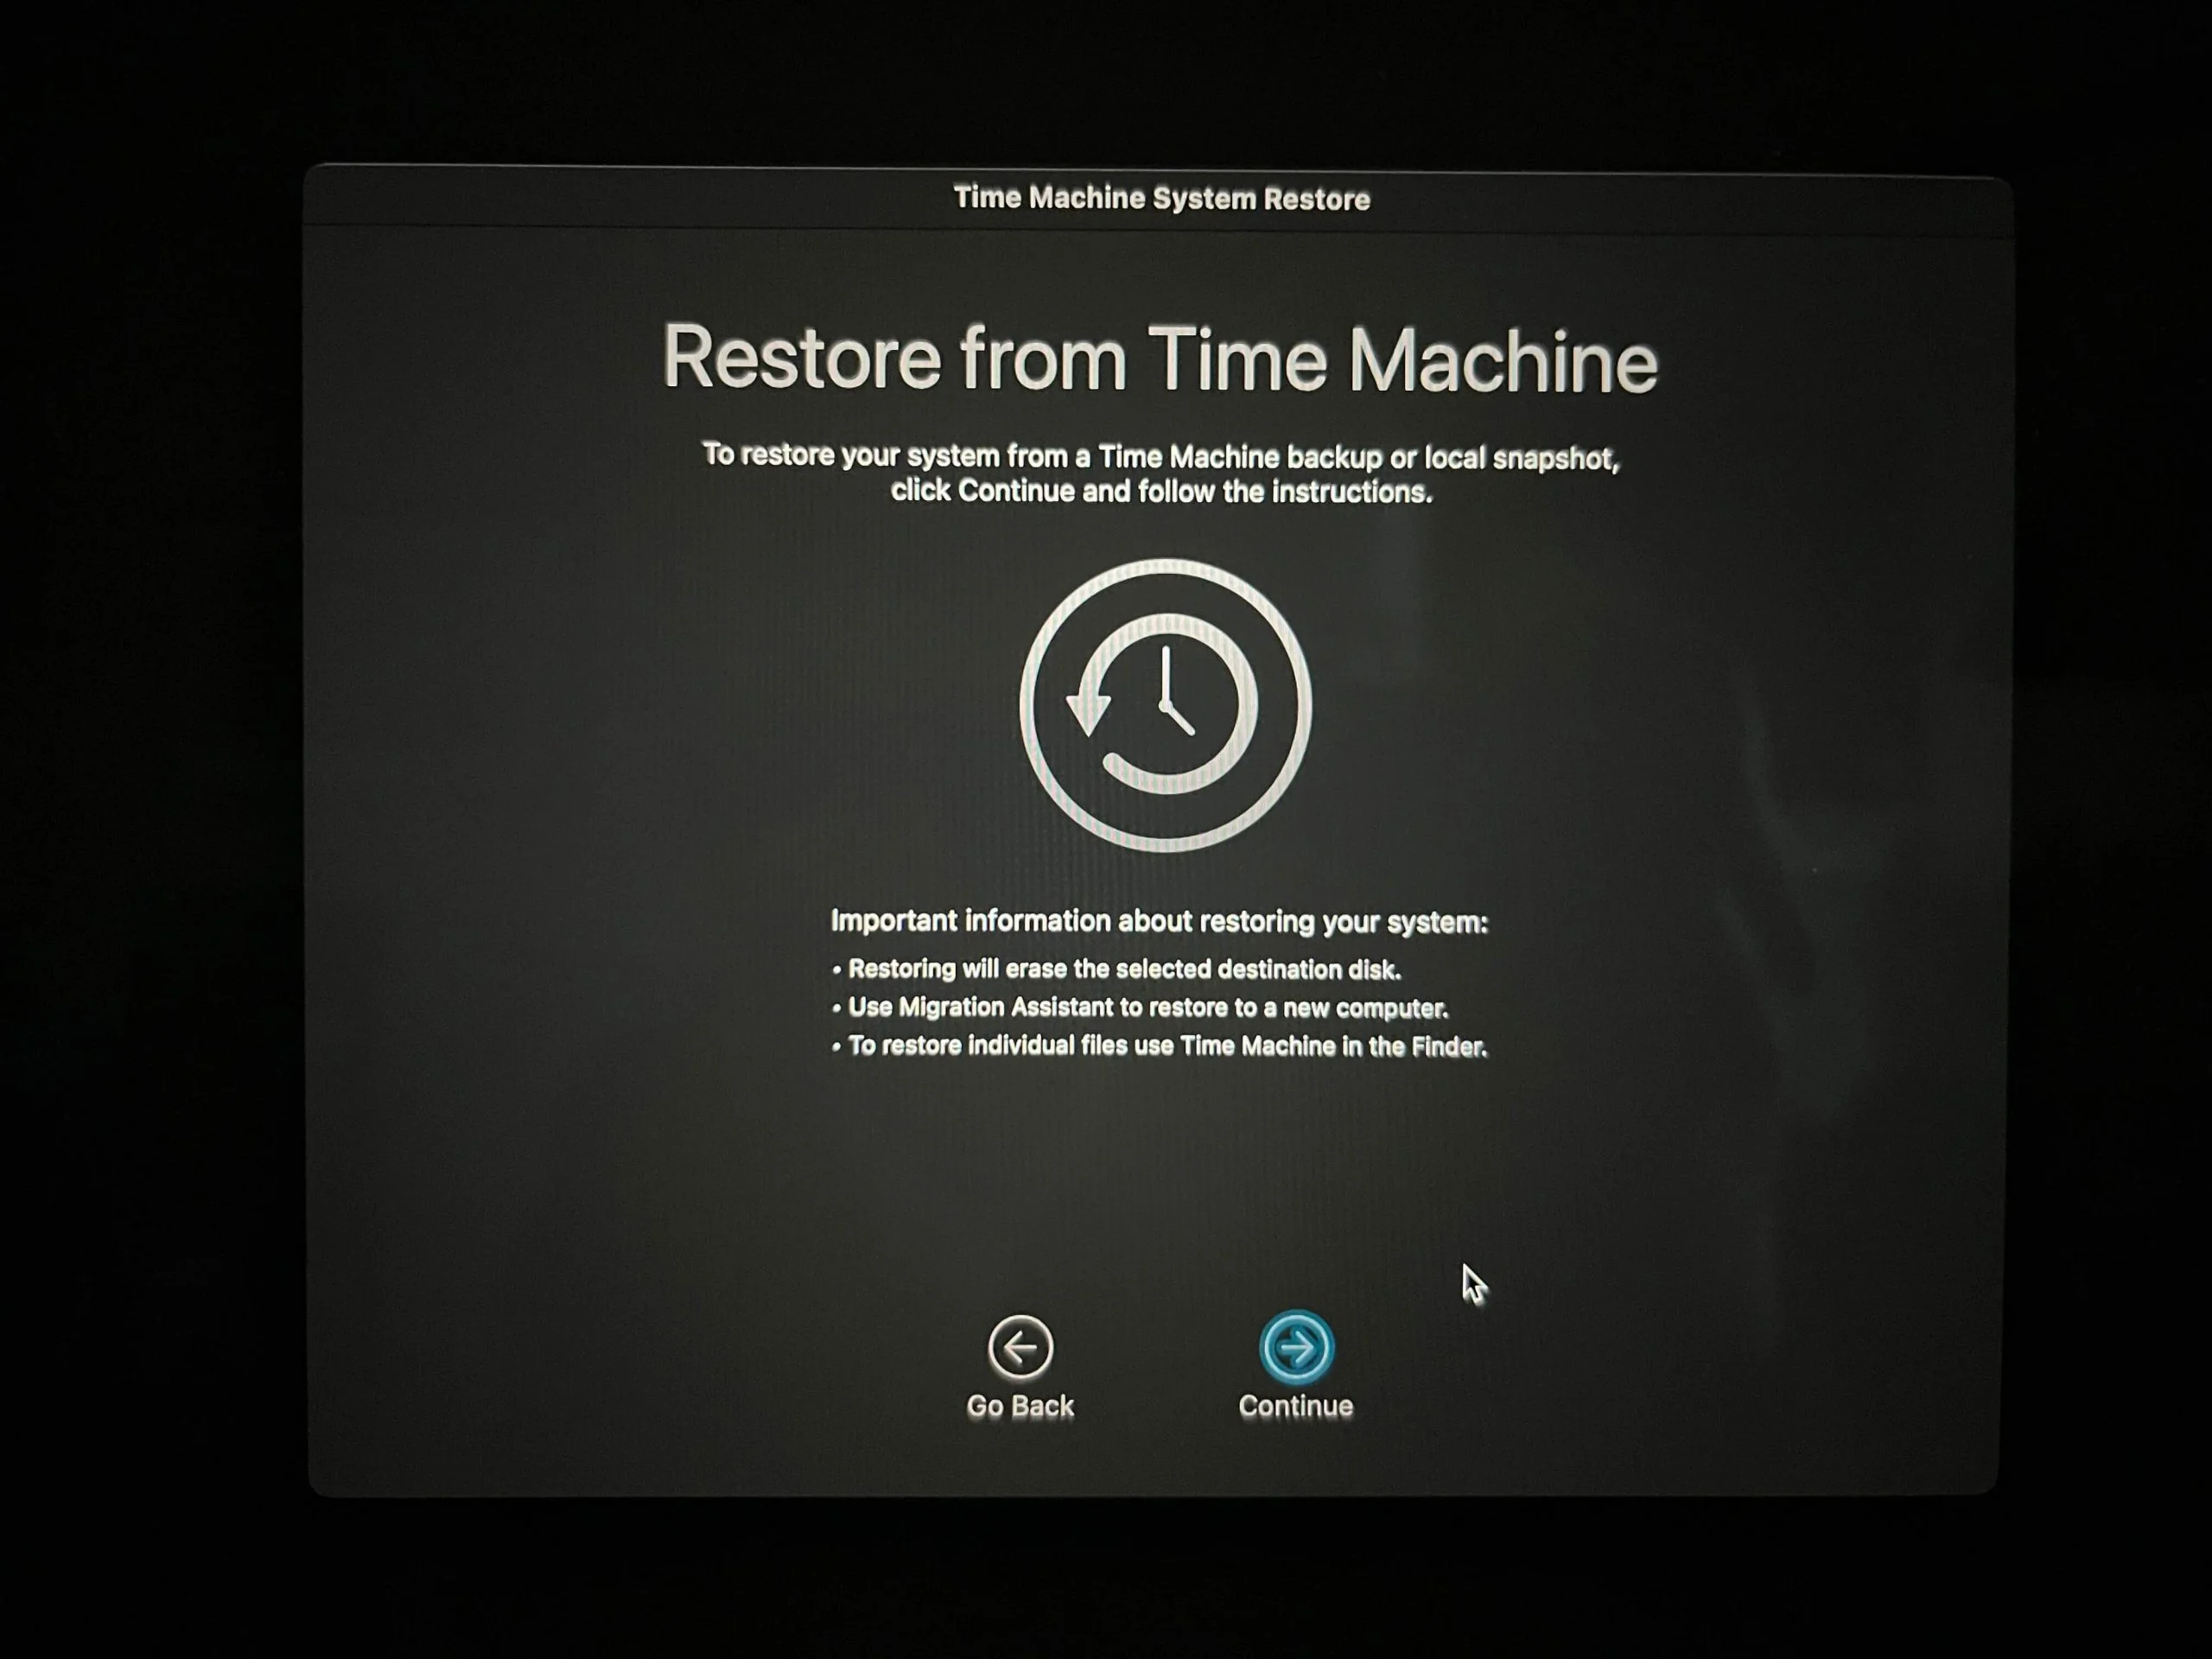
- Read the information on the following screen and click Continue again.
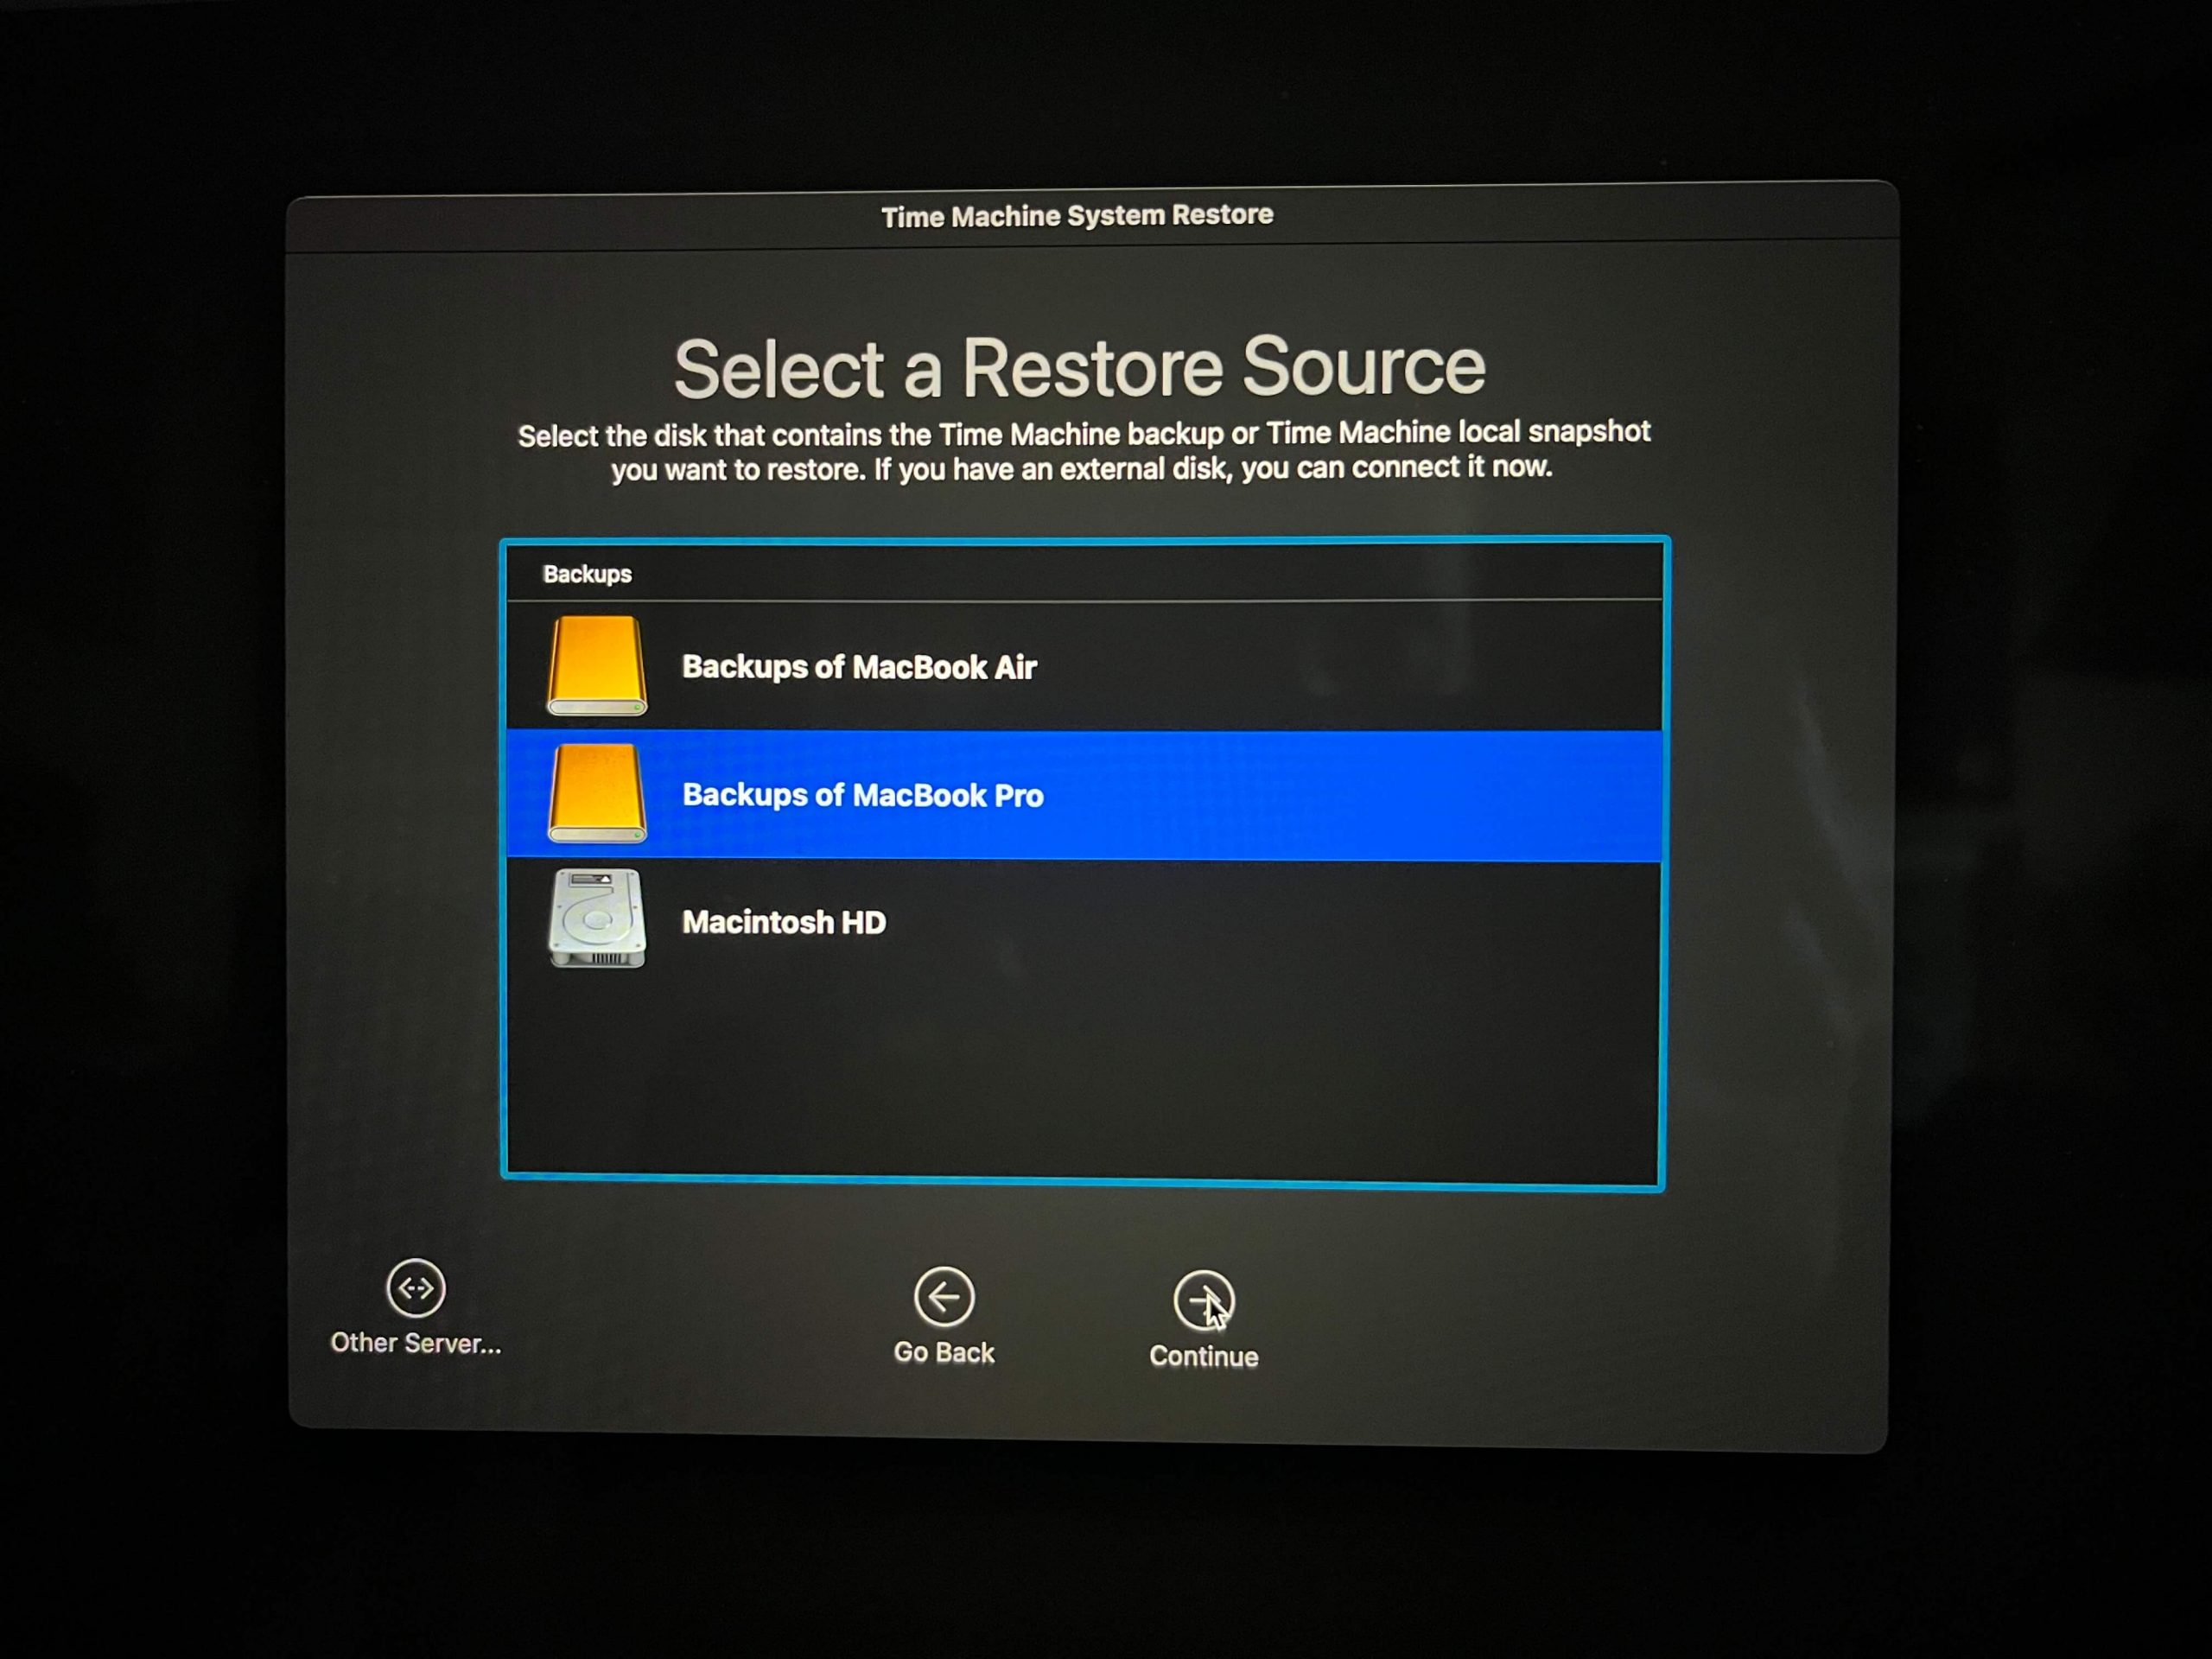
- Select the disc storing the Time Machine backup you’d like to start from.
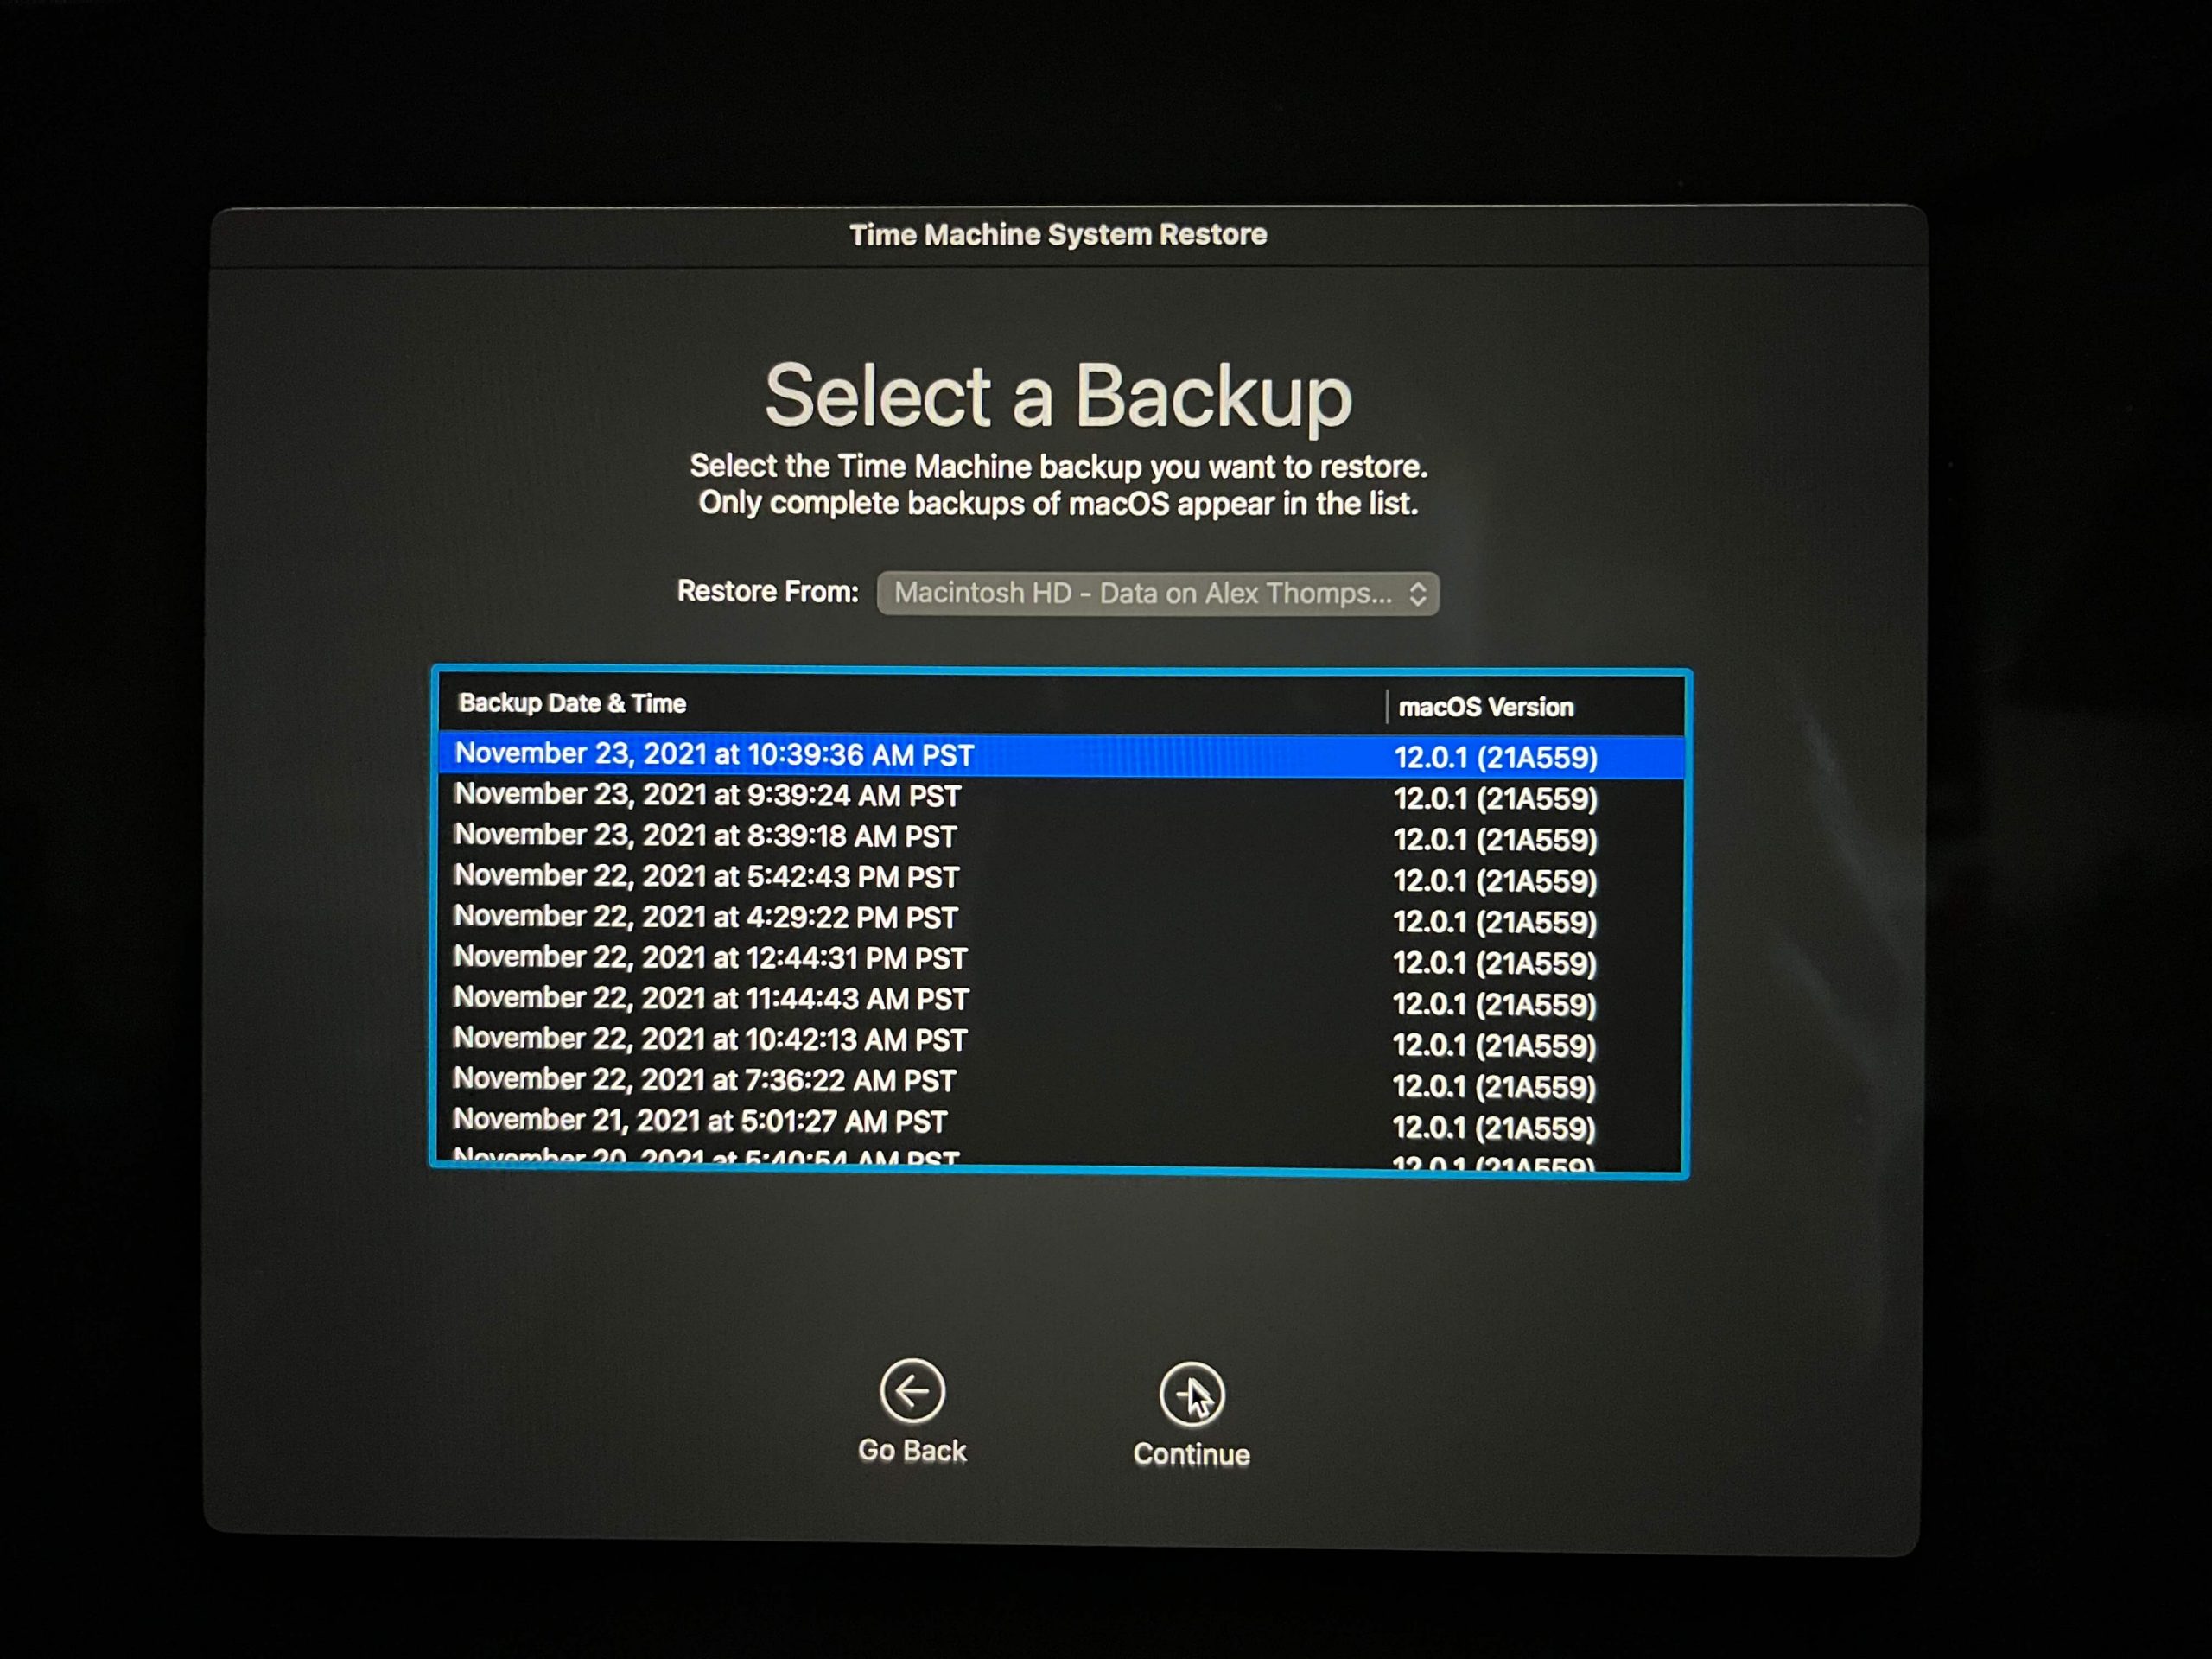
- Then select the backup you’d like to restore from and click Continue.
3. Revert Your Mac to an Earlier Version Using macOS Recovery
Updates in the macOS can bring some pretty big new changes. And some users may want to downgrade to previous versions after updating.
Time Machine makes that possible. And if you’re able to start your Mac from a Time Machine backup (covered in the previous section), you can easily downgrade to a previous OS.
To revert your Mac to an earlier macOS version:
- Be sure the disc storing your Time Machine backups is connected to your Mac and shut down your machine.

- Restart your Mac in recovery mode by holding Command + R and restarting your Mac while keeping the keys held down. You’ll see a screen similar to the one below. Select “Restore from Time Machine” and click Continue.

- Read the information on the following screen and click Continue again.

- Select the disc storing the Time Machine backup you’d like to start from.

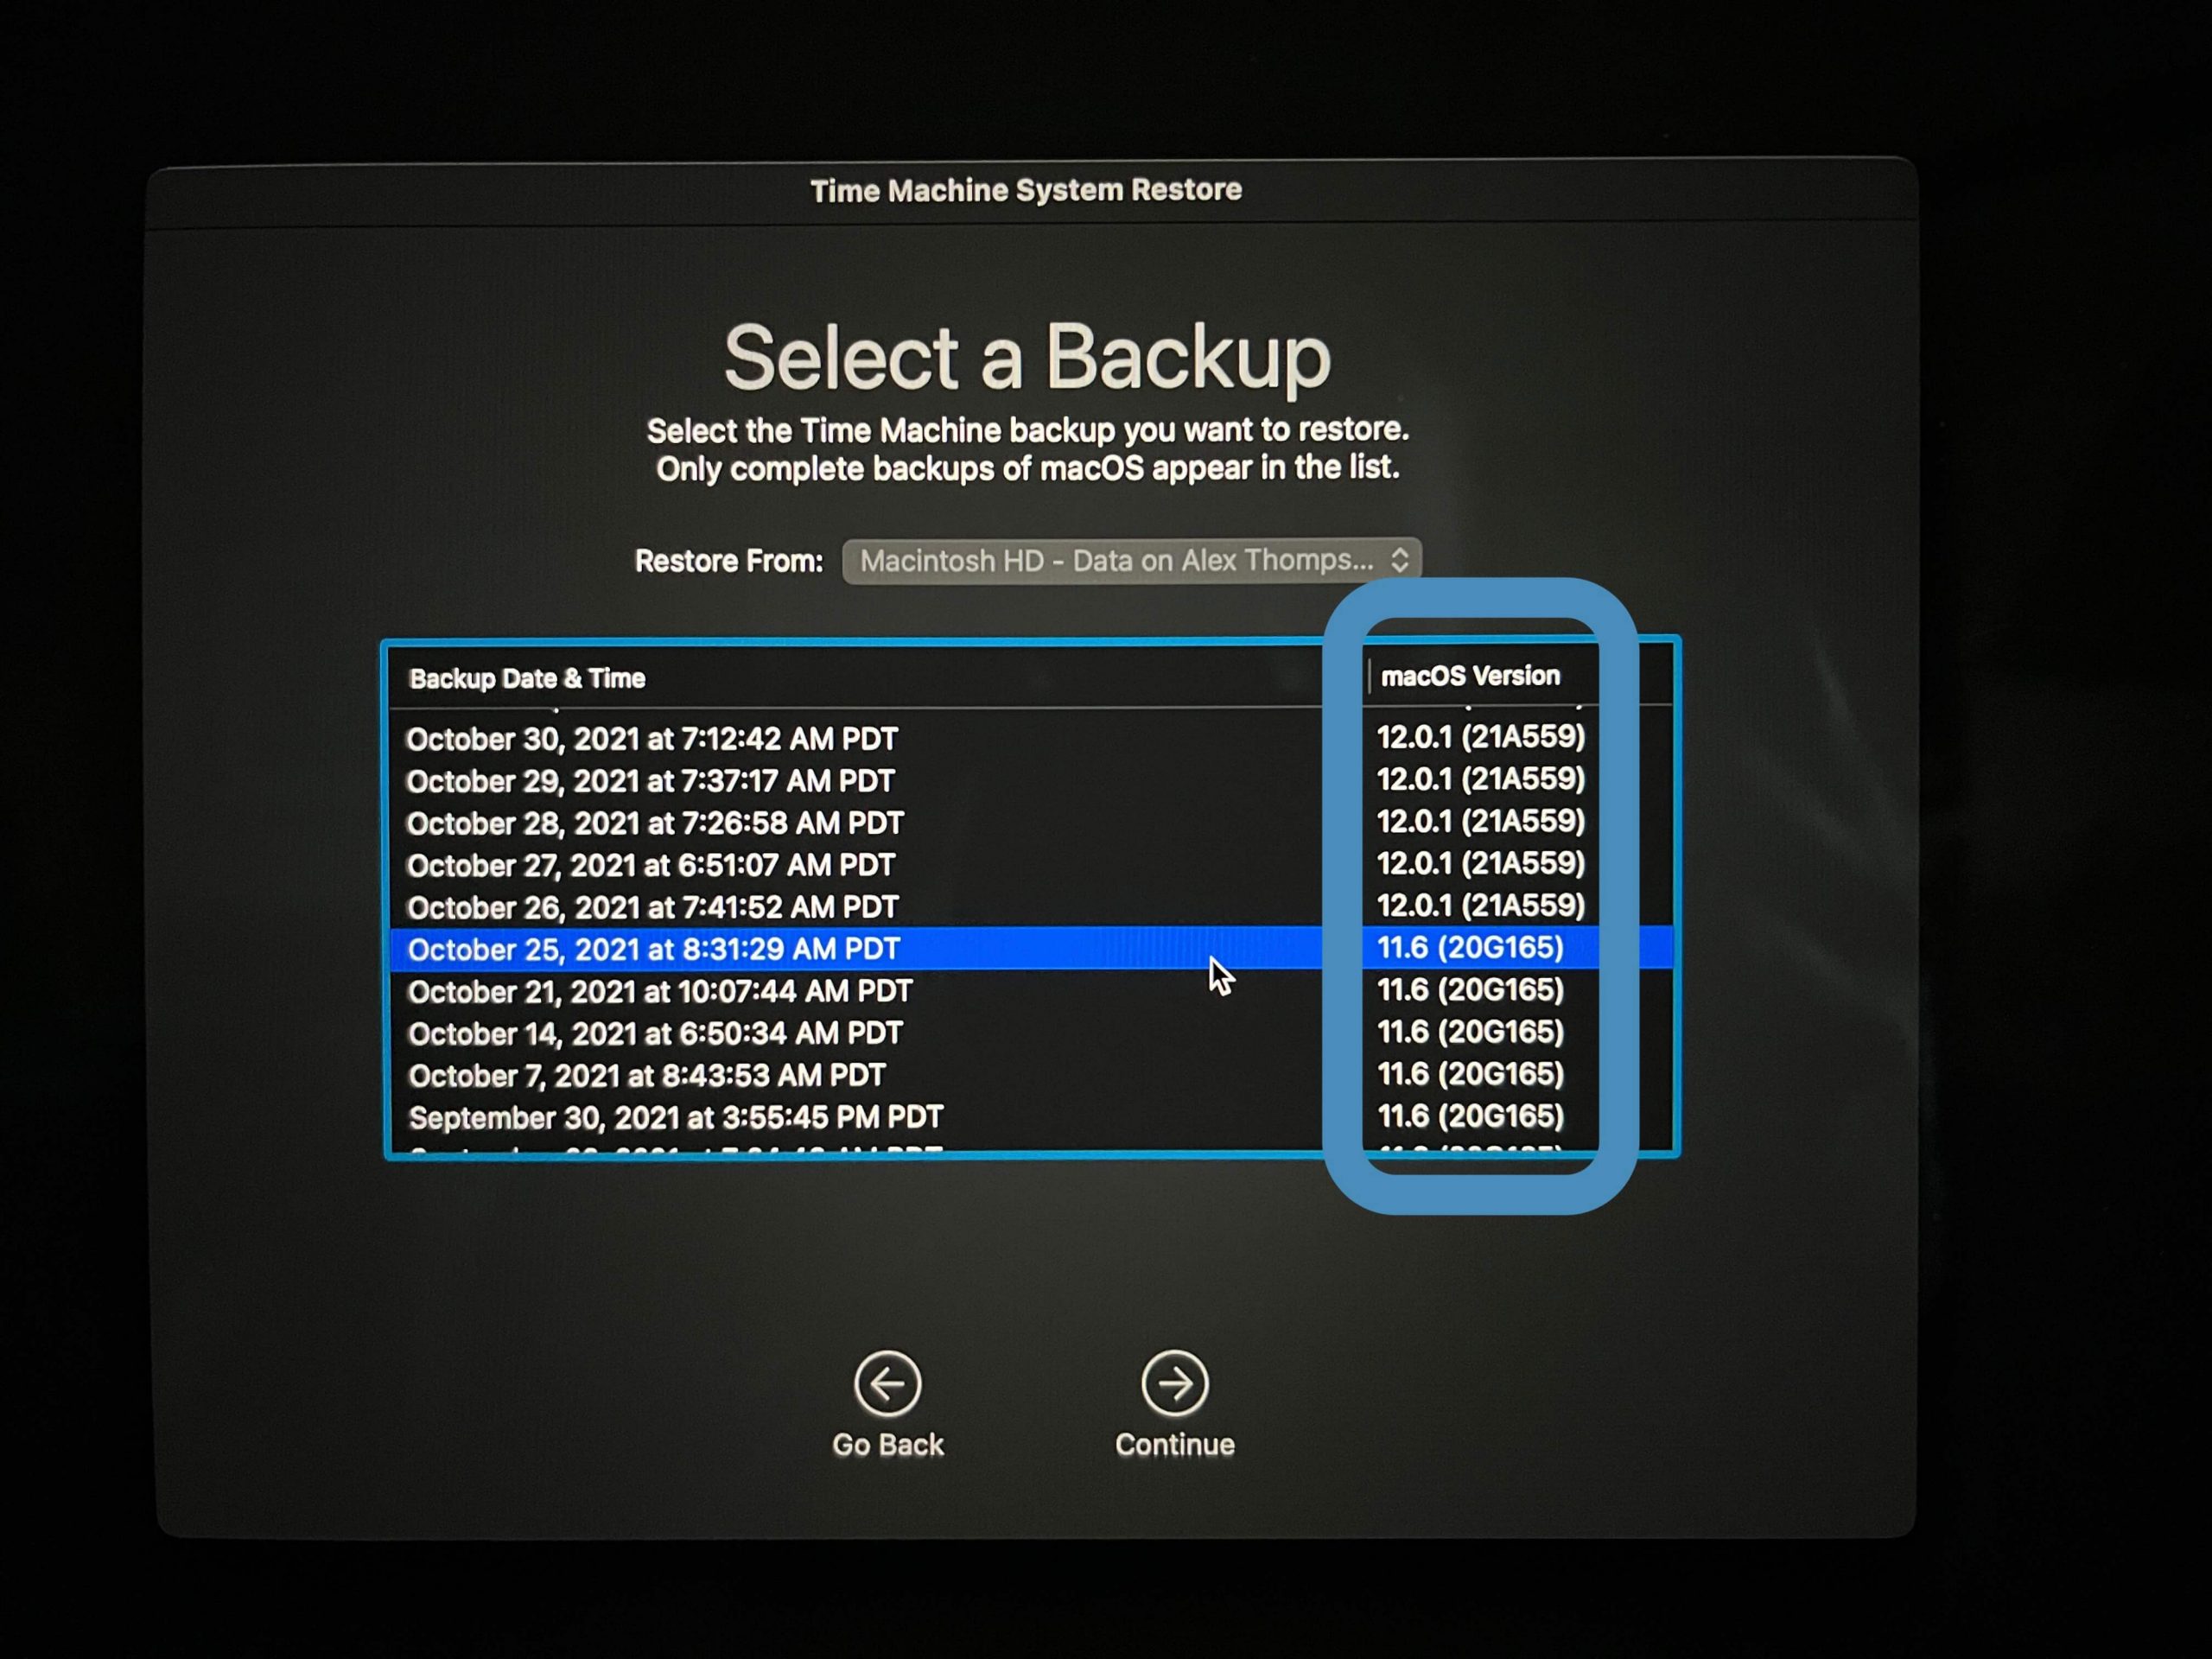
- Then select the backup you’d like to restore from, looking for the version with the previous operating system. You’ll find the macOS version of each backup in the righthand column. Then, just hit Continue.


4. Use Migration Assistant
Migration Assistant is a handy tool for transferring large swathes of data from one Mac to another. It’s especially helpful when you’ve upgraded to a new machine.
But it can also transfer your Time Machine backup data to your current machine too. You can easily transfer user and system settings, user files, applications, and more using Migration Assistant.
To use Migration Assistant to restore data from Time Machine:
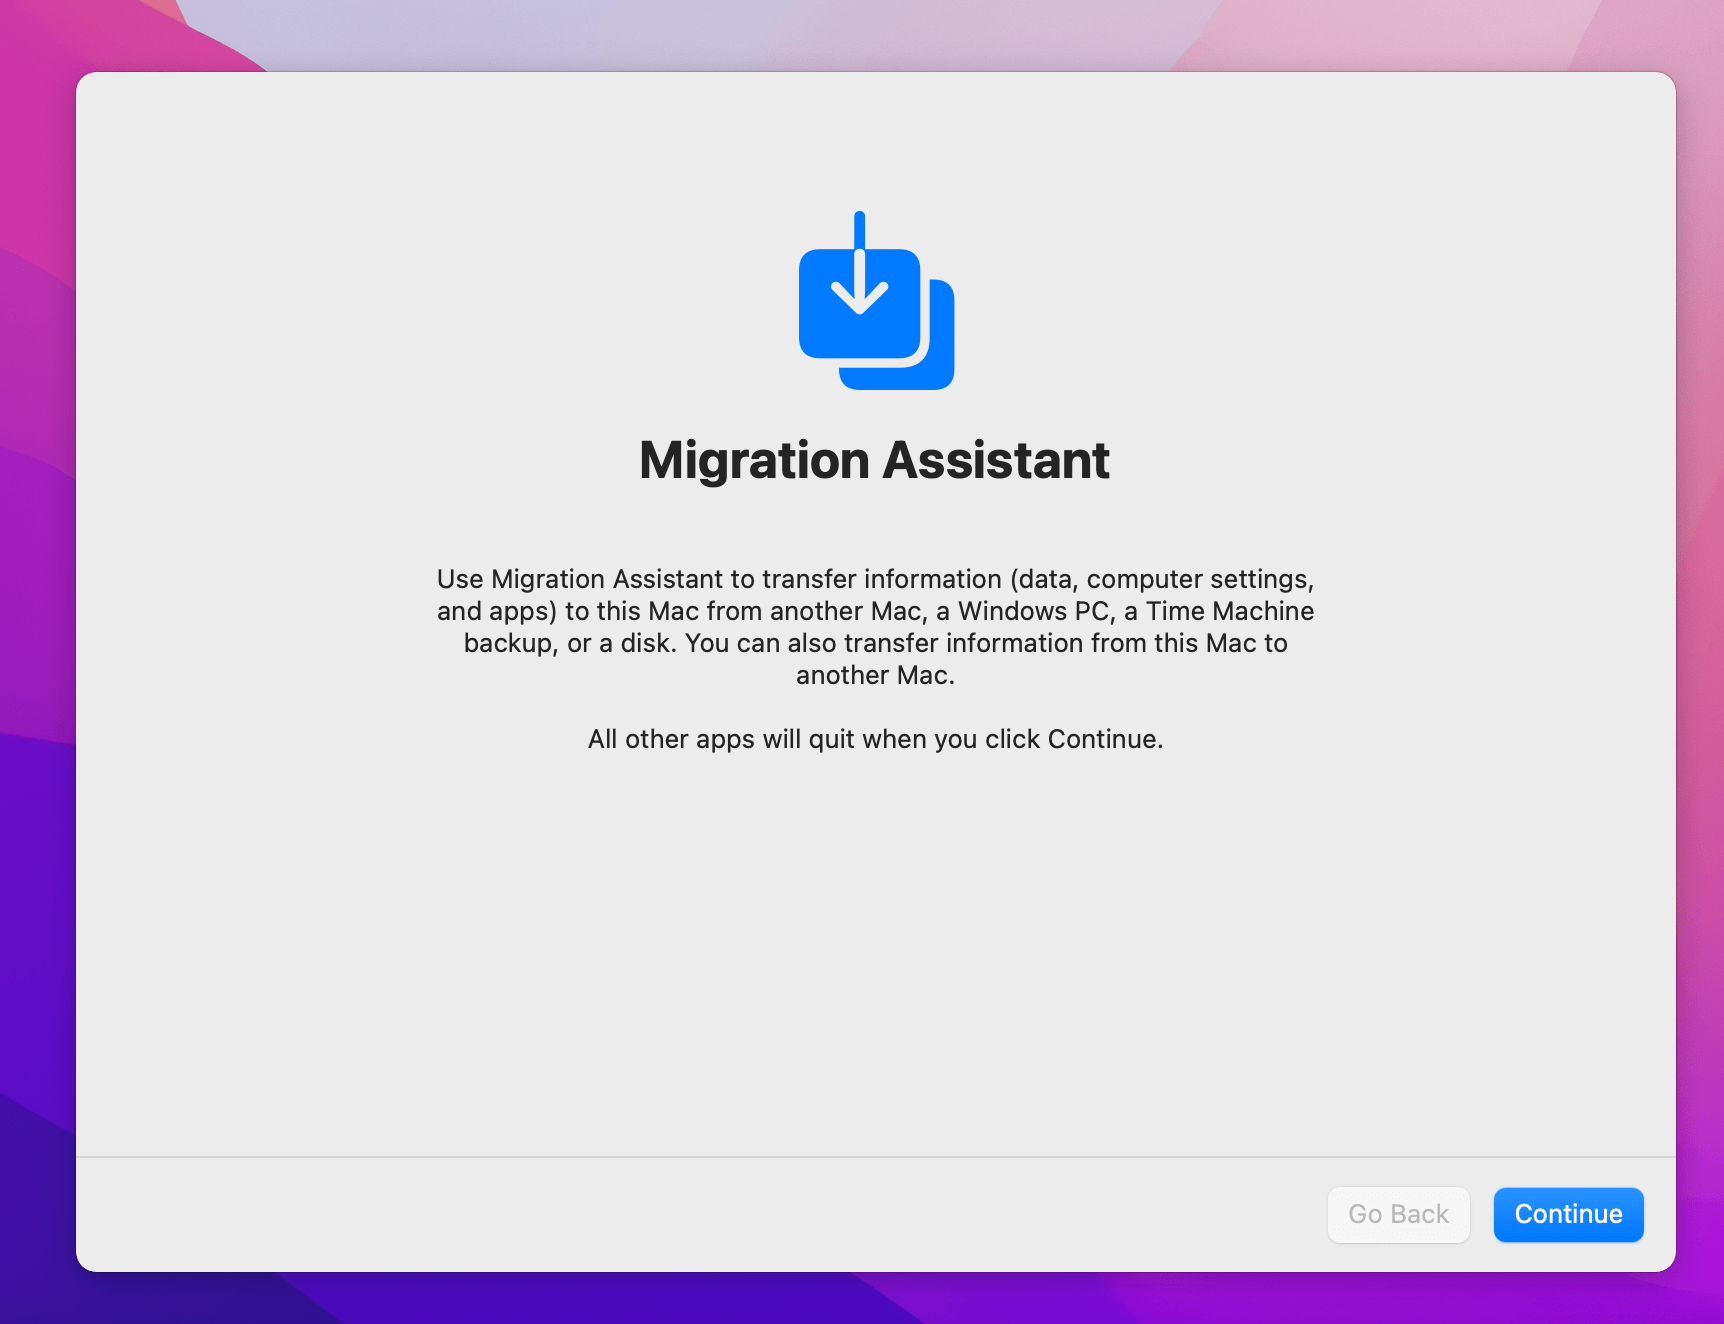
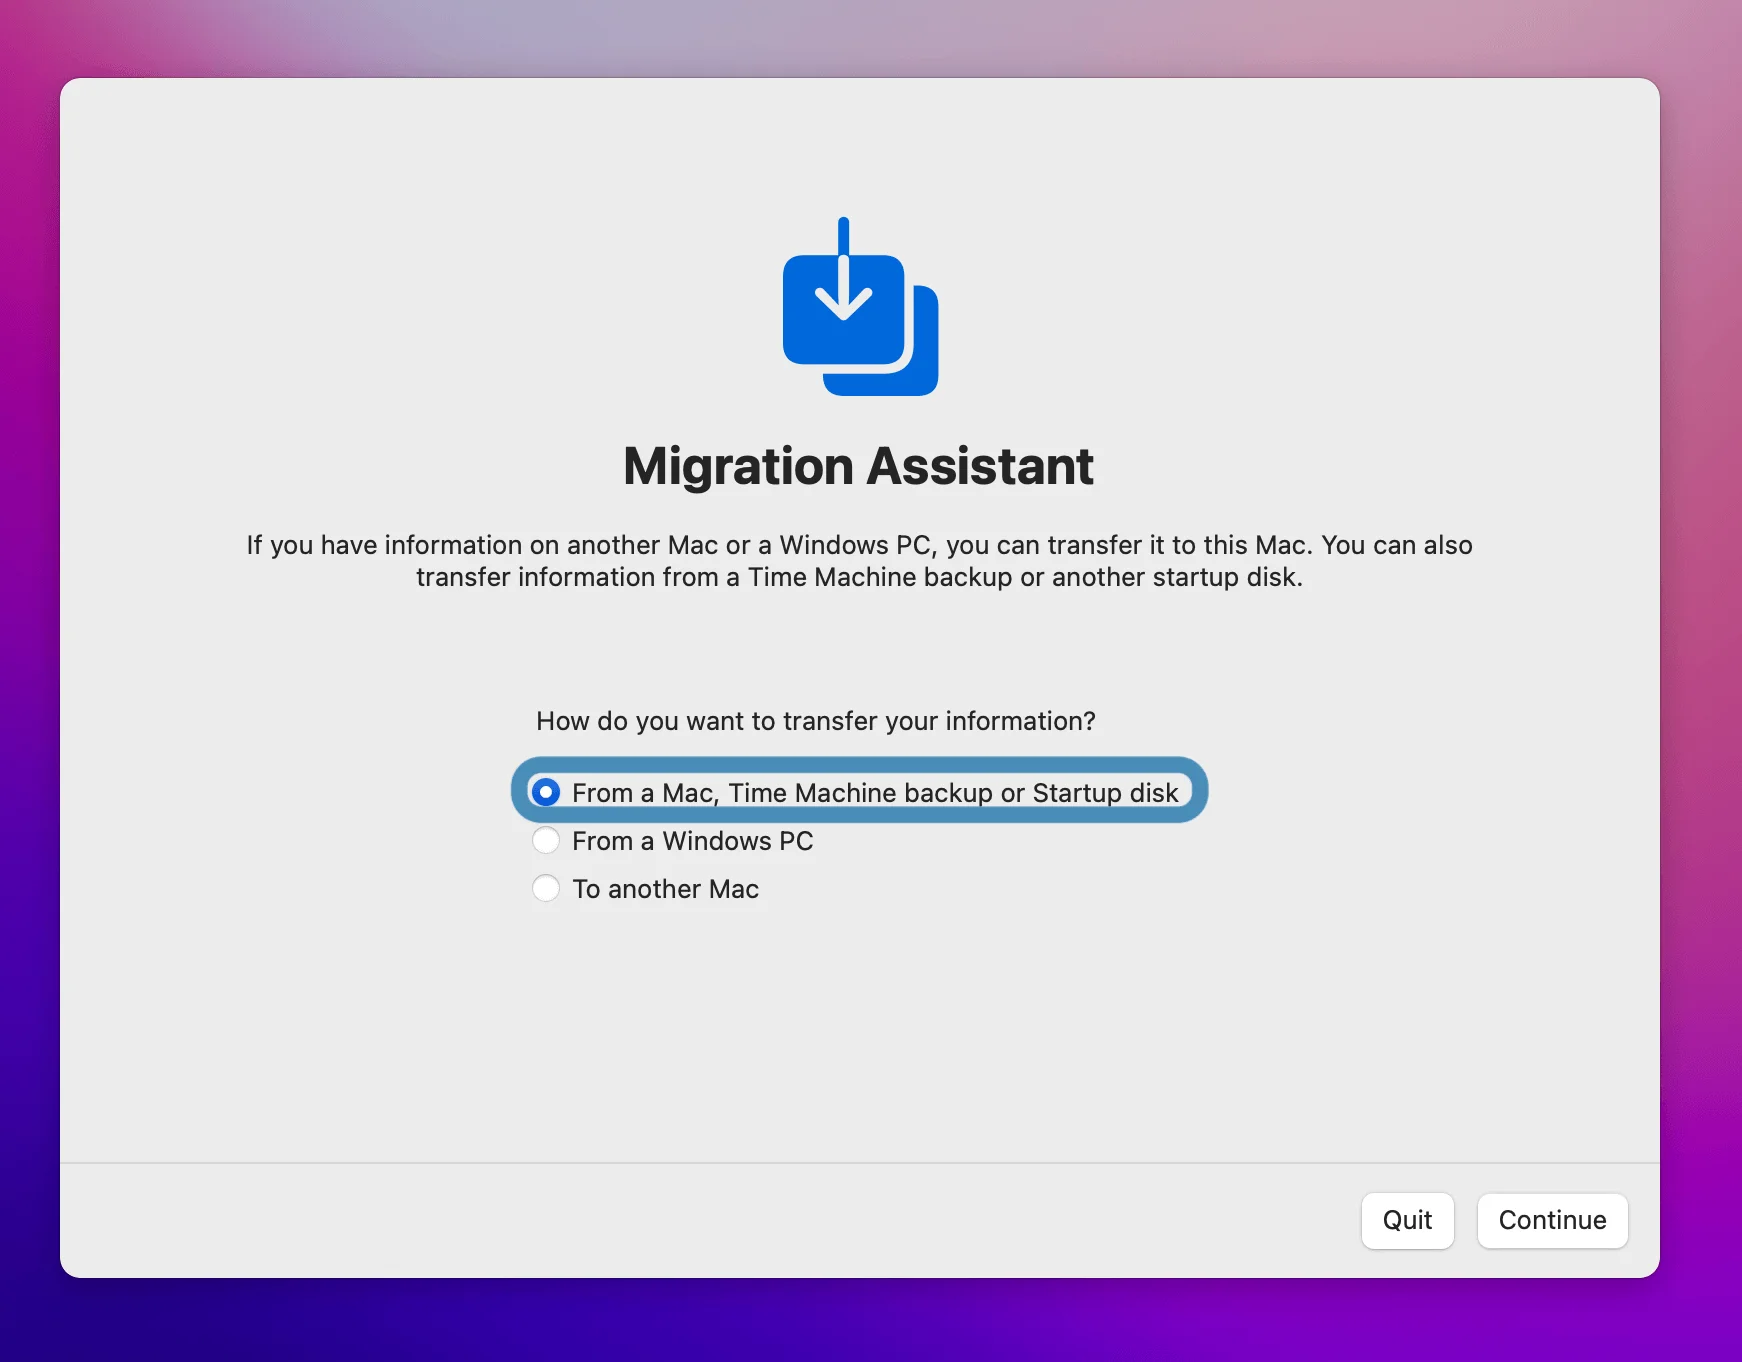
- Open Migration Assistant in Finder or using Spotlight (Command + Space). You’ll be notified that all other open apps will close in order to continue. Be sure the disk storing your Time Machine backups is connected to your Mac.
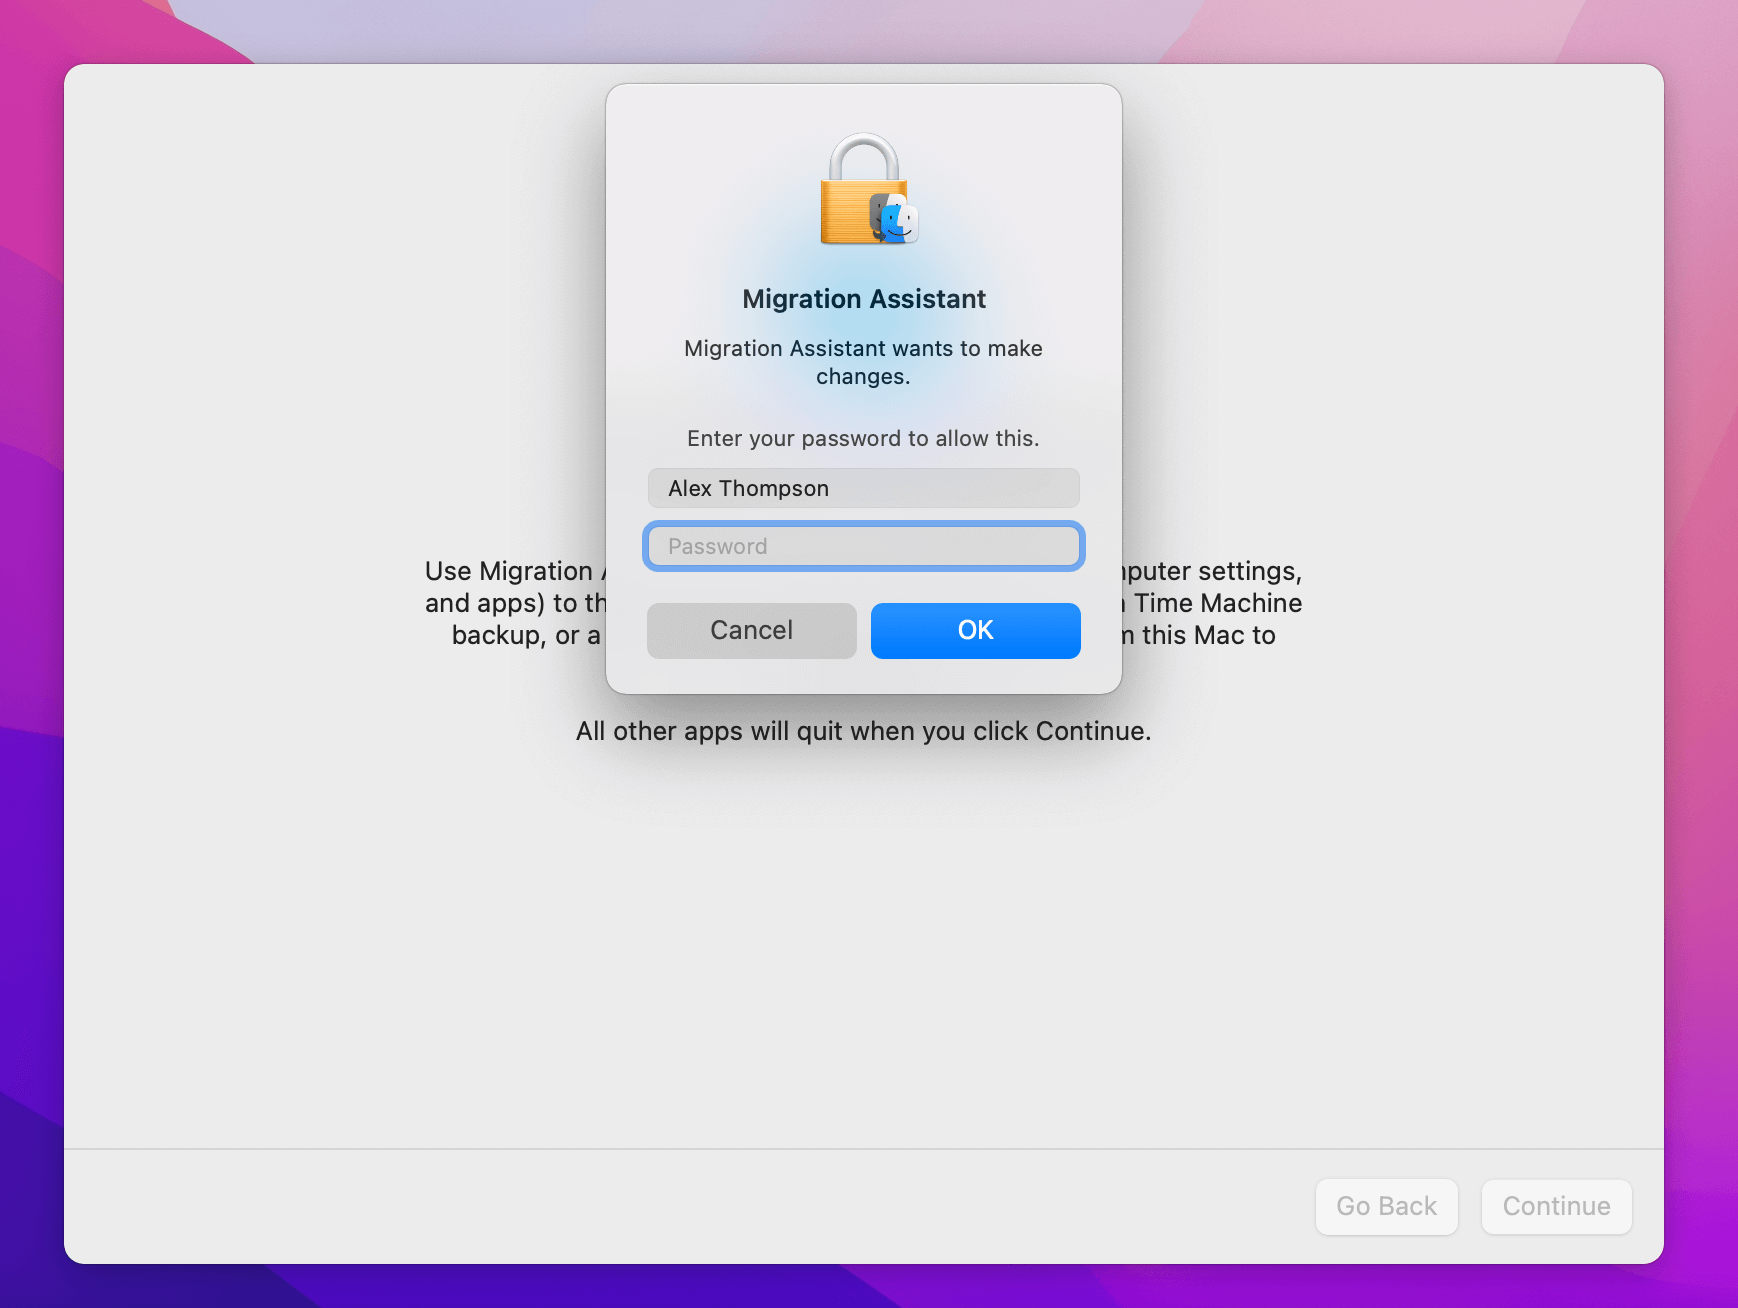
- After you click Continue, you’ll need to enter your password.
- Choose the first option to restore a backup on Mac from Time Machine.
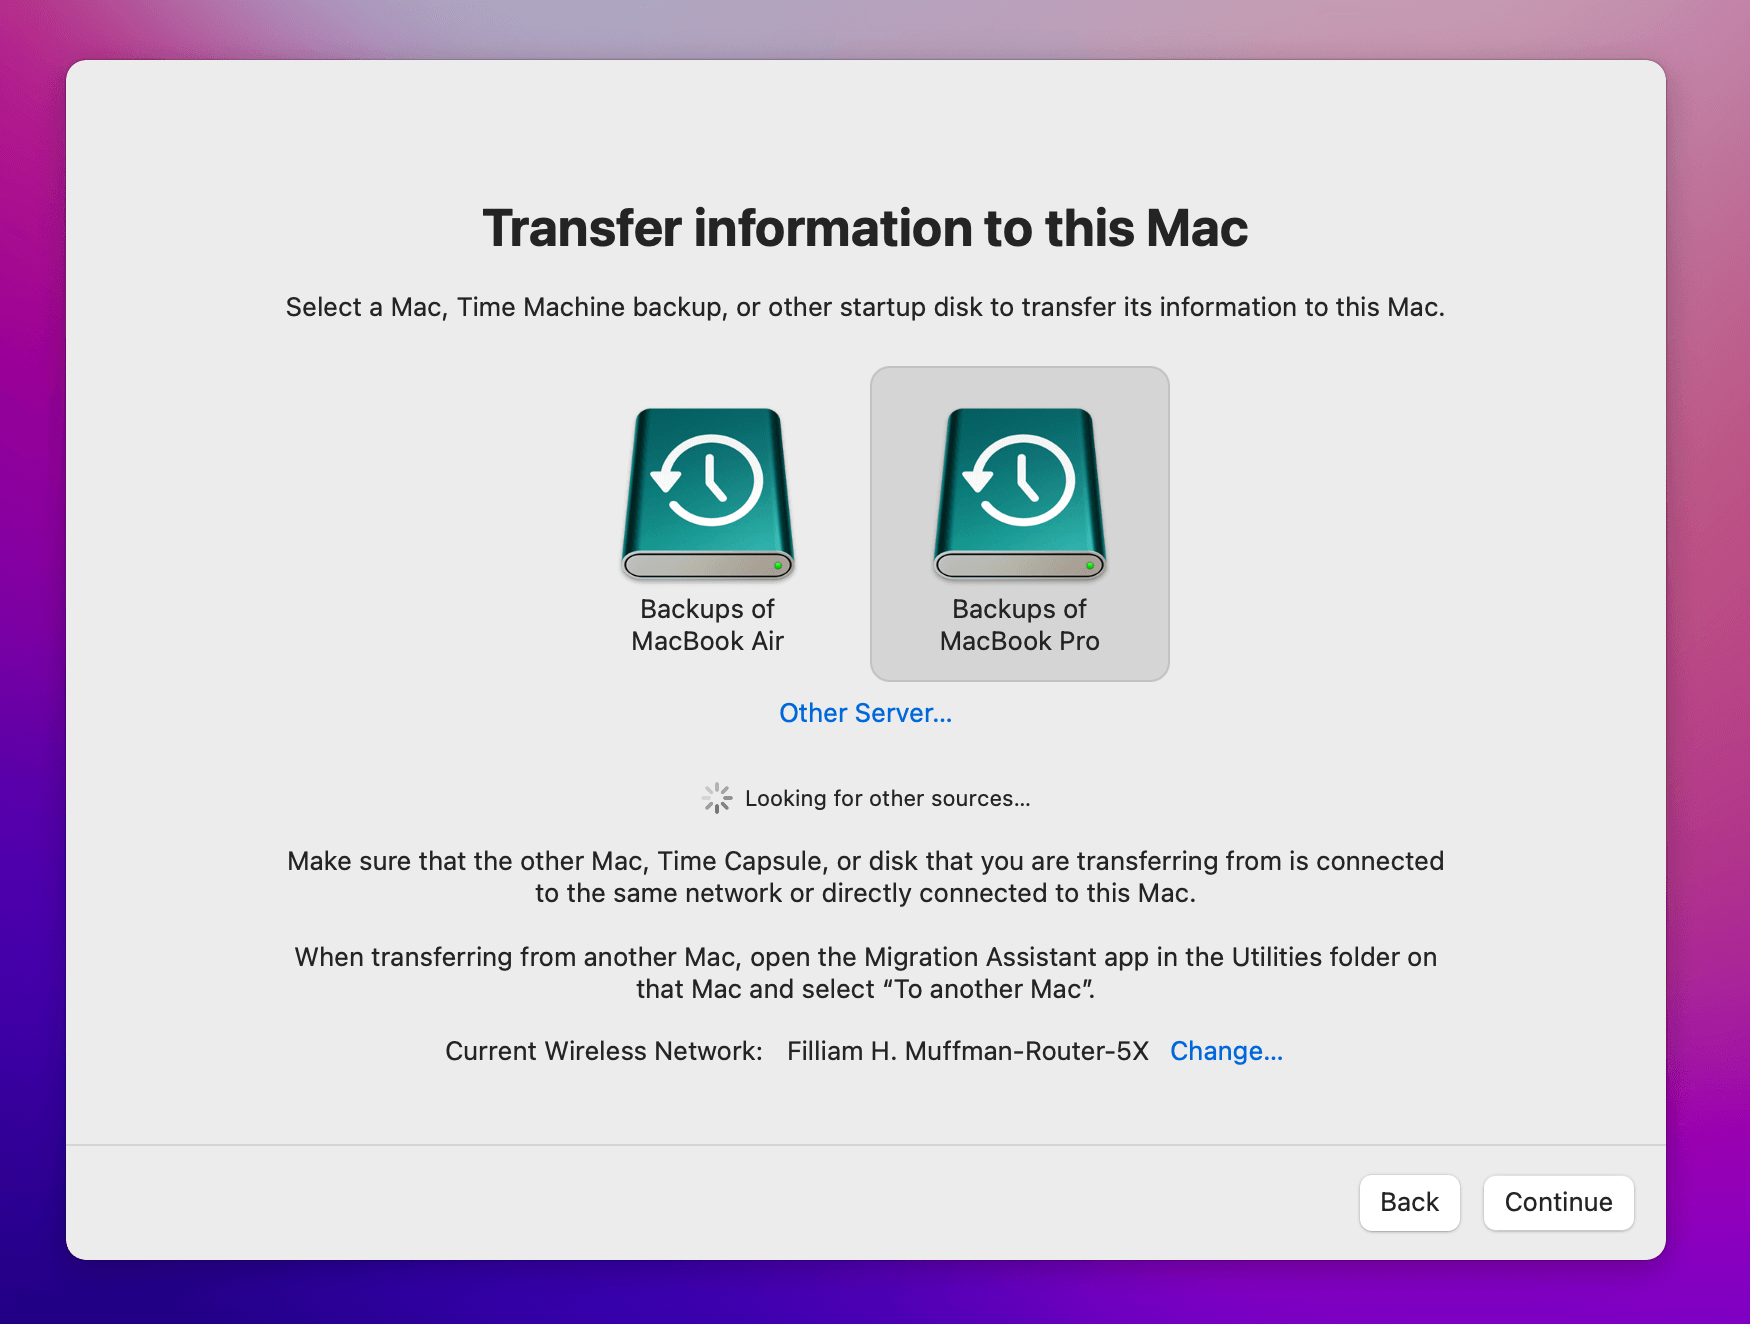
- Select the disk where your desired Time Machine backup is stored.
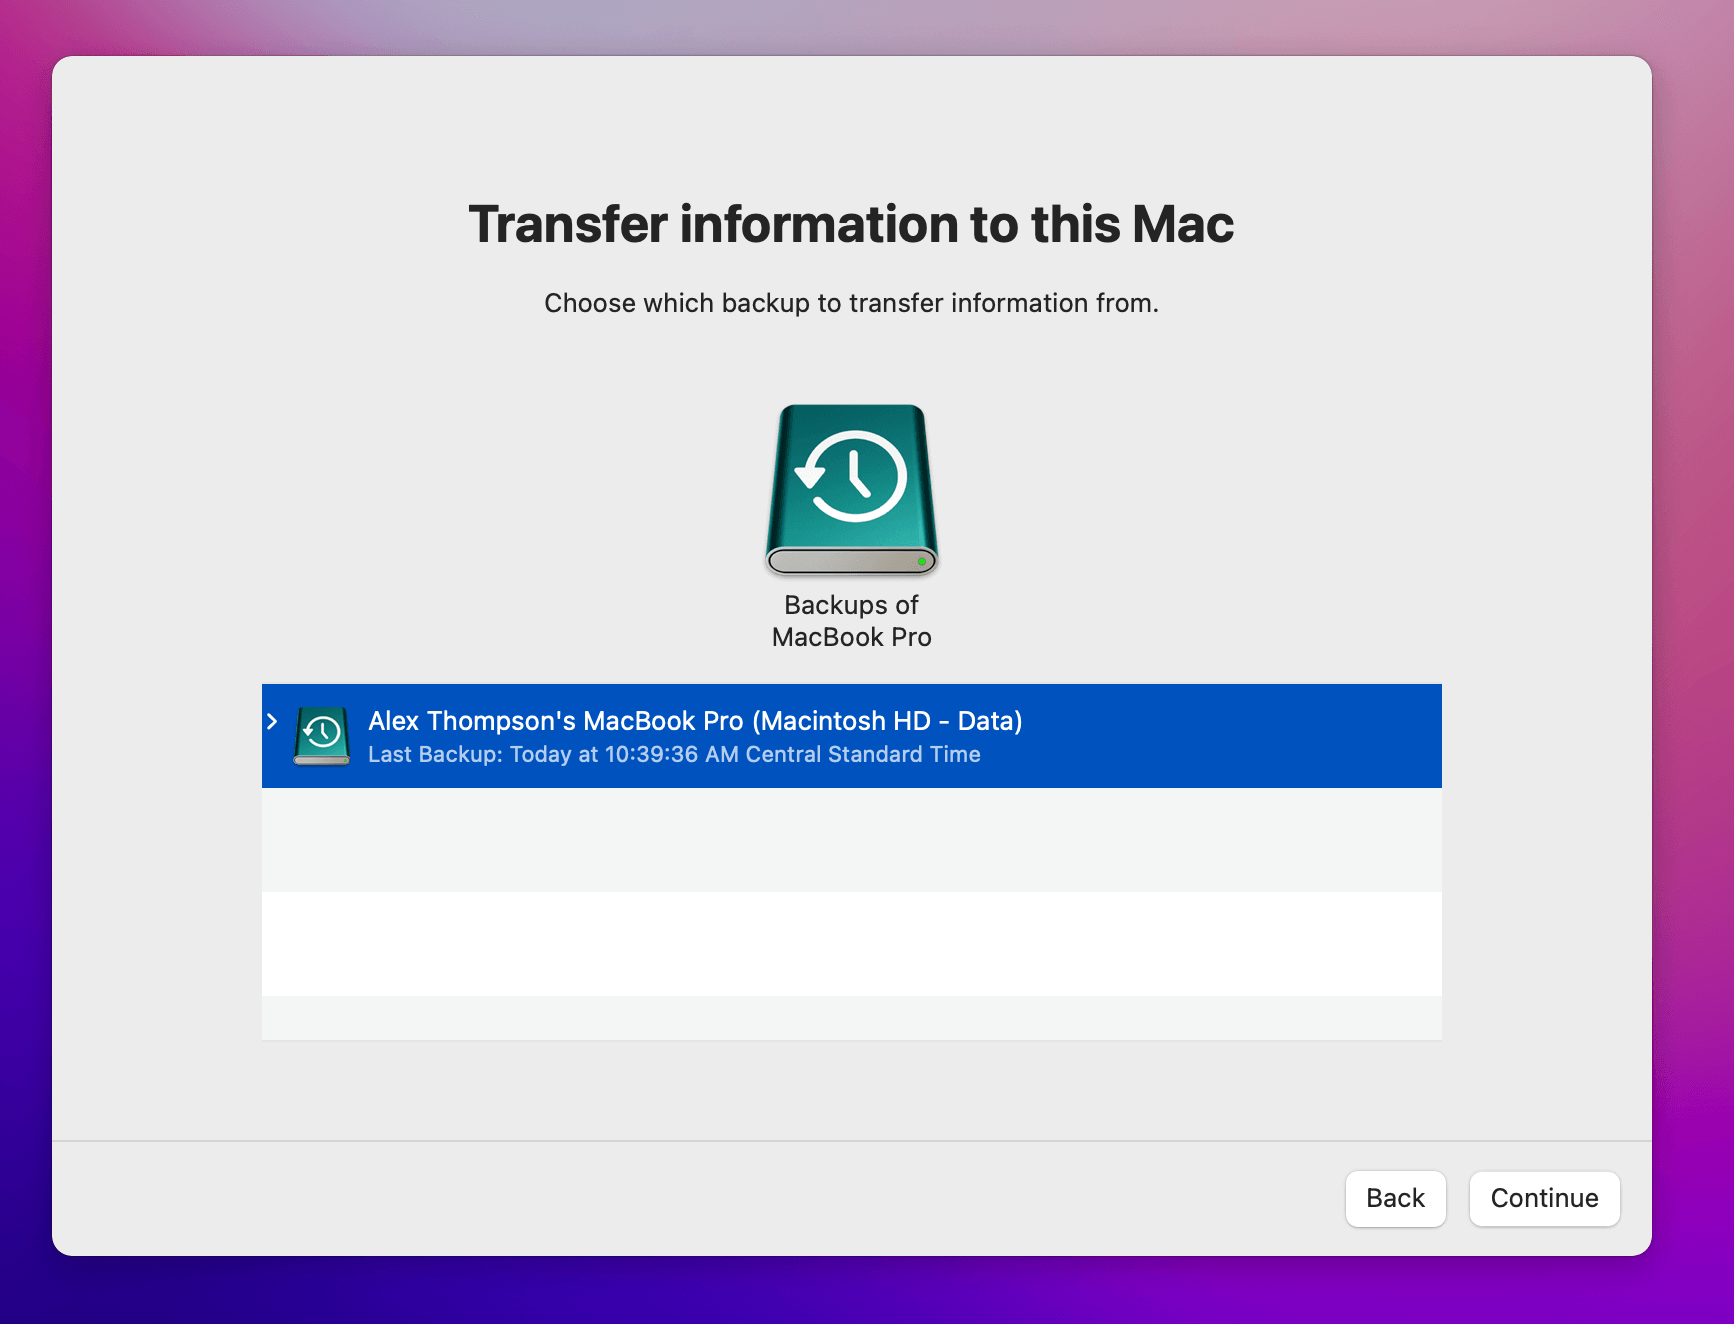
- Choose the backup you’d like to restore from.
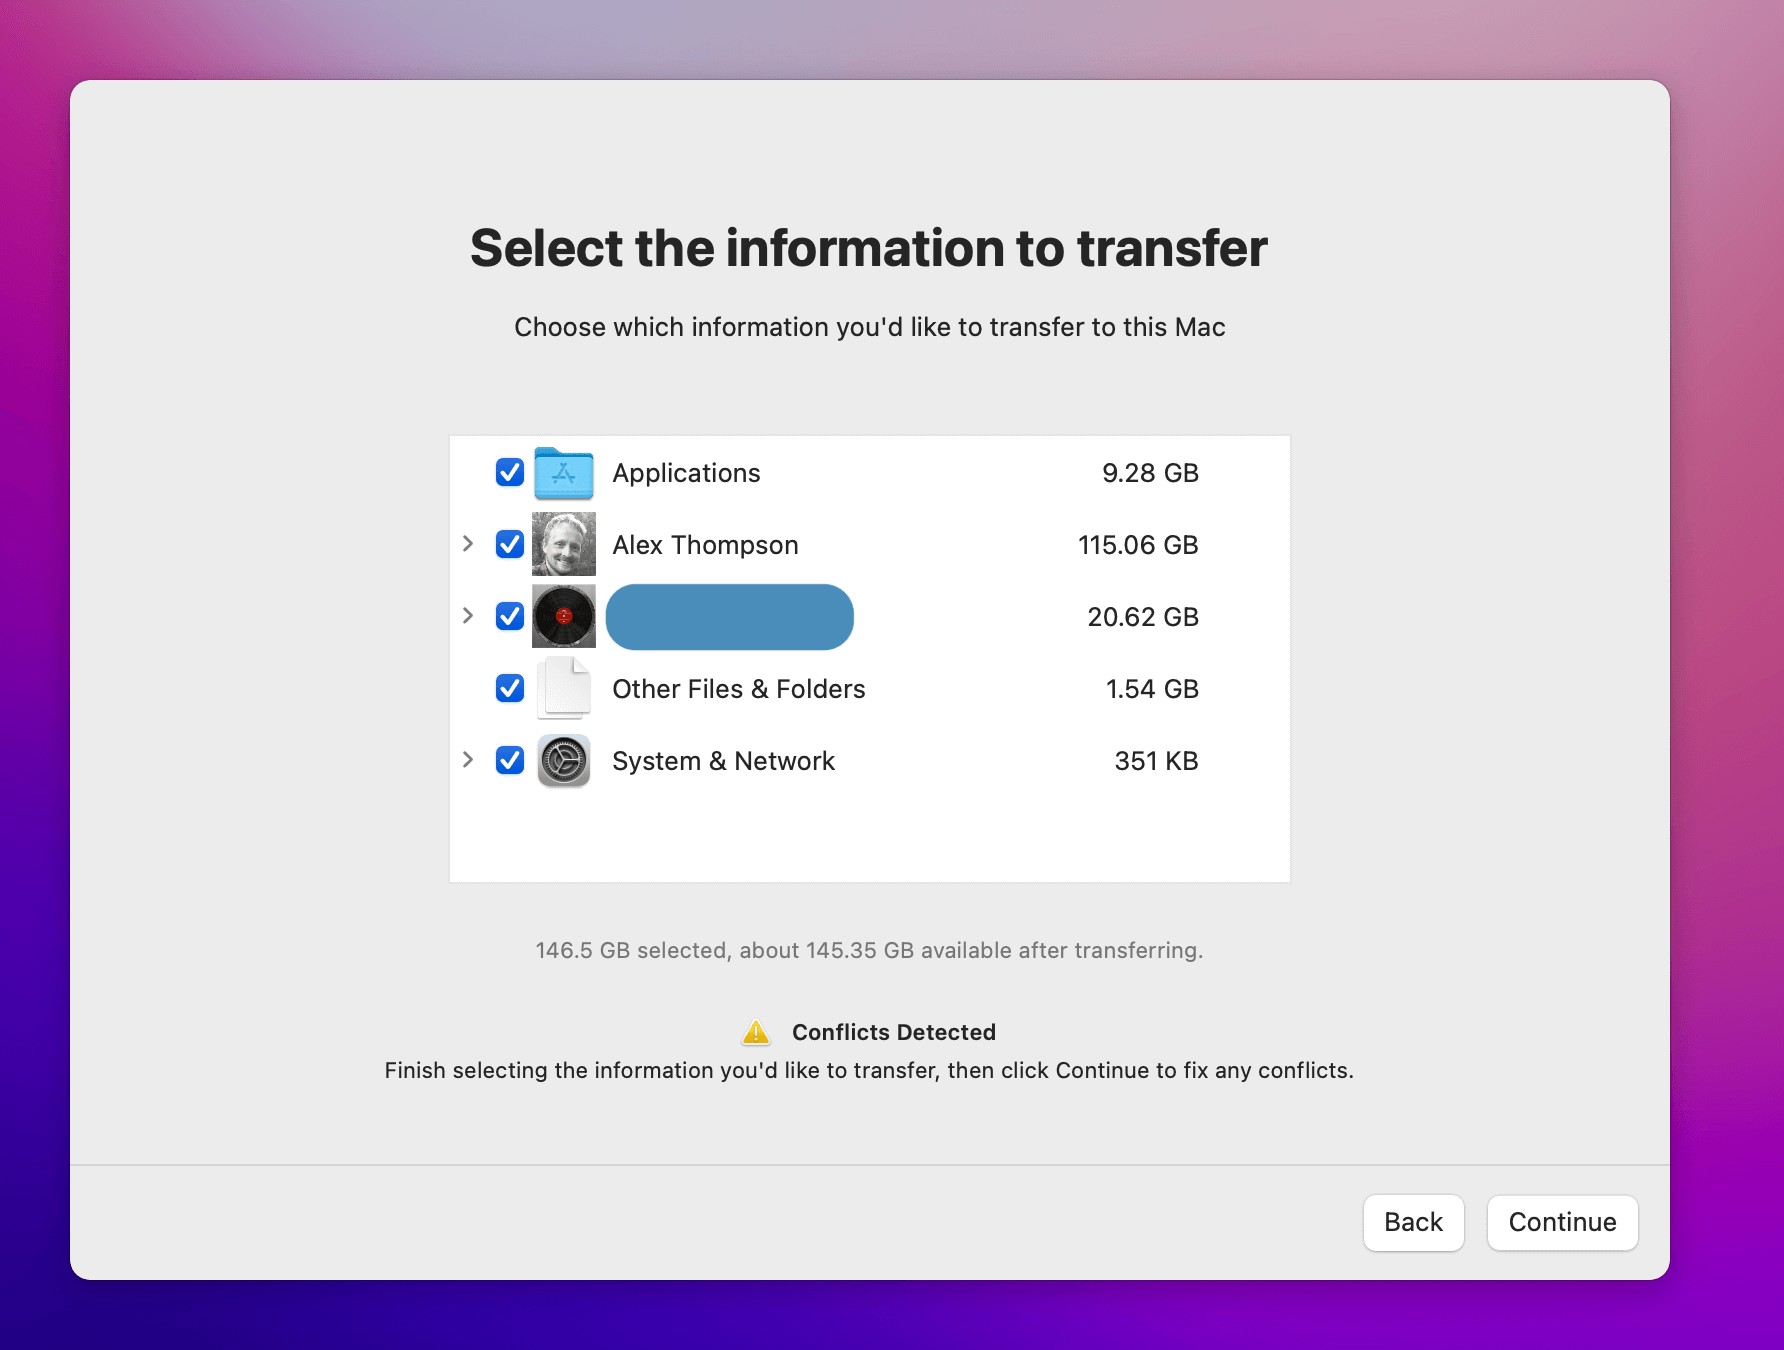
- Select the information you’d like to restore and click Continue. For large amounts of data, the transfer can take quite a while to complete.
Recover Data Without Time Machine
Time Machine is a great native backup service that makes it easy to keep all your data safe and sound. The only problem is it only works when you’ve been actively backing up your system.
If you are one of the many who don’t regularly run backups (shame on you), then you may find yourself needing to recover precious data without the help of Time Machine.
Similarly, you may have created and deleted a file before you ran a backup, leaving you in the same predicament.
That’s where data recovery software comes in.
When you delete information, it isn’t actually removed from your hard drive immediately. Instead, it’s just flagged as being okay to overwrite with new data. And that means you can still restore that data as long as it hasn’t been overwritten yet. You’ll need specialized data recovery software to do so.
We’ve found the best data recovery software option out there is Disk Drill. The interface is user-friendly. The process of recovering “lost” files is simple. And there are plenty of other helpful features to take advantage of too.
Plus, there’s a free-for-life version.
To recover data without Time Machine using Disk Drill:
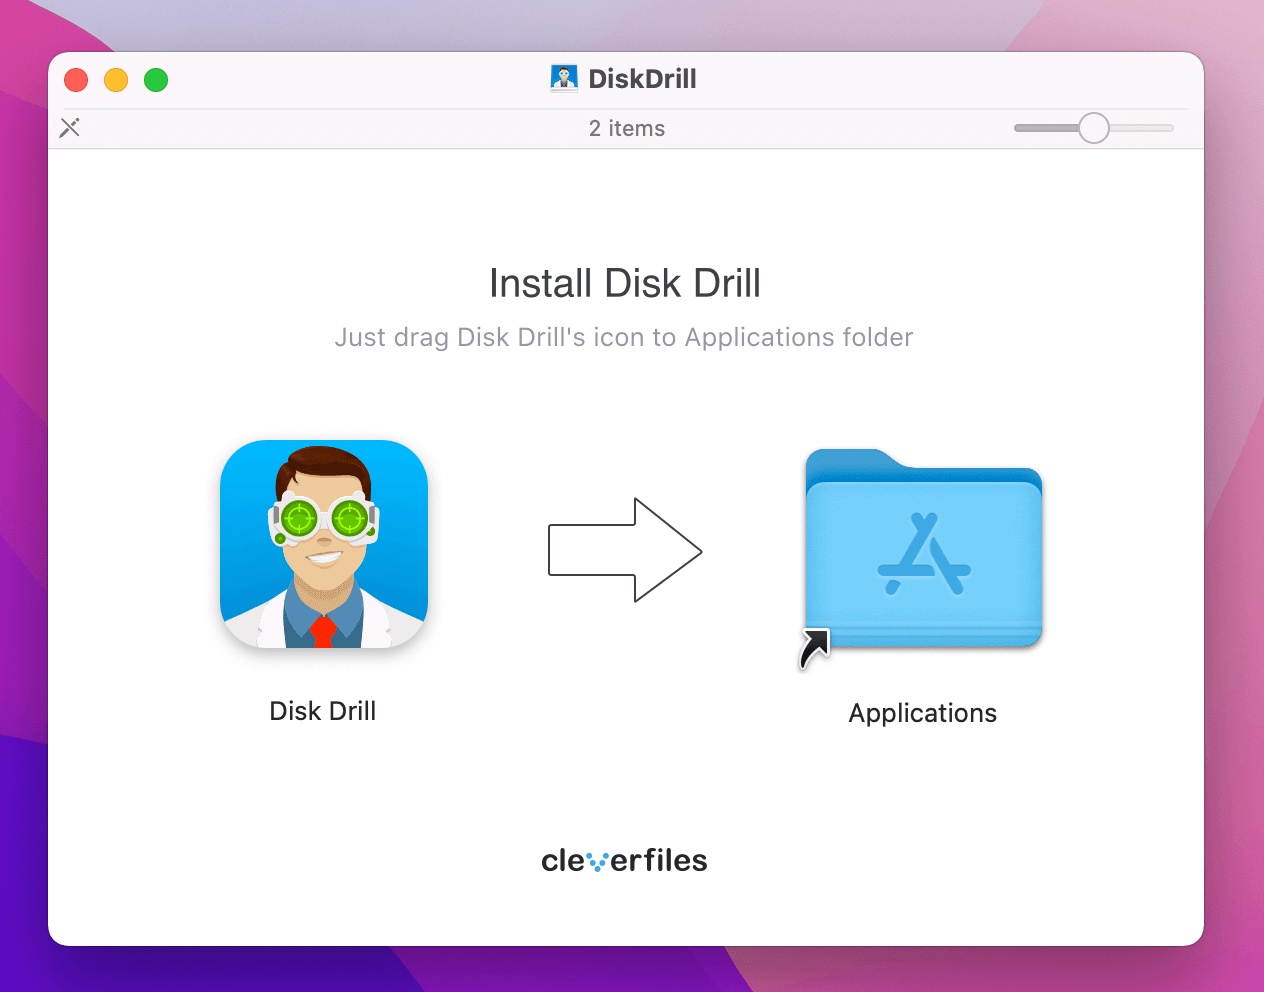
- Download and install Disk Drill.
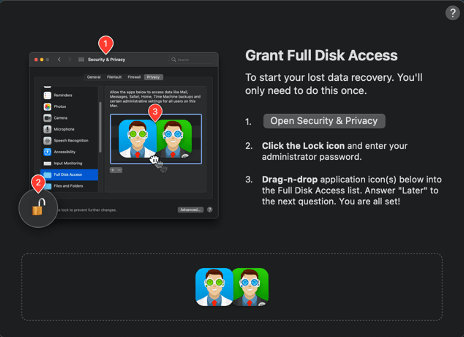
- Grant access permissions to Disk Drill so the software can search your disk drives for lost files.
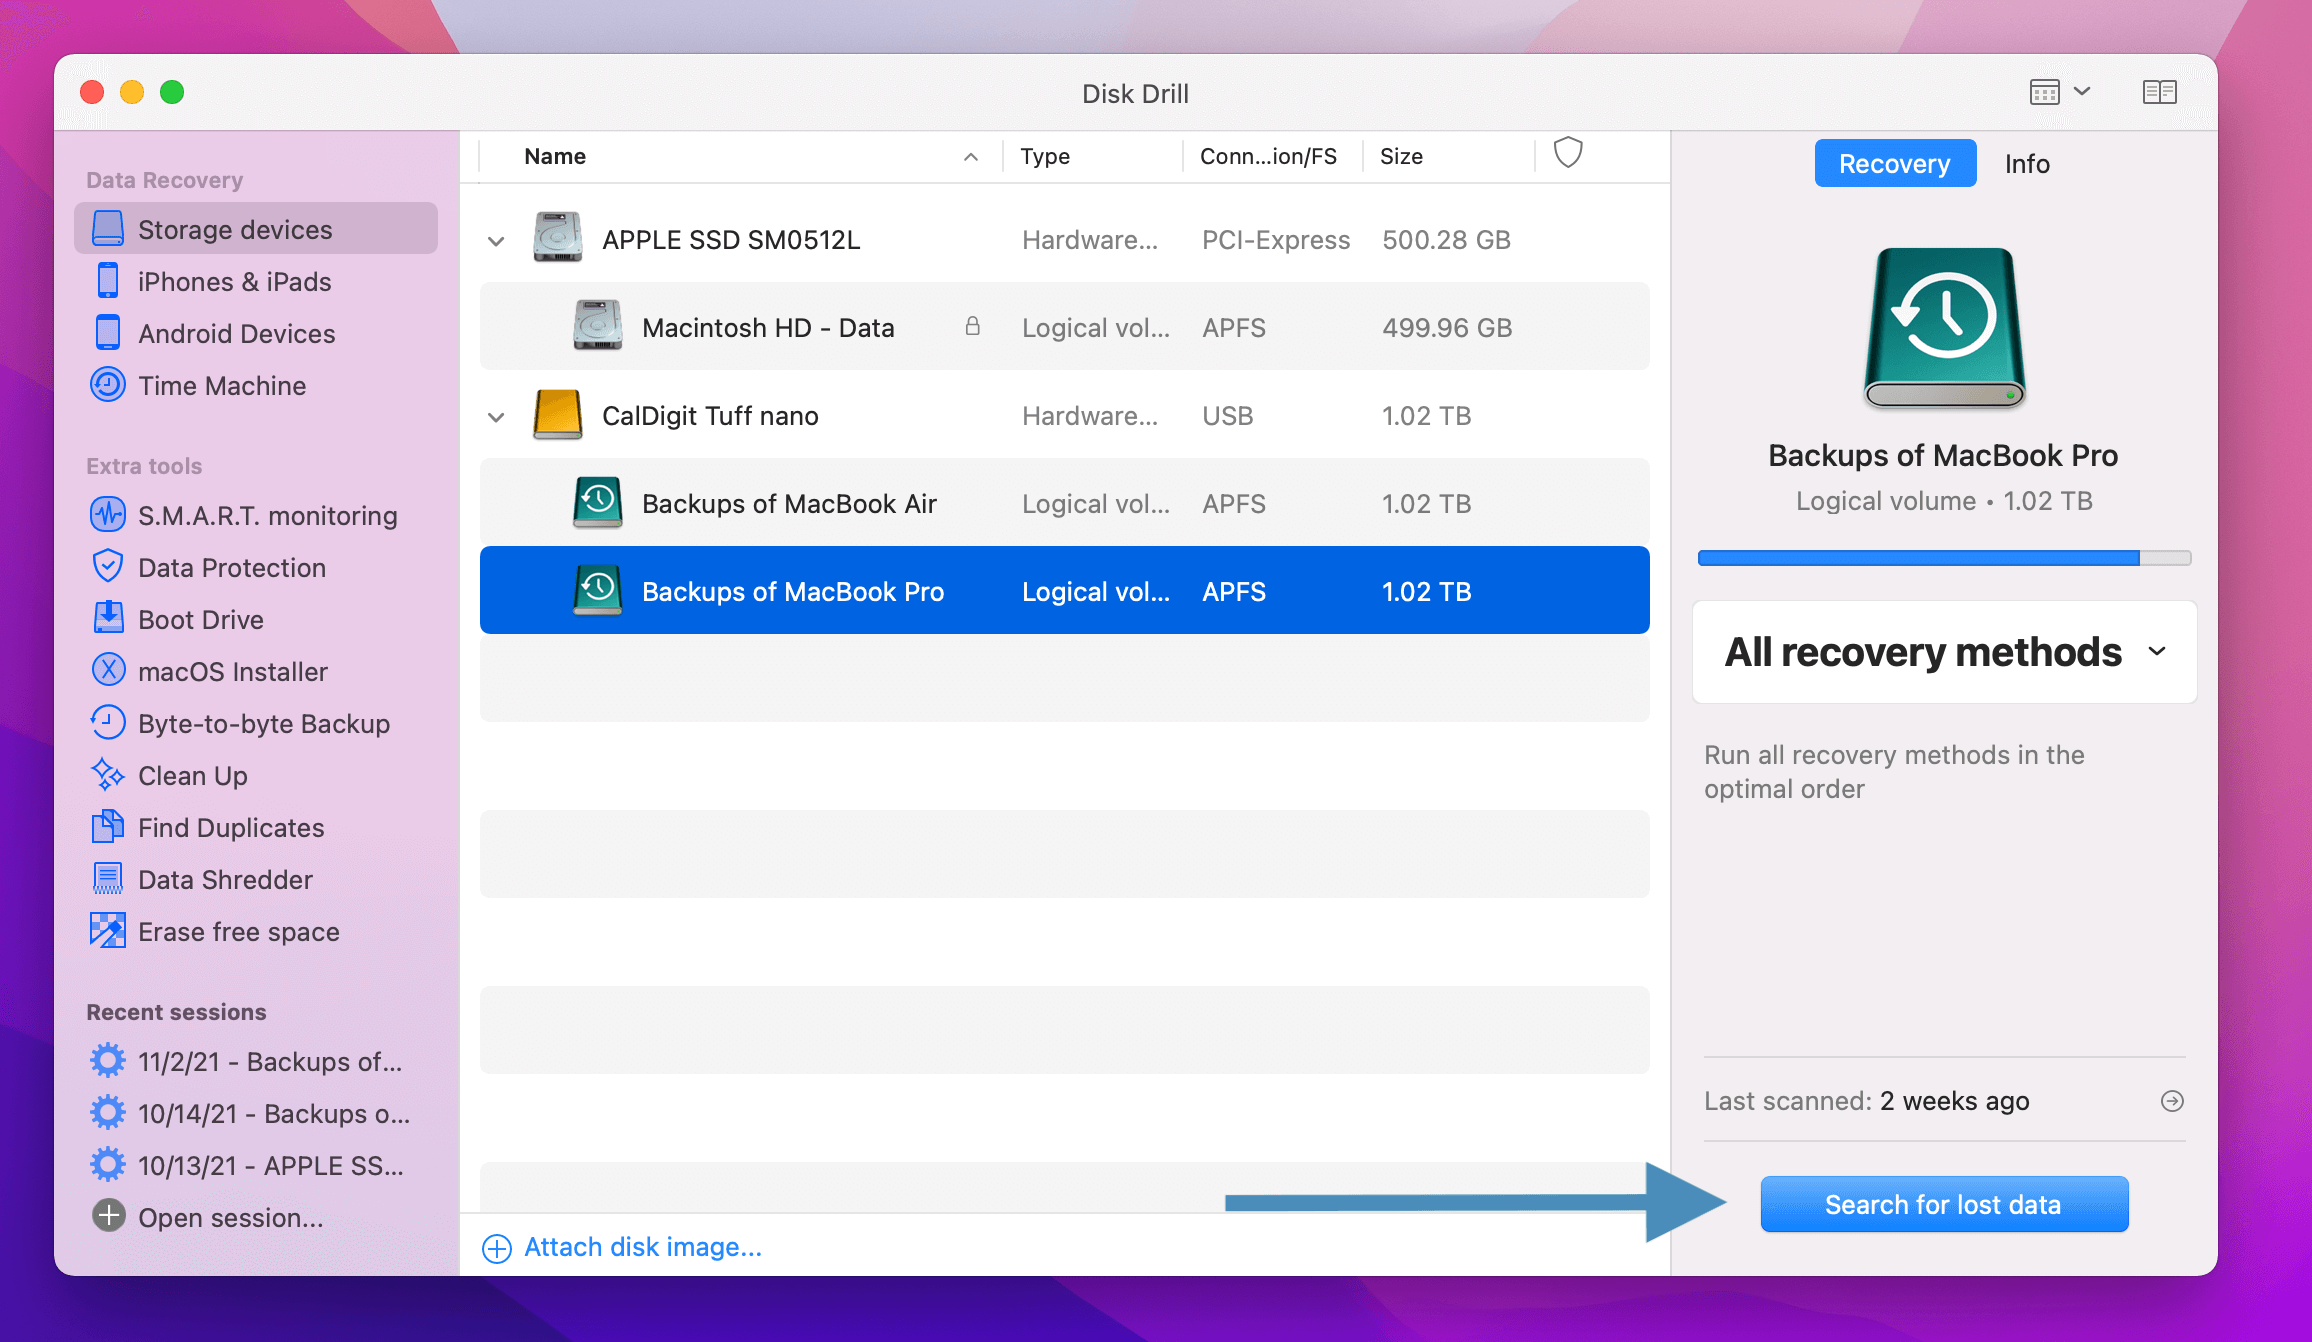
- Select the disk your lost data is housed on. This could be your hard drive or an external drive. Then click “Search for lost data”.
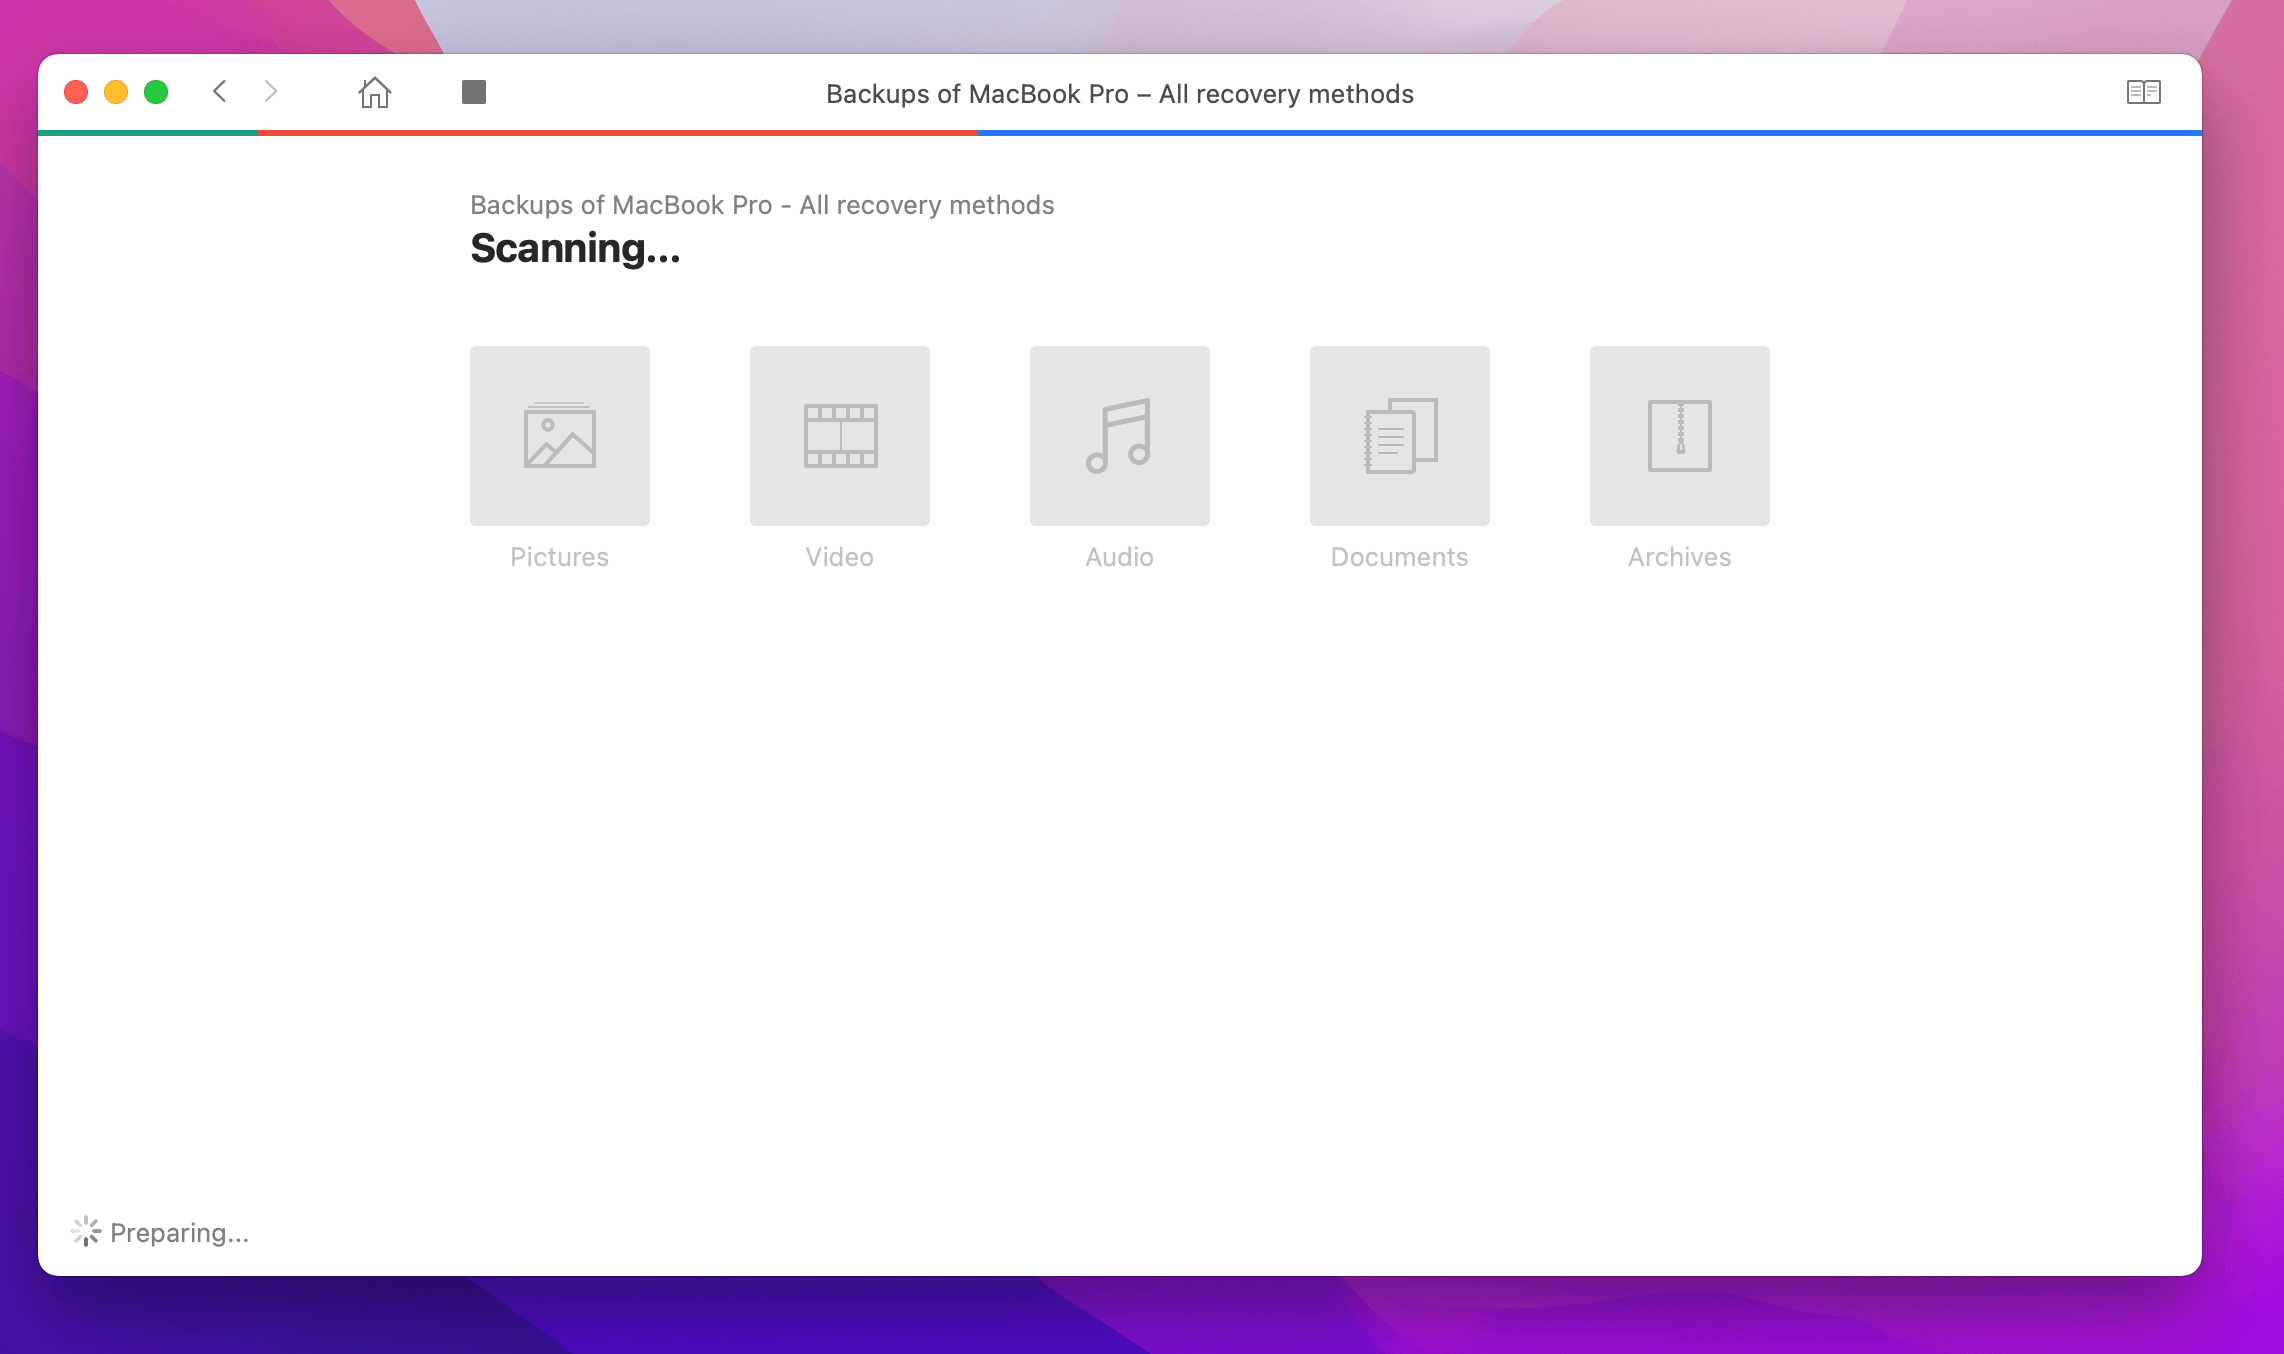
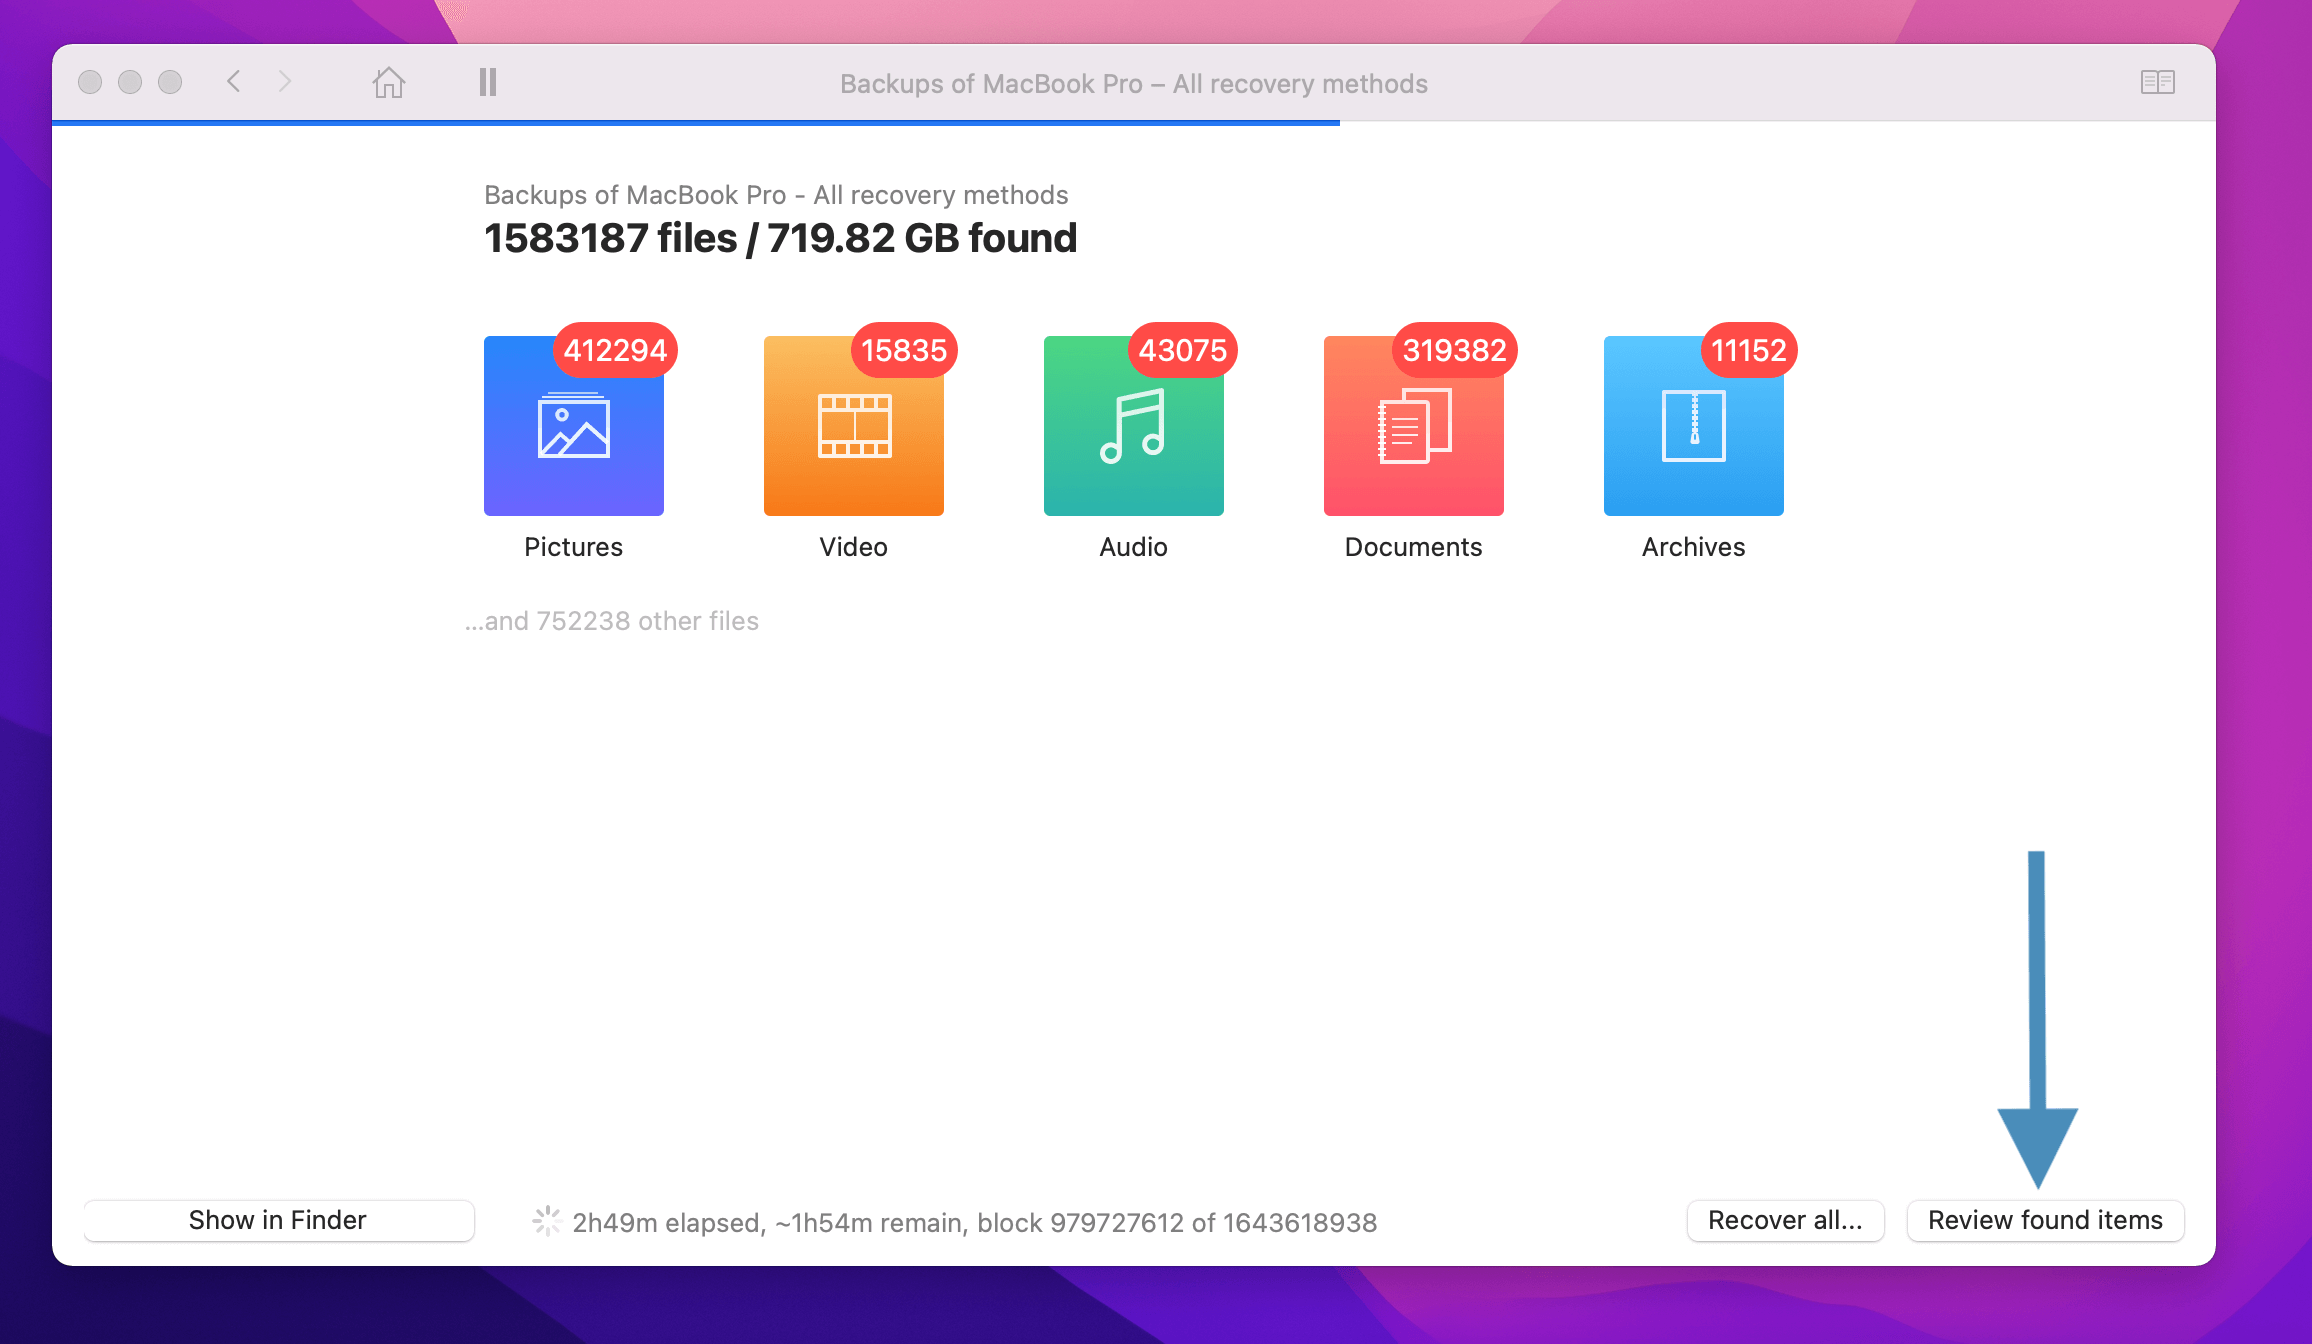
- Wait for Disk Drill to scan the drive (may take a while based on the amount of data).
- Click “Review found items” to see which files you can restore.
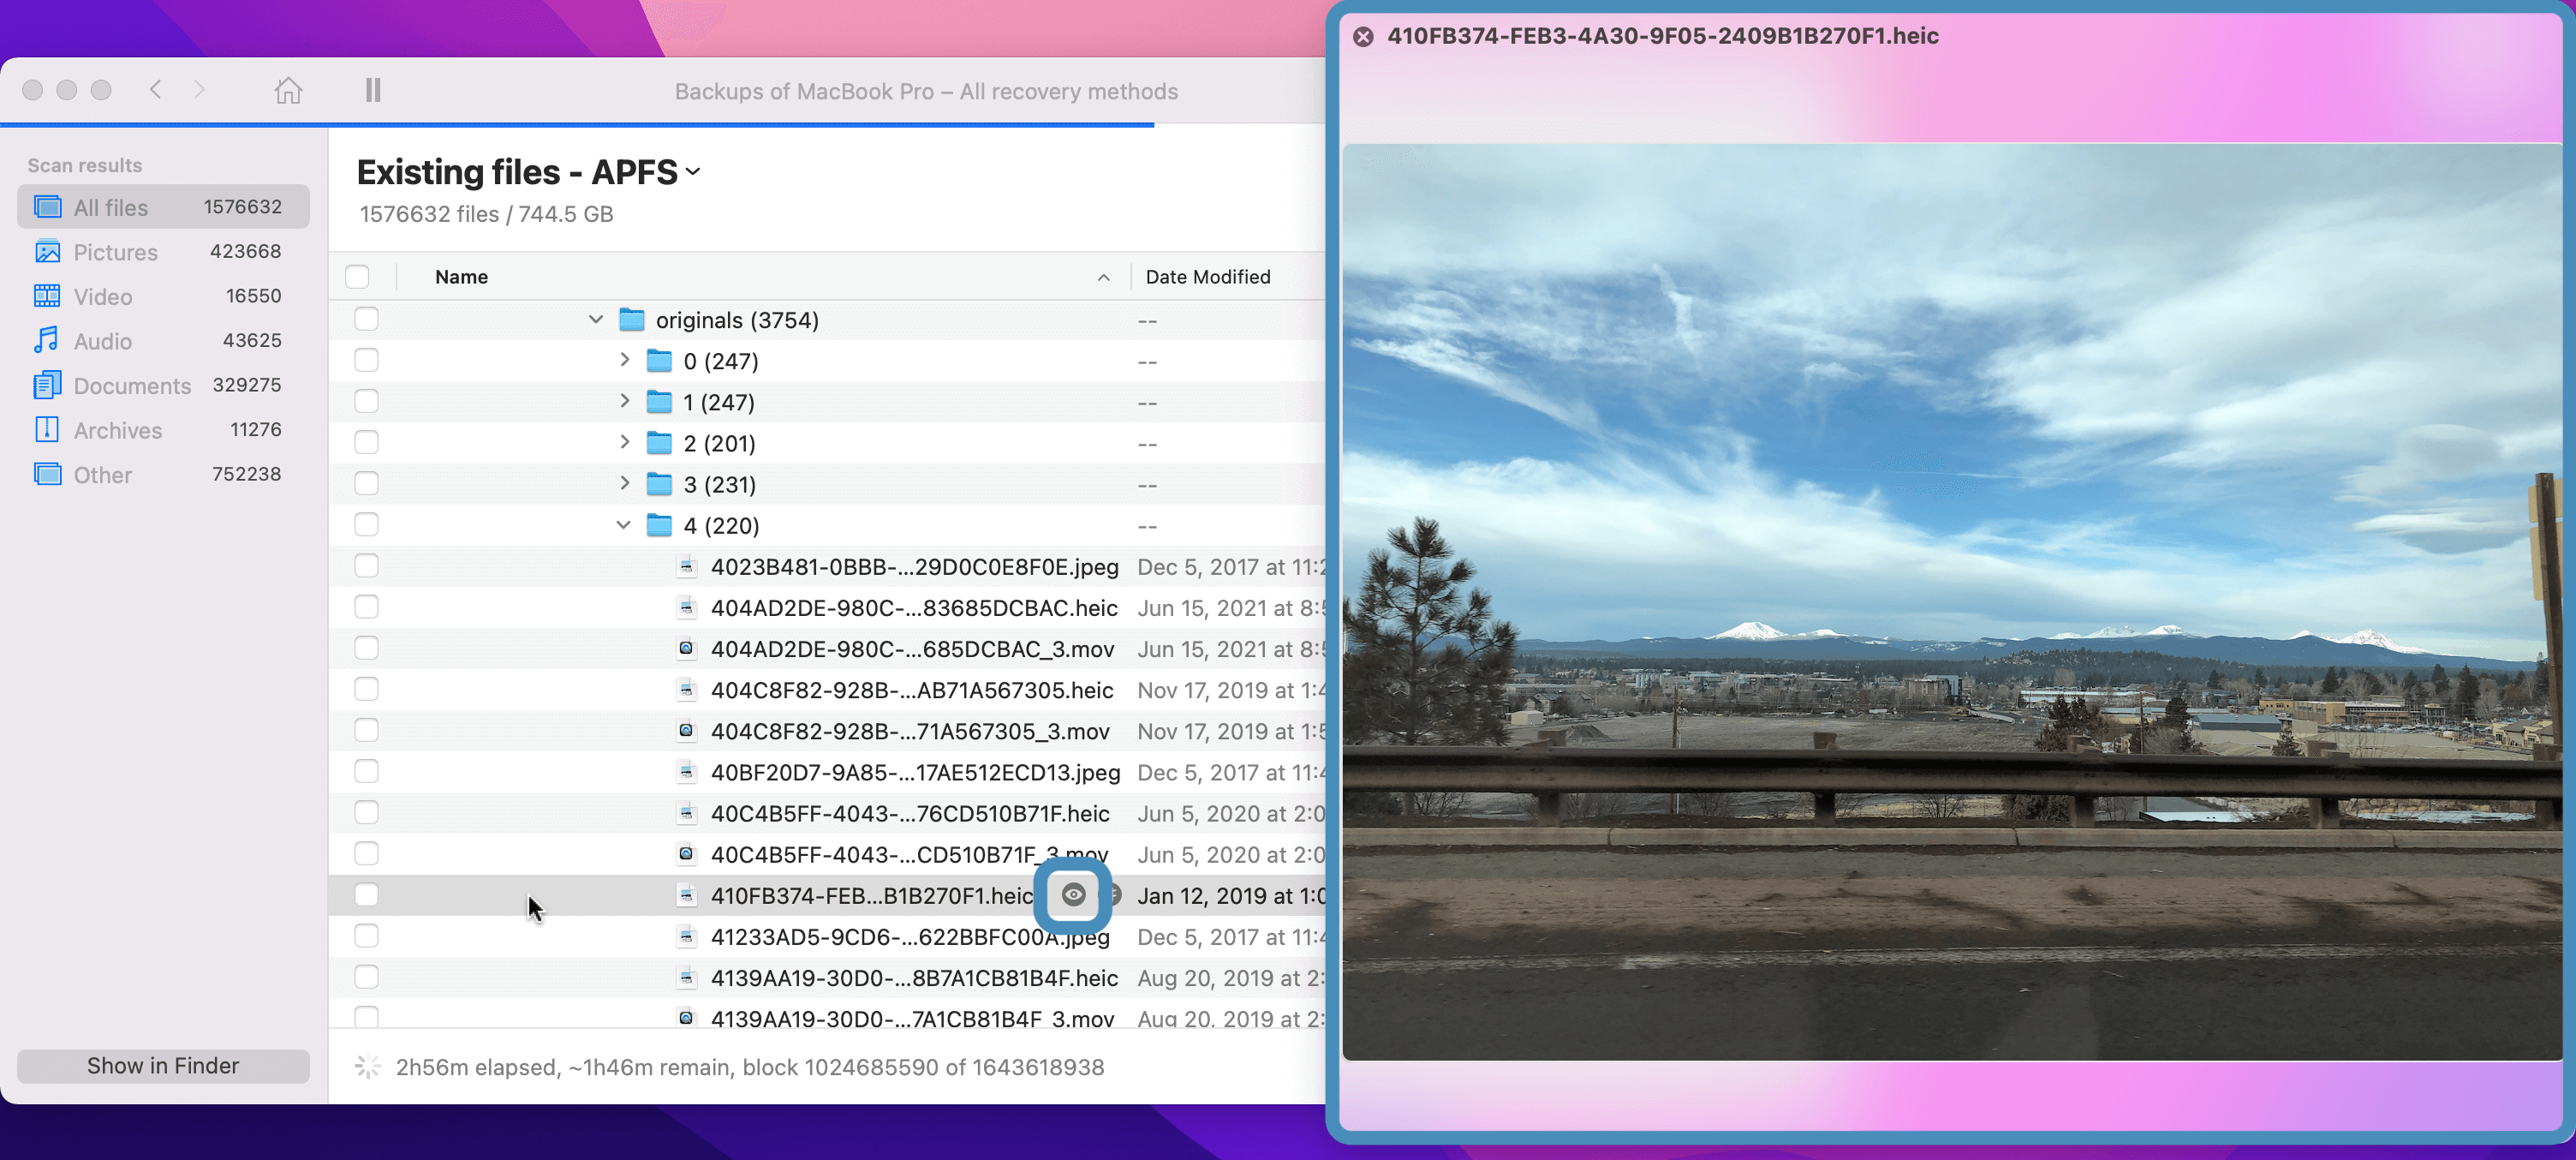
- Find the files you’d like to restore. Use the preview button (shaped like an eye) to make sure you have the correct file.
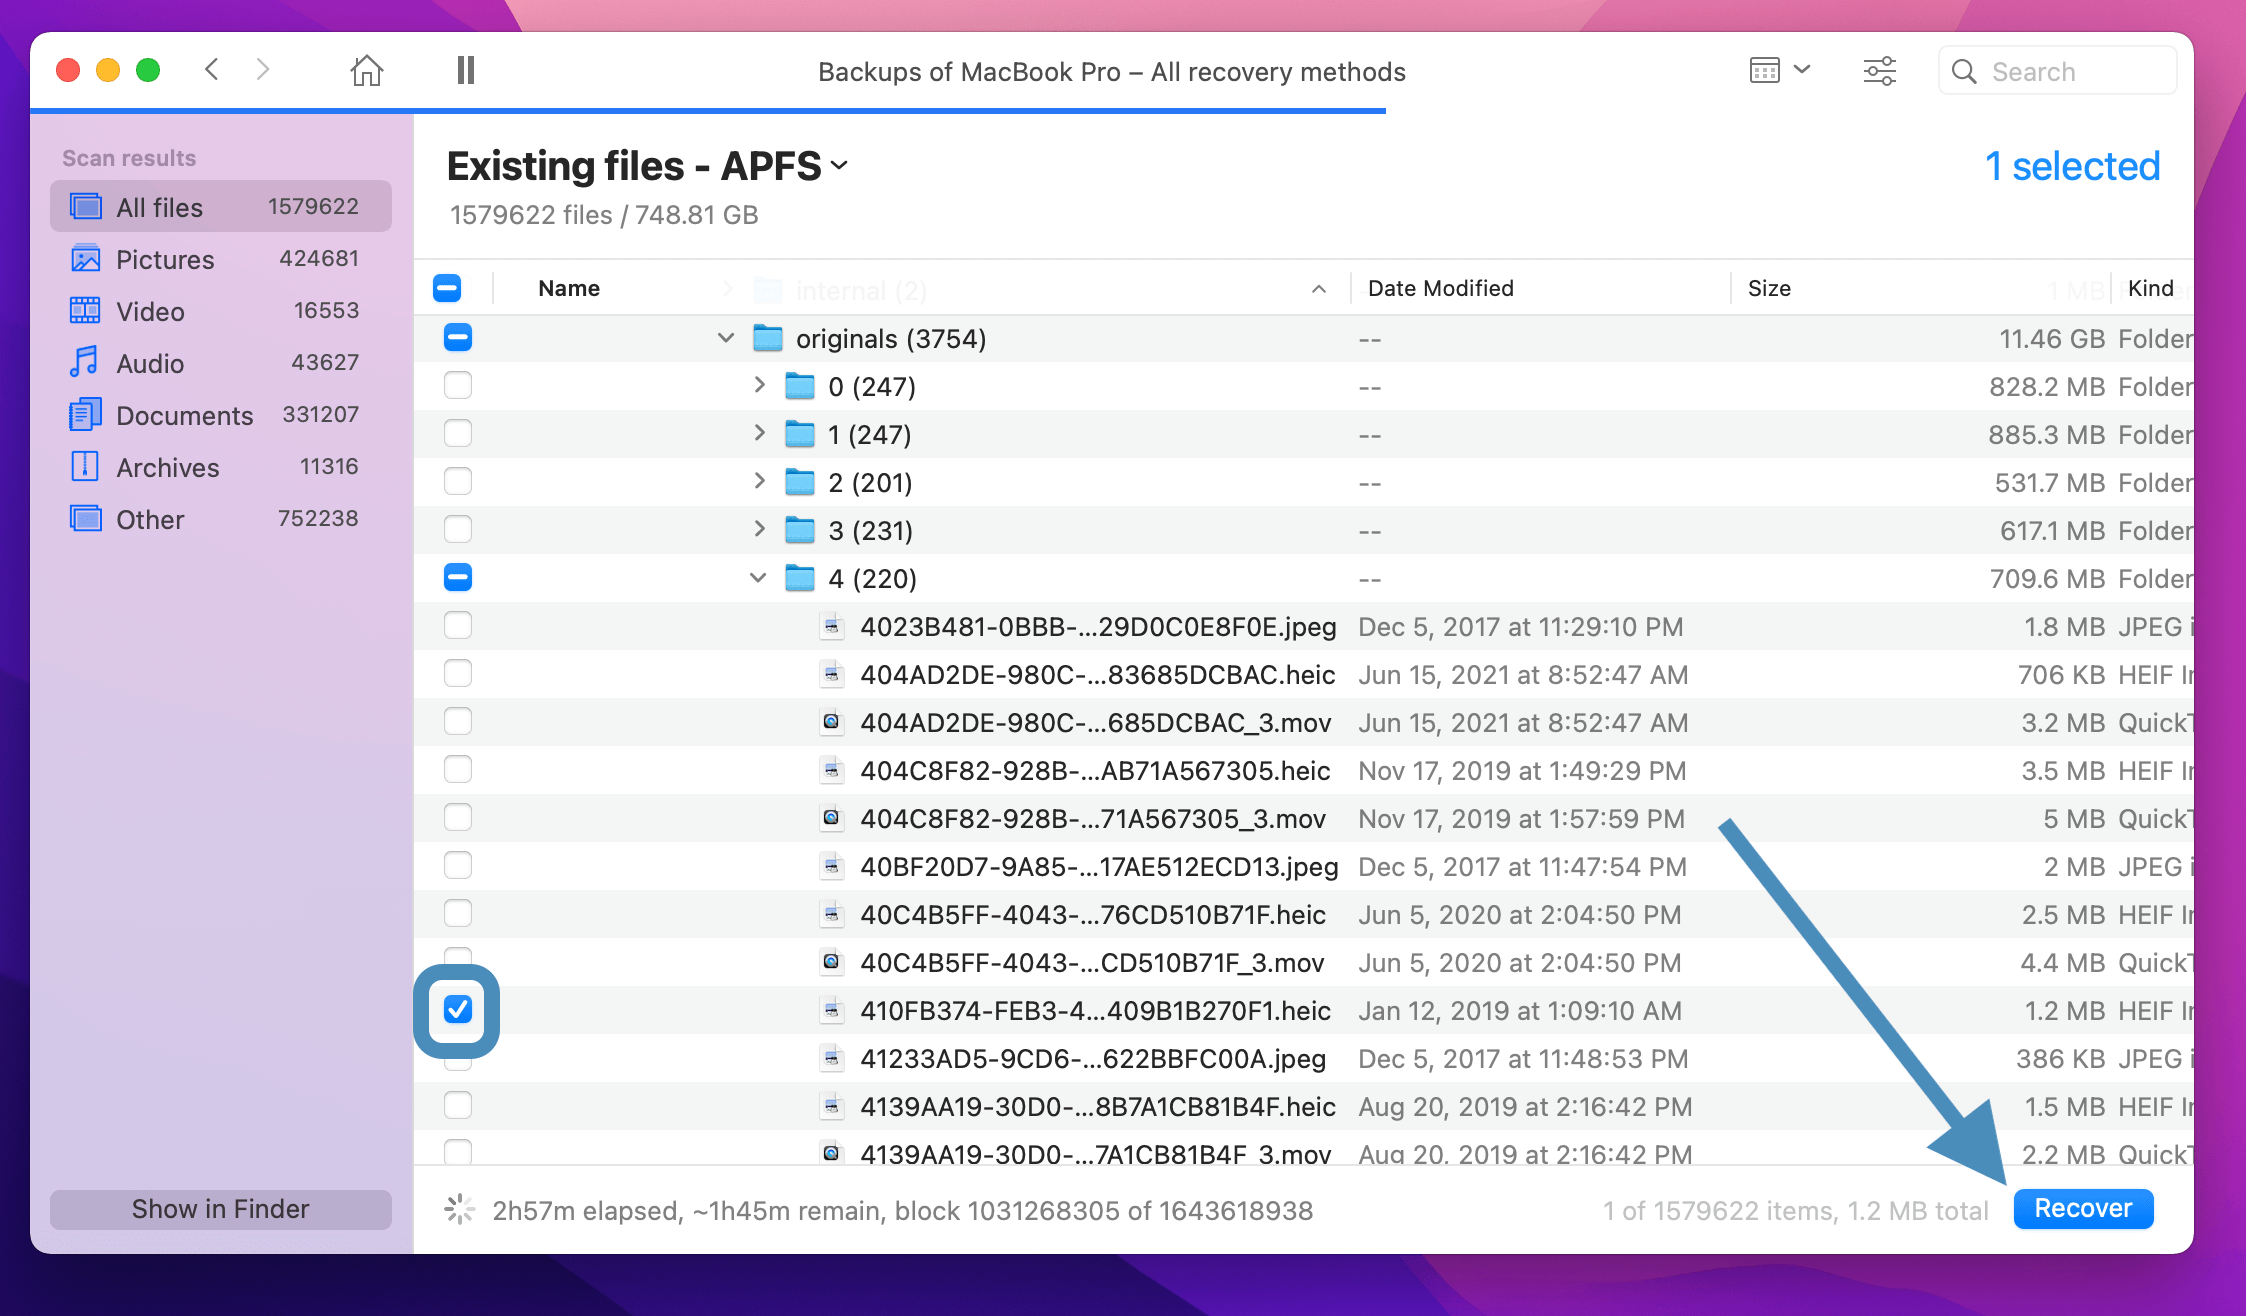
- Select the files you’d like to restore and click Recover.
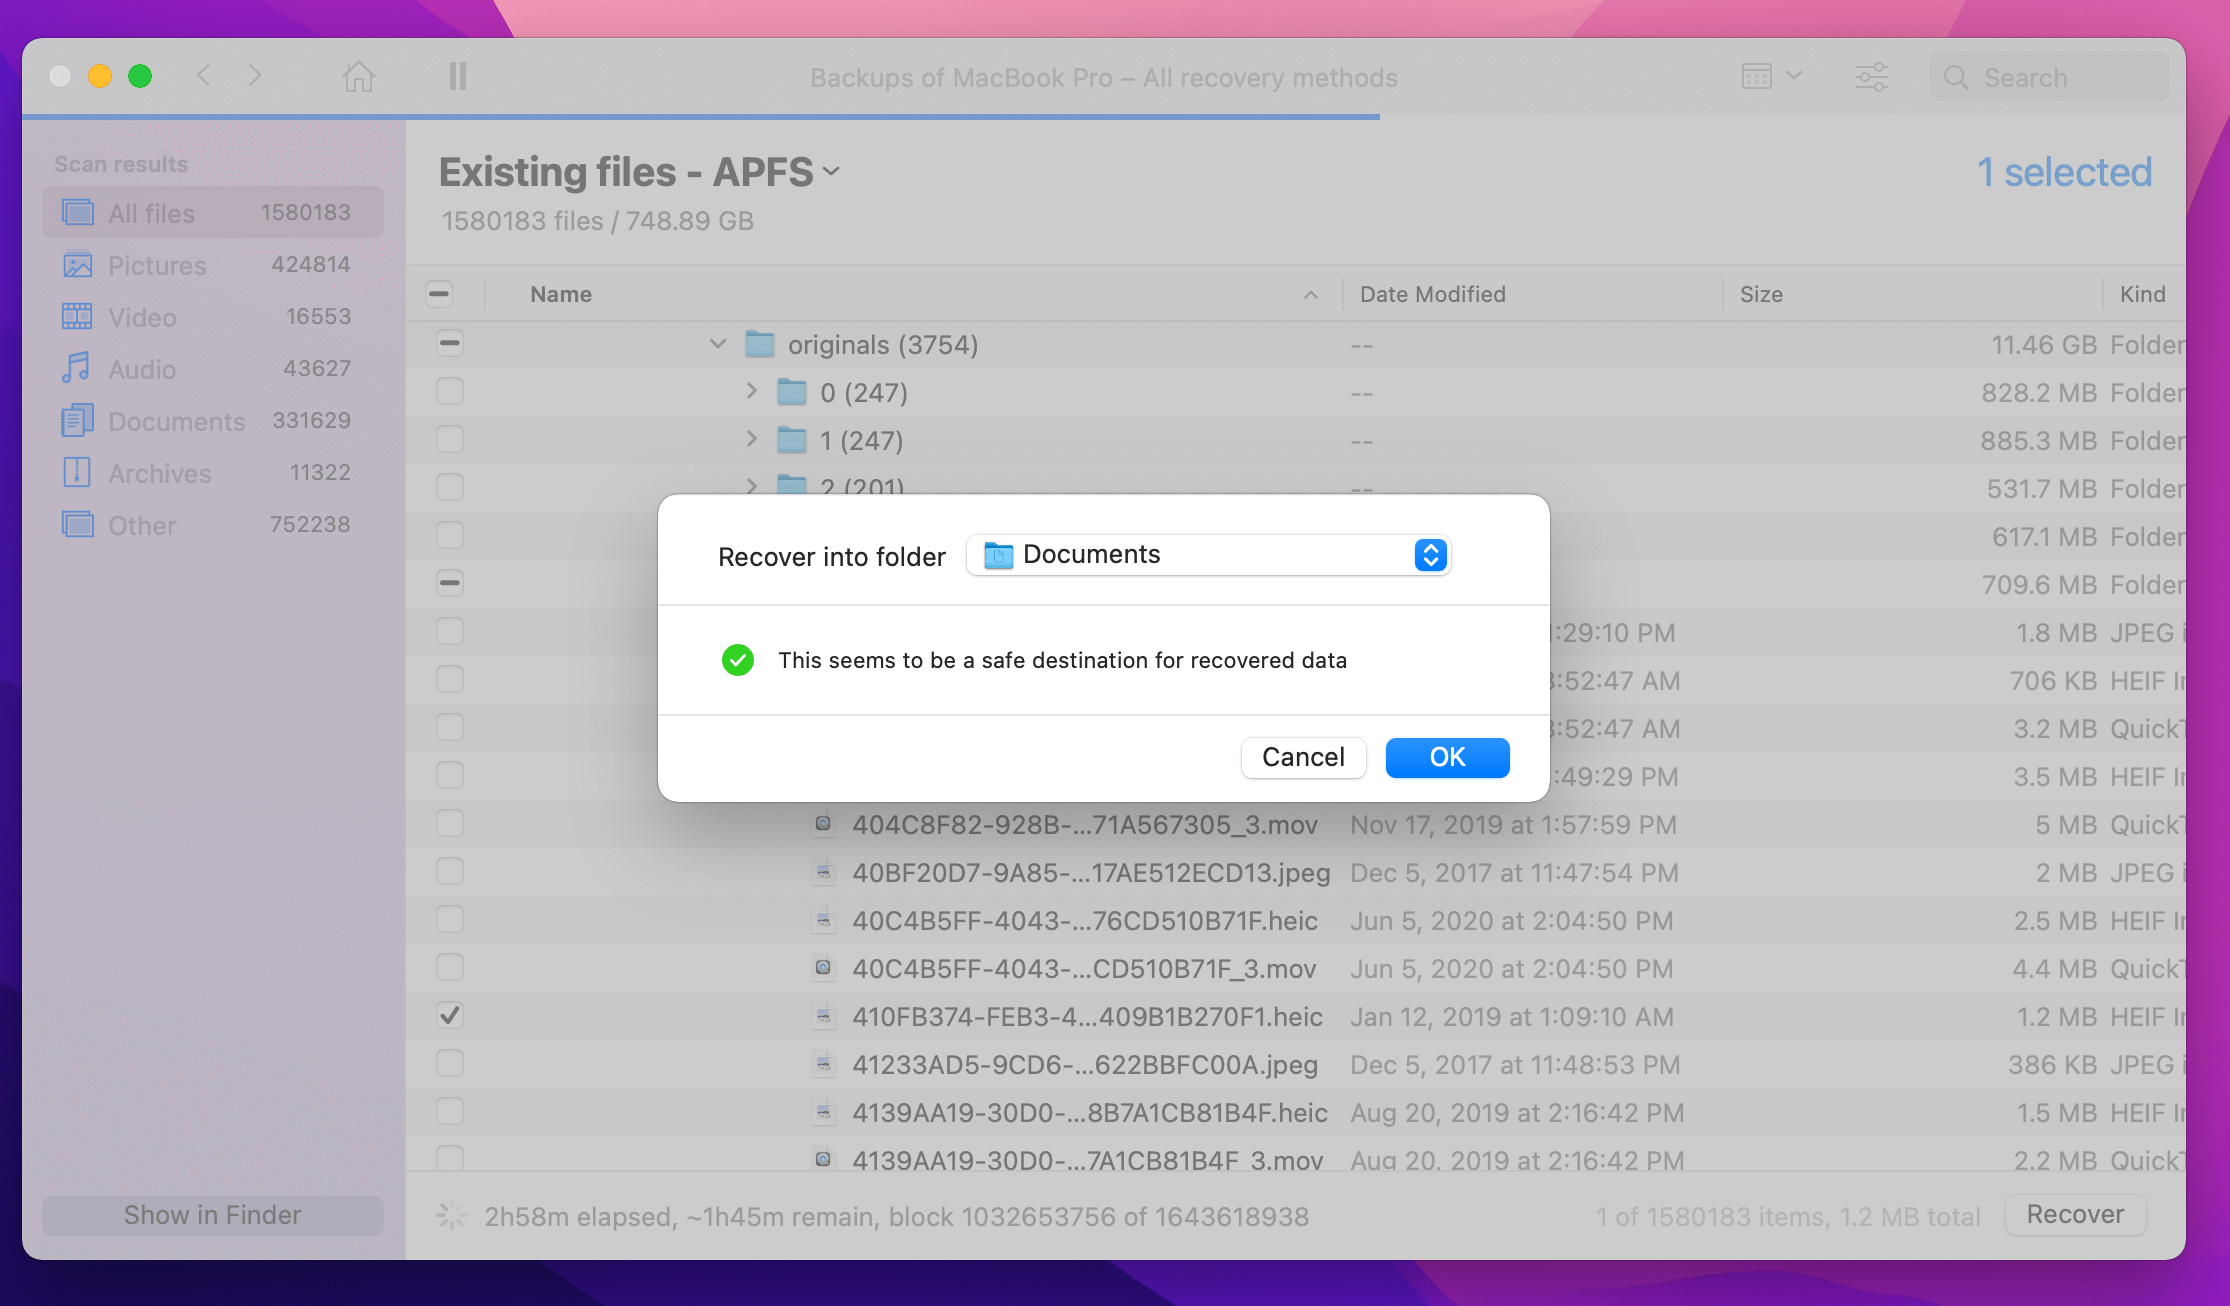
- Specify where you’d like to restore the files to and click OK.

How to View Time Machine Backups from Another Mac
If you find yourself wanting to view Time Machine backups that were made on another Mac, you’re in luck—the process is simple. All you need is the external drive where the backups are stored and your own machine.
How to view Time Machine backups from another Mac:
- Plug the drive with the Time Machine backup you’re interested in into your Mac.
- Open Finder and click the storage drive with the backup.
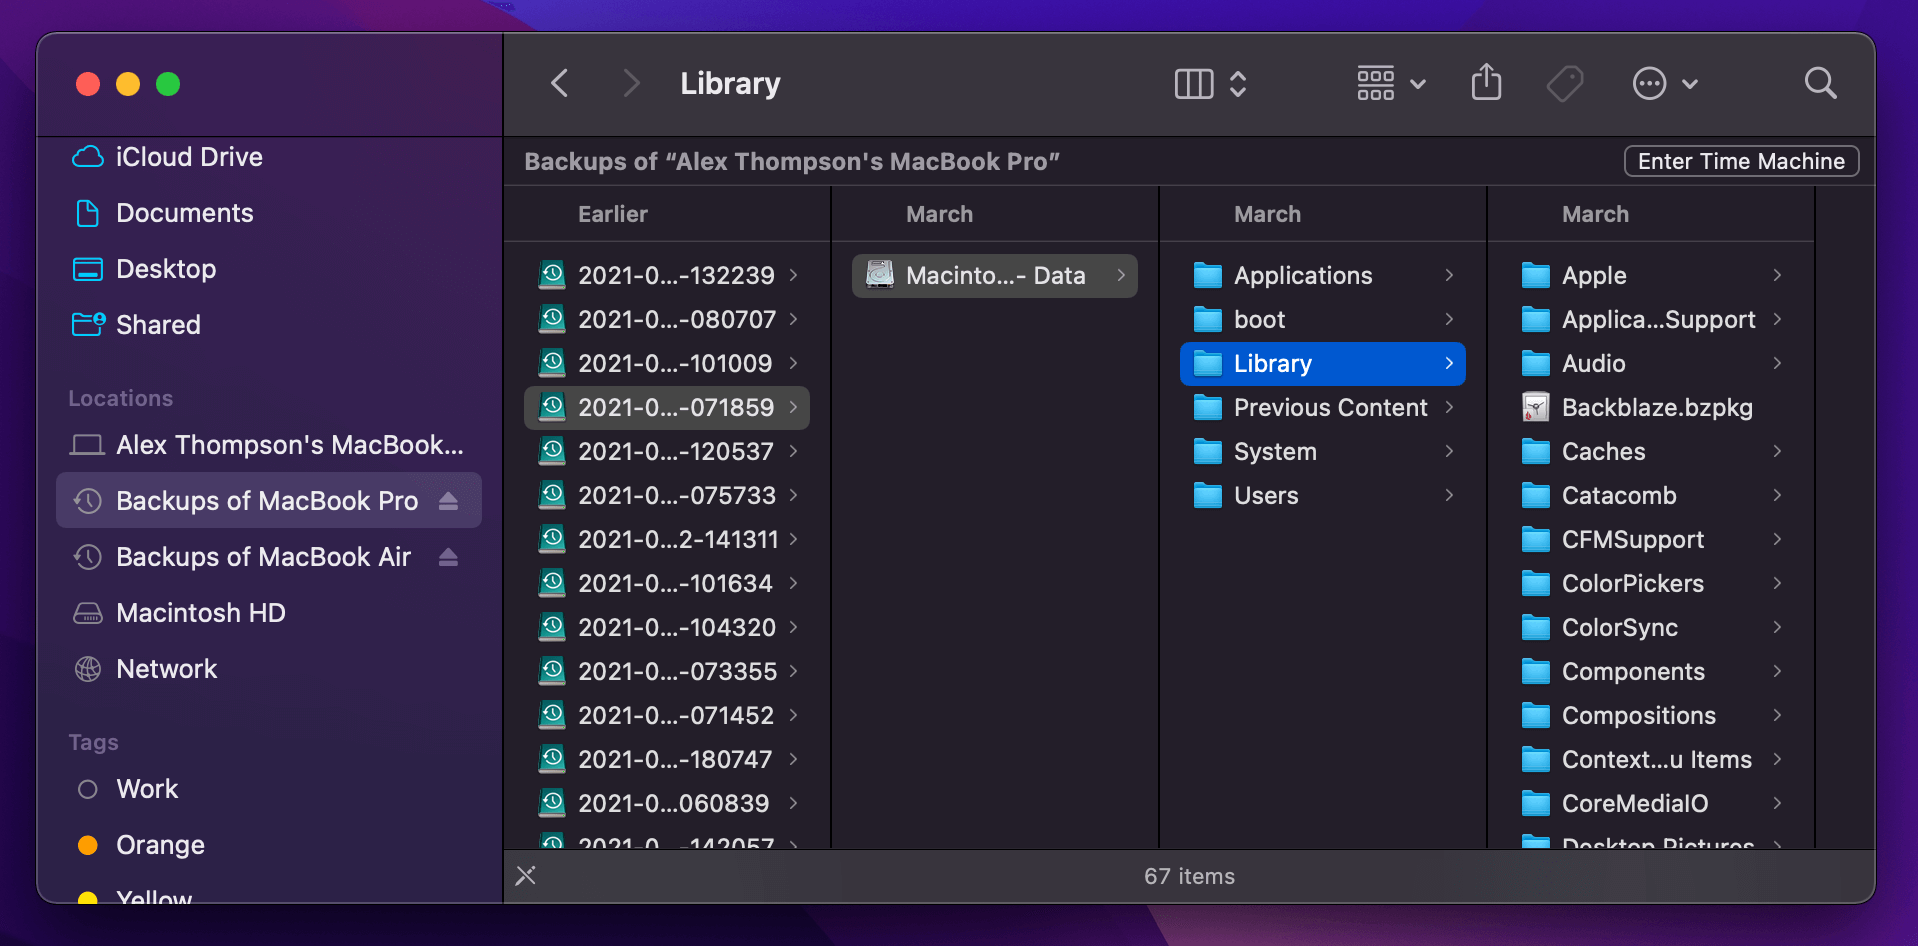
- Find the folder named “Backups.backupdb” and select it. Inside, you’ll be able to see all the backups currently stored on the drive. You may also find that your drive has no “Backups.backupdb” folder and instead simply contains the backup files organized by date. It might look something like the image below.
- If you want to transfer files or folders to your own Mac, copy and paste the files or folders.
How to Delete Time Machine Backups
Time Machine actually removes old backups for you, no manual deleting required. That being said, if you do want to delete backups yourself (to free up more space perhaps), there are ways to do so.
To manually delete Time Machine backups before updating to Big Sur or later:
- Connect the external drive that’s storing your Time Machine backups.
- Open the Time Machine App.
- Navigate to the desired backup you’d like to delete using the arrows or the timeline to the right.
- Select the ellipsis in the Toolbar.

- Click either “Delete Backup” or “Delete All Backups of [File Name]”. The difference here is the first option deletes the entire backup. The second option deletes every backup of the specific file you have highlighted, not the entire backups themselves.
To manually delete Time Machine backups post updating to Big Sur or later:
- Connect the external drive that’s storing your Time Machine backups.
- Open the drive in Finder.
- Locate the backup you’d like to remove. You can explore what files and folders are contained in the backup by drilling down into the backup file.
- Right click the desired backup and select “Delete Immediately…”
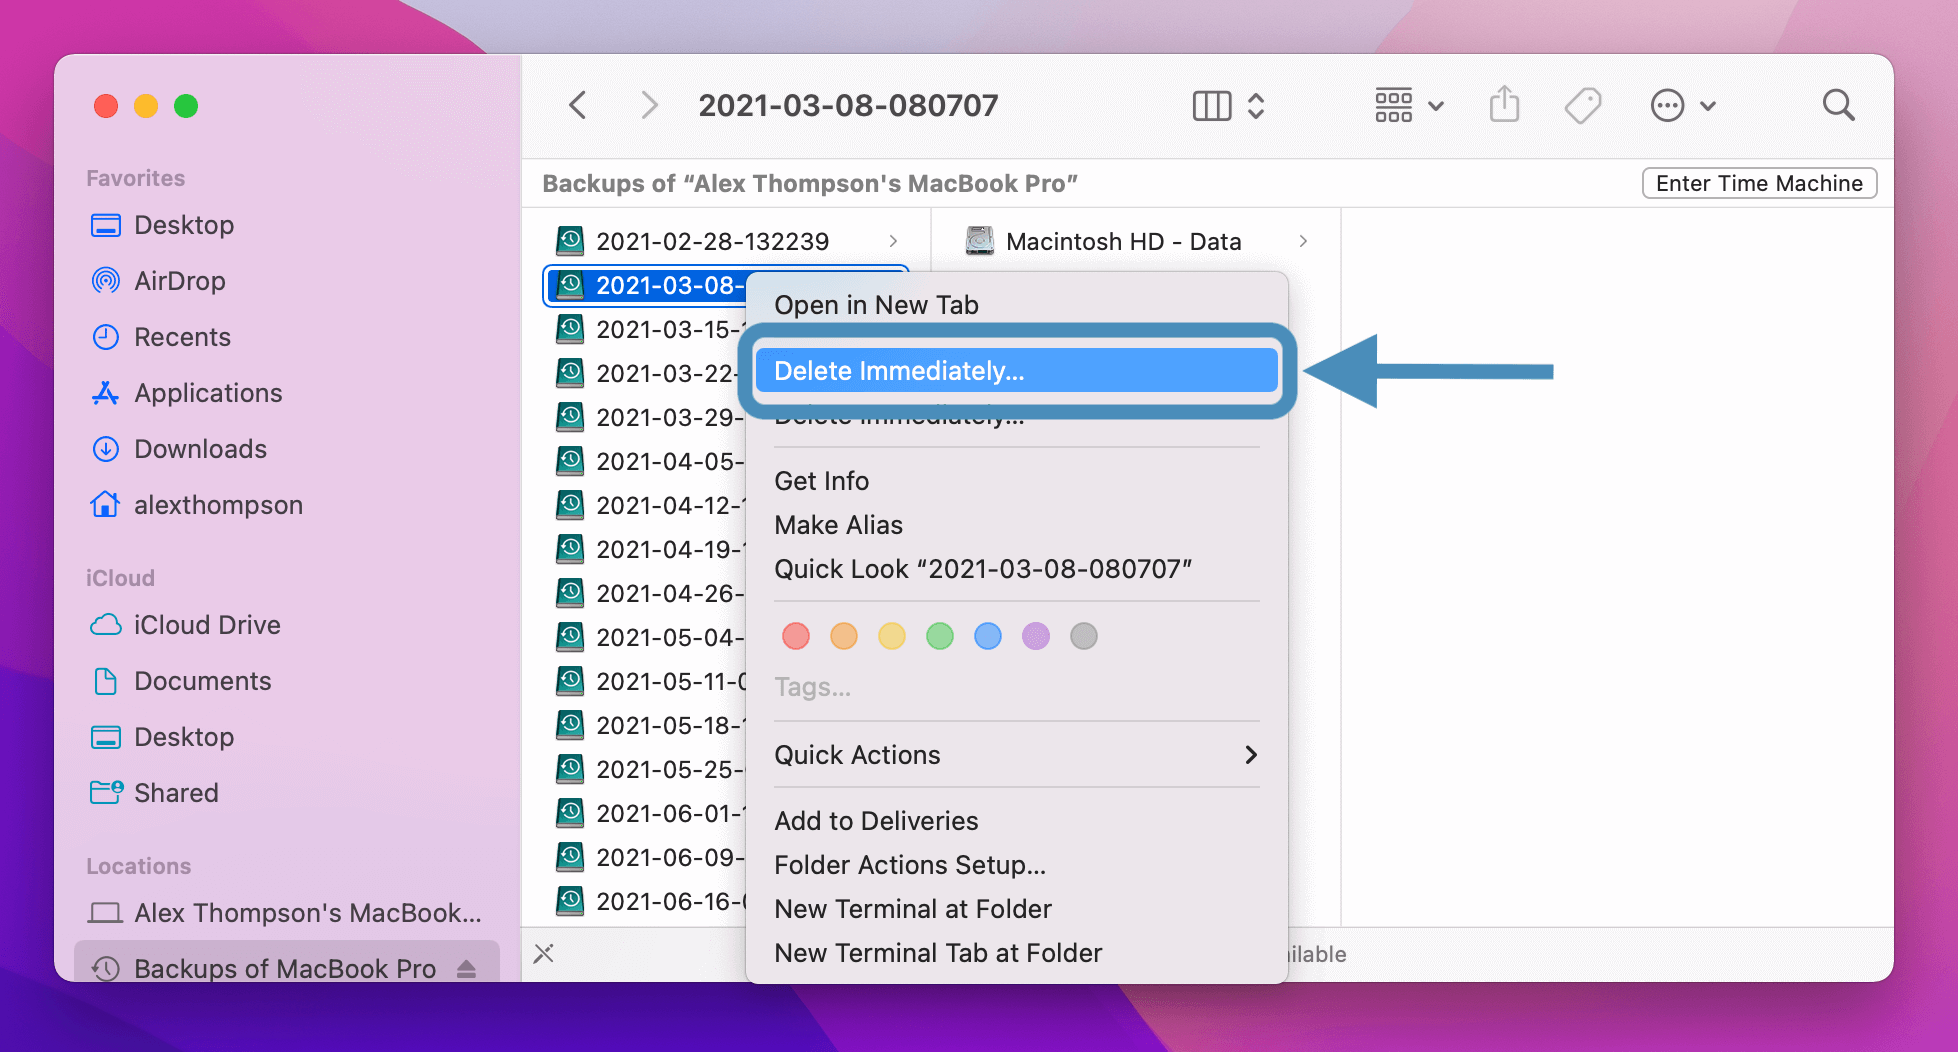
- You’ll be warned that this action is permanent and cannot be undone. Select Delete to remove the backup permanently.


Conclusion
With Time Machine, you can restore lost files, revert to prior document versions, and recover data you thought was long lost.
The four techniques in this article outline the easiest and most effective way to utilize this Mac backup feature. And with them, you can get back to normal faster than ever.
FAQ
Below are just a few of the most frequently asked questions when it comes to how to restore a Mac from Time Machine.
“Restore from Time Machine Backup” is likely referring to an option in macOS Recovery mode.
In this mode, users can choose to restore their system from a previous Time Machine backup, reinstall their operating system, browse Safari for Apple support, or attempt to repair or erase a disk using Disk Utility.
Choosing the Time Machine option means the system will revert to its state at the time of the chosen backup.
If you’ve been backing up your Mac through Time Machine using an external hard drive, there are a few ways you can restore your data.
First, make sure you connect the drive where your Time Machine backups are stored. Then, choose one of the four methods discussed in this guide:
- Restore deleted files or revert to older document versions through the Time Machine app.
- Use Migration Assistant.
- Start your Mac from a Time Machine backup.
- Revert your Mac to an earlier operating system using macOS Recovery.
Yes.
Time Machine is made to be especially user-friendly. As such, it backs up everything that’s stored on your startup disk by default. This includes everything from system files and applications to preferences, emails, music, photos, and even iMessages.
The best way to transfer files from Time Machine to a new Mac is by using Migration Assistant.
If you’ve been backing up your files on an external hard drive, the process should be relatively straightforward. Just:
- Make sure the external drive is connected to your new Mac.
- Open Migration Assistant on the new Mac.
- Choose the “From another Mac, PC, Time Machine backup or other disk” option.
- Enter your administrator credentials.
- Choose the external drive and the backup you’d like to transfer files from.
- Choose the types of files you’d like to transfer (the process may take a while depending on the amount of data).