How to Recover Deleted Files on a Mac Without Software
Table of Contents
So, it turns out you’ve accidentally deleted several important files on your Mac. Now you may be tempted to download a data recovery program. Not so fast! You may be able to recover your files without them.
This guide shows you how to recover deleted files on a Mac without software. Inside, we’ll look at the six best ways to restore your data—no software required. Plus, we’ll also examine two foolproof methods of preventing data loss on your Mac (as they say, the best offense is a strong defense).
How to Recover Deleted Files on a Mac Without Software
Whether you’re looking to restore nostalgic family vacation images, important tax documents, or video files with your favorite cinematic masterpieces, there are a few ways to recover permanently deleted files on Mac or MacBook Pro.
Below are the six best methods for doing so. And best of all, these methods don’t require you to download any additional software to get the job done.
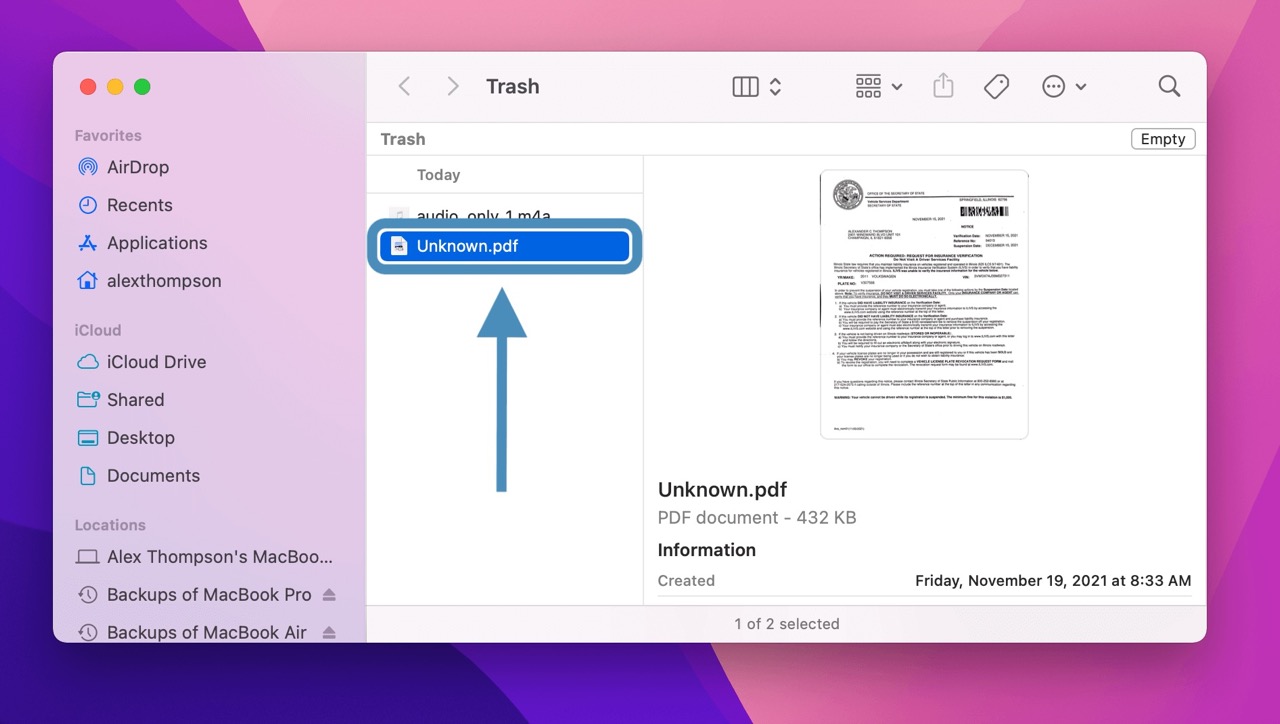
1. Via the “Put Back” Option
By far, the simplest way to recover deleted files is through the Trash Bin folder (or simply “Trash”) on your Mac.
This special folder is designed to store files that you’ve deleted until you choose to empty the Trash Bin entirely. So instead of losing those files entirely, you have to take an extra step to get rid of them all together.
Think of it as an extra safeguard.
If you haven’t emptied your Trash Bin in quite some time, your missing file can likely still be found right there. All it takes is locating the file and selecting “Put Back.”
To restore your file via the “Put Back” option:
- Open the trash folder by selecting the icon from your dock.

- Search for your file in the open trash folder.
- Select your file, right-click it, and select the “Put Back” option.
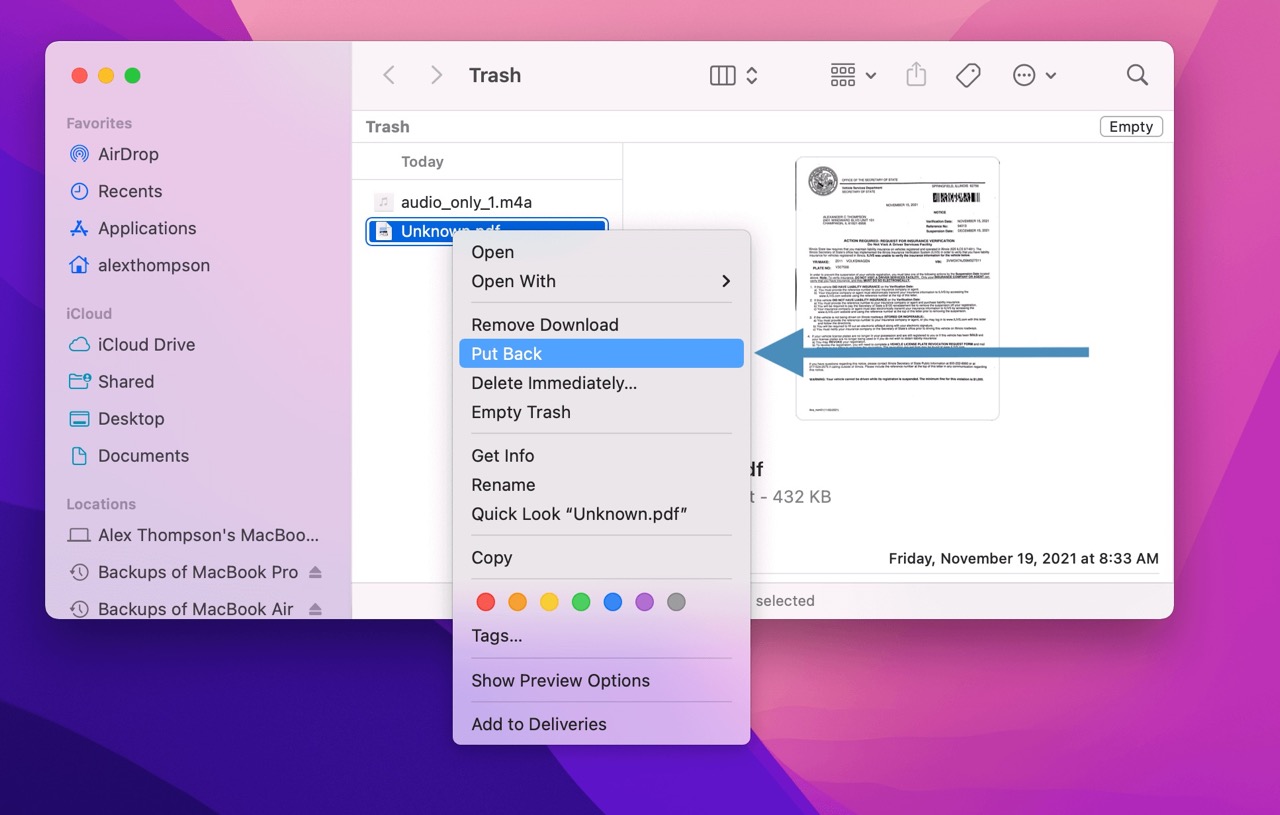
- Your file will then be restored to its original location, and you can use it like normal.

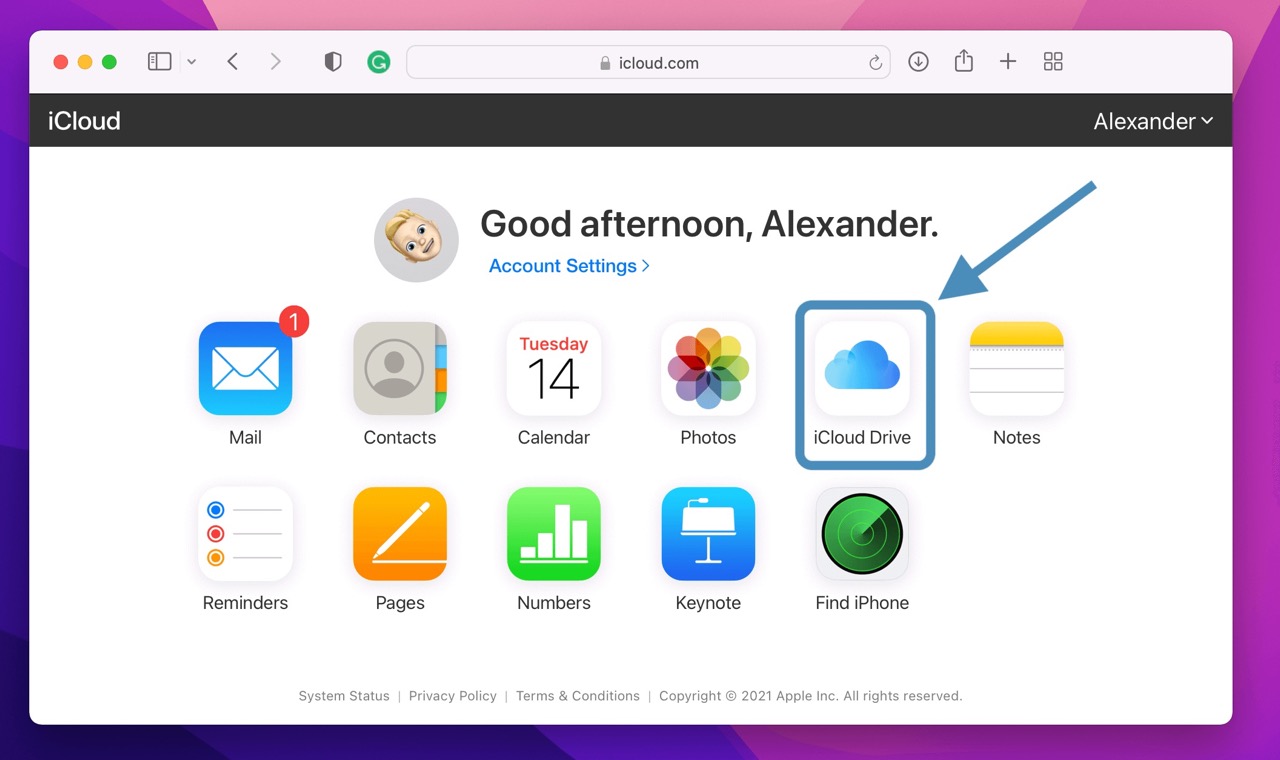
2. Retrieve from iCloud Drive
If you have iCloud Drive set up, you can also restore deleted files from there too.
iCloud Drive is Apple’s cloud-based storage system. It stores your files and folders in the cloud. As such, if you make changes on one device (like changing a file name, for example), iCloud Drive automatically reflects those changes on your other devices.
To restore files directly deleted from iCloud Drive:
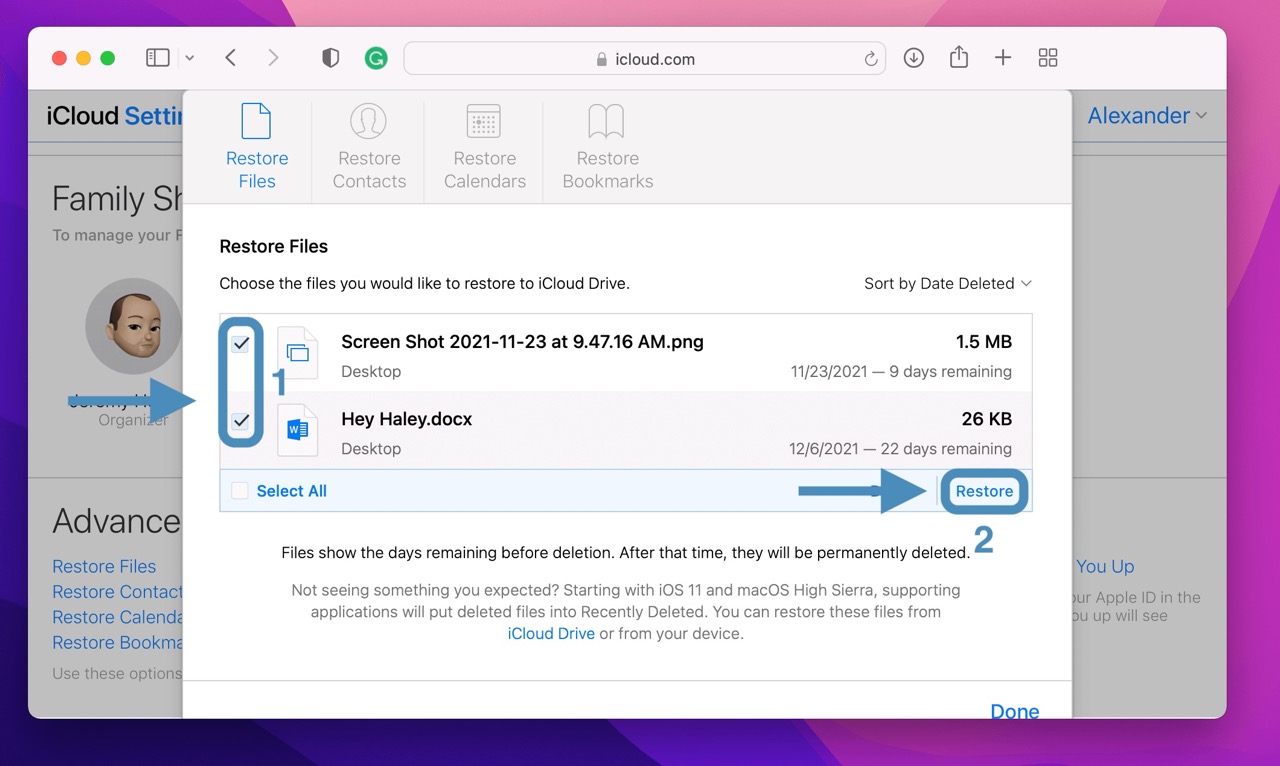
- Go to iCloud.com and log into your account using your Apple ID and your password.
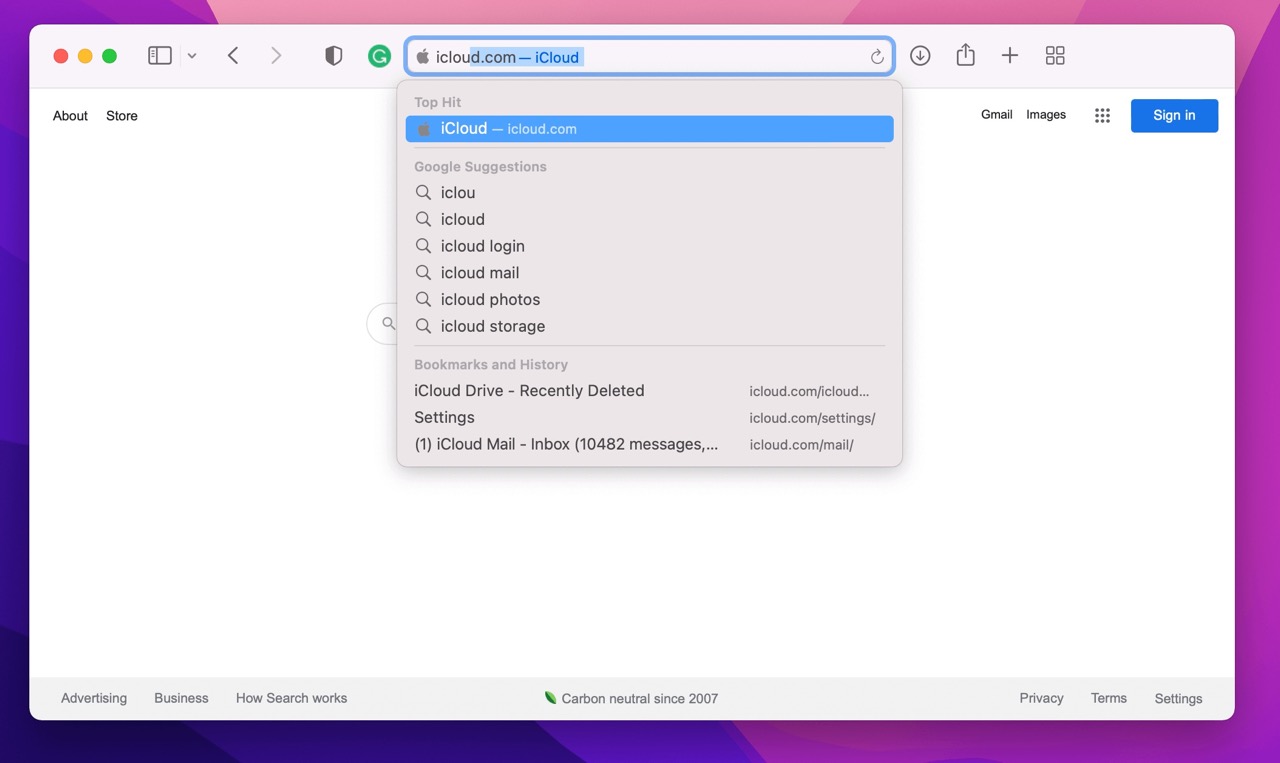
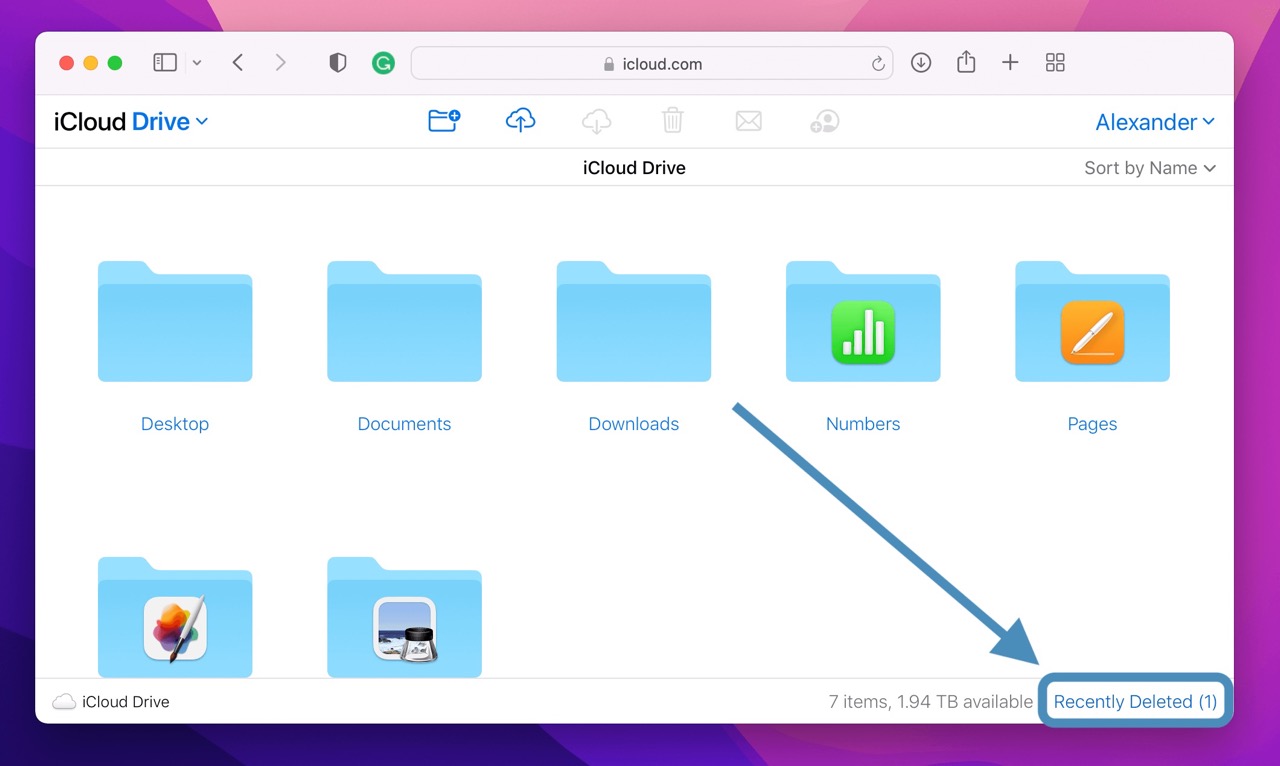
- Once you’re logged in, go to iCloud Drive.
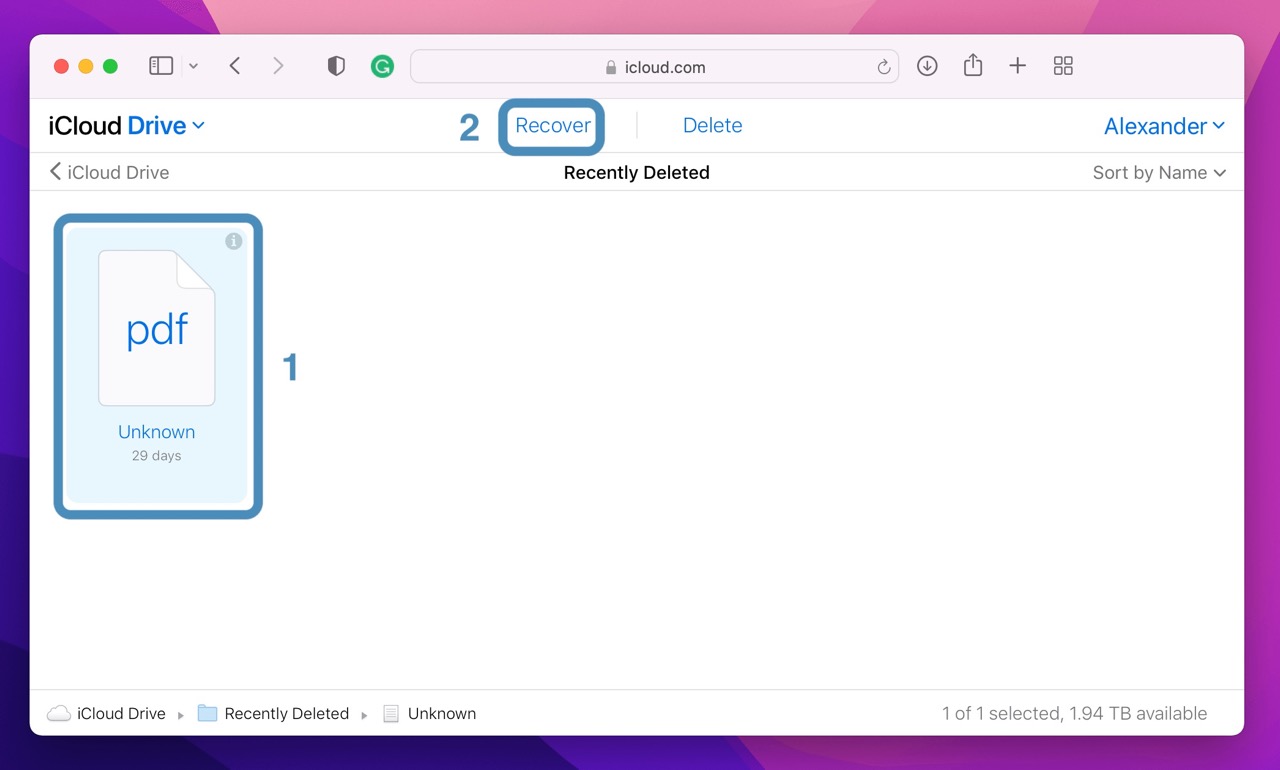
- Click the “Recently Deleted” option in the lower right section of the window.
- Select the files you’d like to restore and click “Recover.”
- If you’ve deleted files from within an app on your Mac, you can restore those files by navigating to your profile and clicking “Account Settings.”
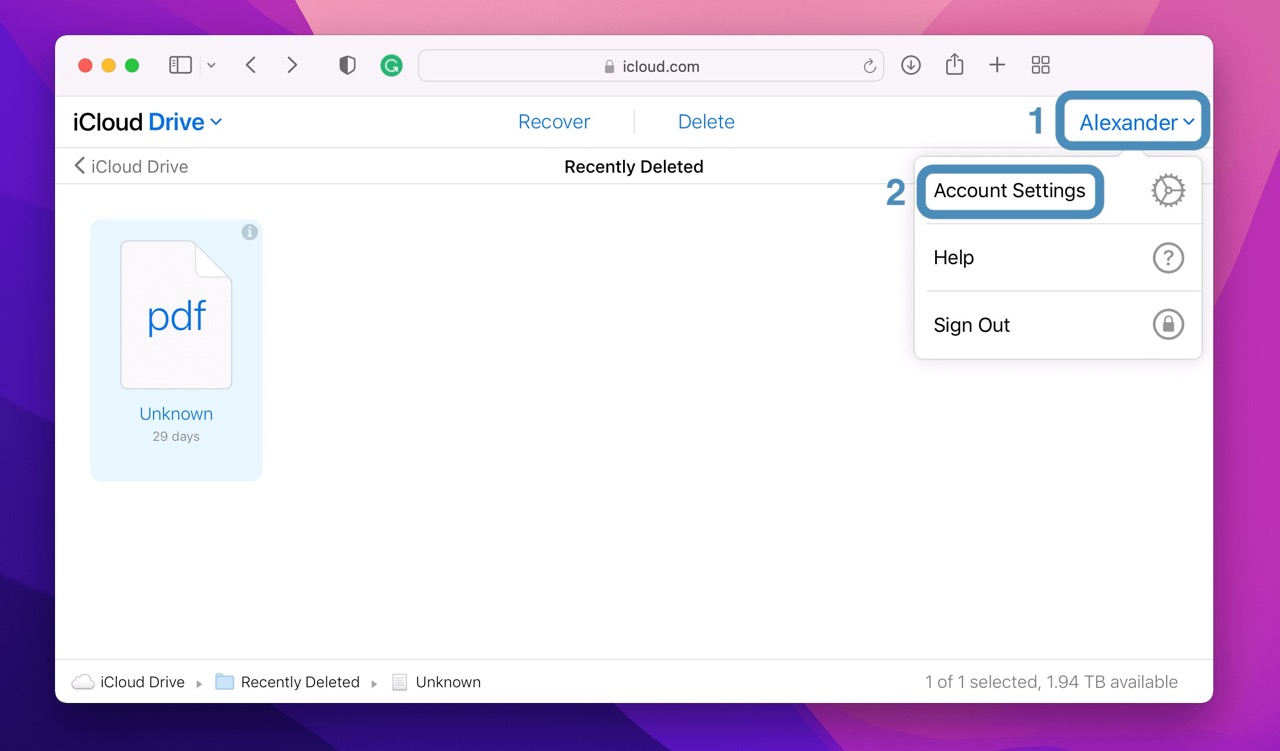
- Click “Restore Files” in the lower-left section of the screen.
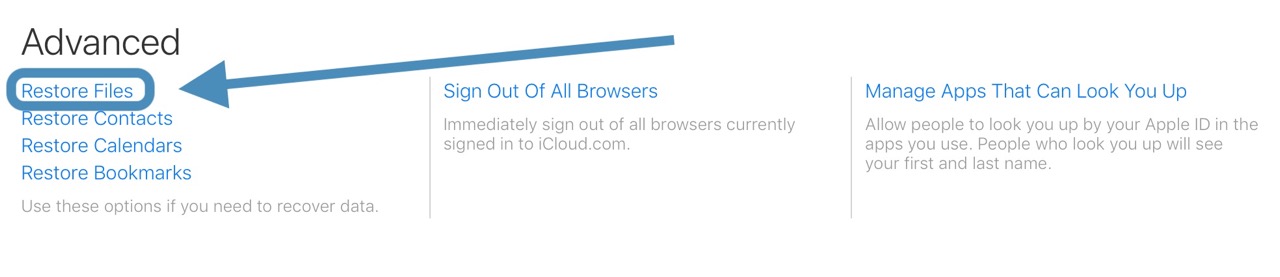
- Select the files you’d like to recover and click “Restore.”
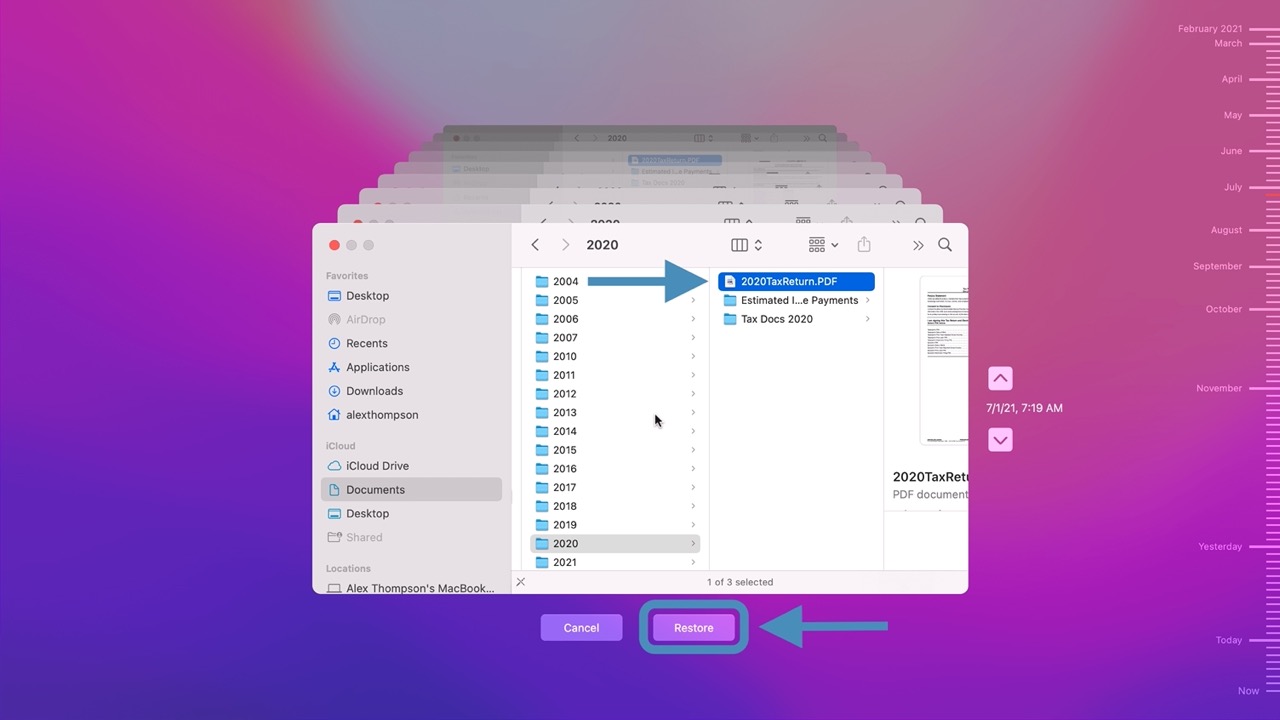
3. Restore Your Lost Files from a Time Machine Backup
Your Mac already comes with a built-in backup feature called Time Machine. This feature automatically backs up your data like personal preferences, apps, music, photos, emails, documents, and even iMessages.
If you’ve lost files, you can search through your Time Machine backups to restore them. Plus, if you’re wondering how to recover emptied trash on Mac without software, Time Machine is the best solution.
To restore your lost files from a Time Machine Backup:
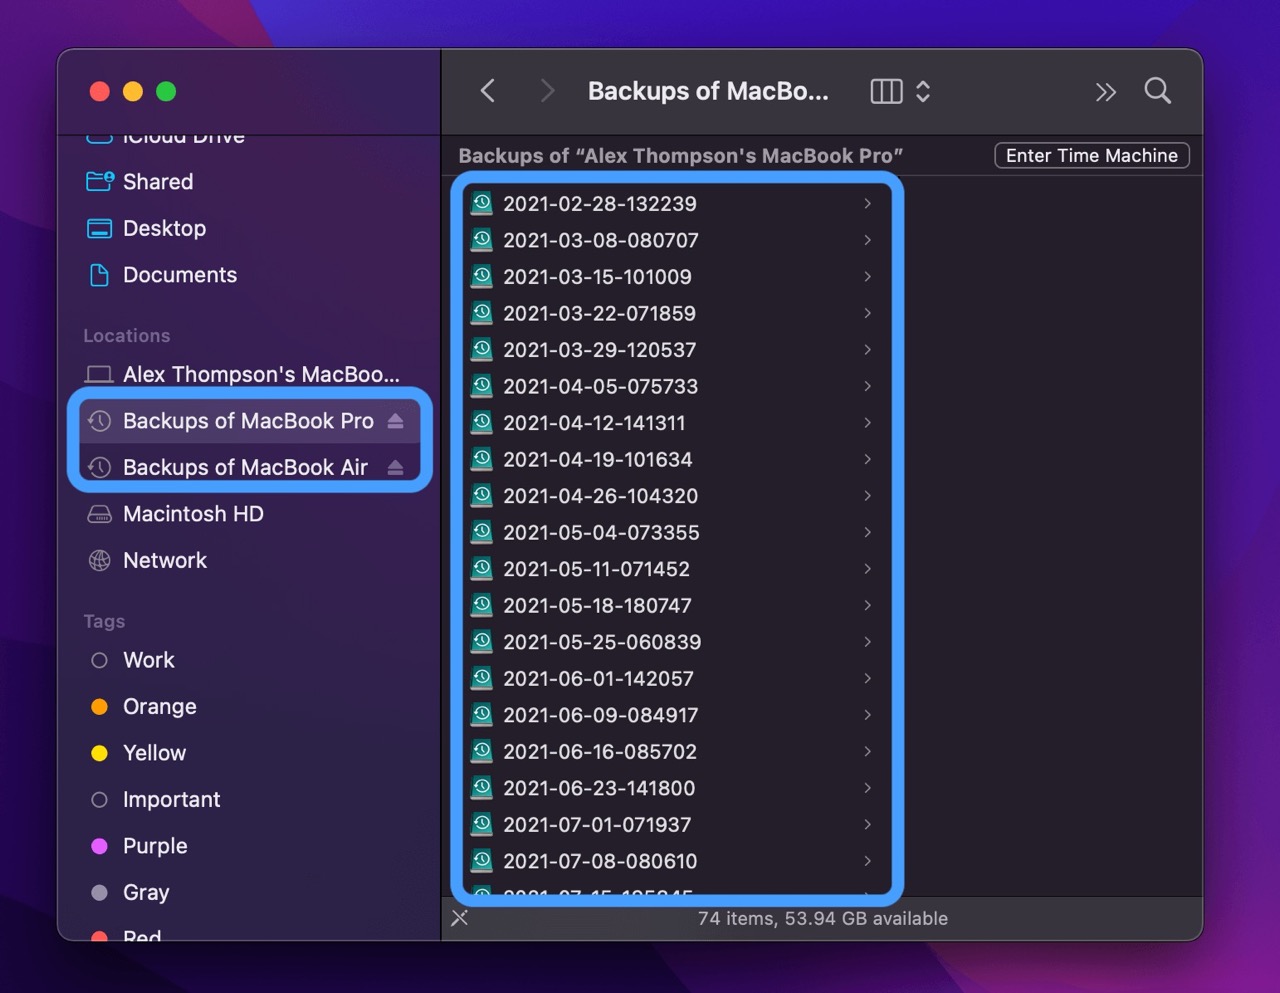
- Open the Finder window where your file was originally located. Then open Time Machine by clicking the icon in your menu bar shaped like a clock.

- Scroll through the available backups by clicking the arrows, the timeline to the right, or by clicking the windows behind the open one.
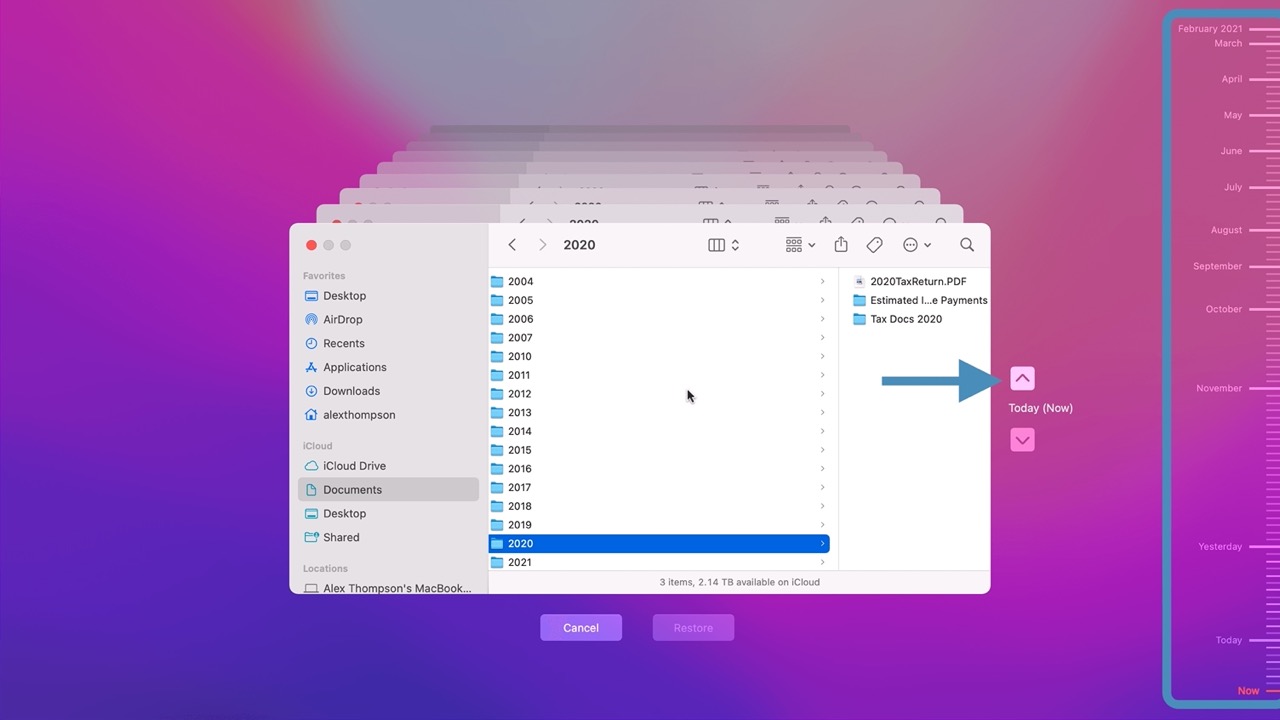
- Find the most recent backup where your file is still undeleted. You can use the date and time to the right of the window to make this easier.
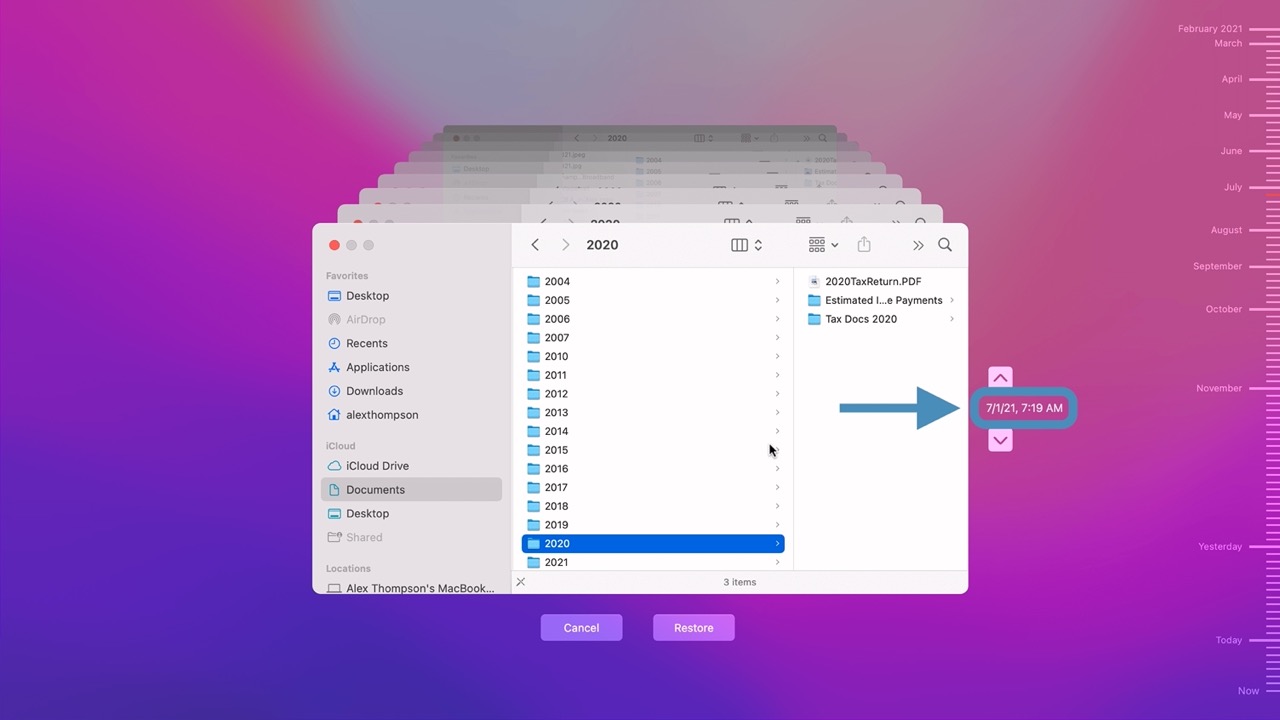
- Select your file and click “Restore” to restore your file to its location before it was deleted.
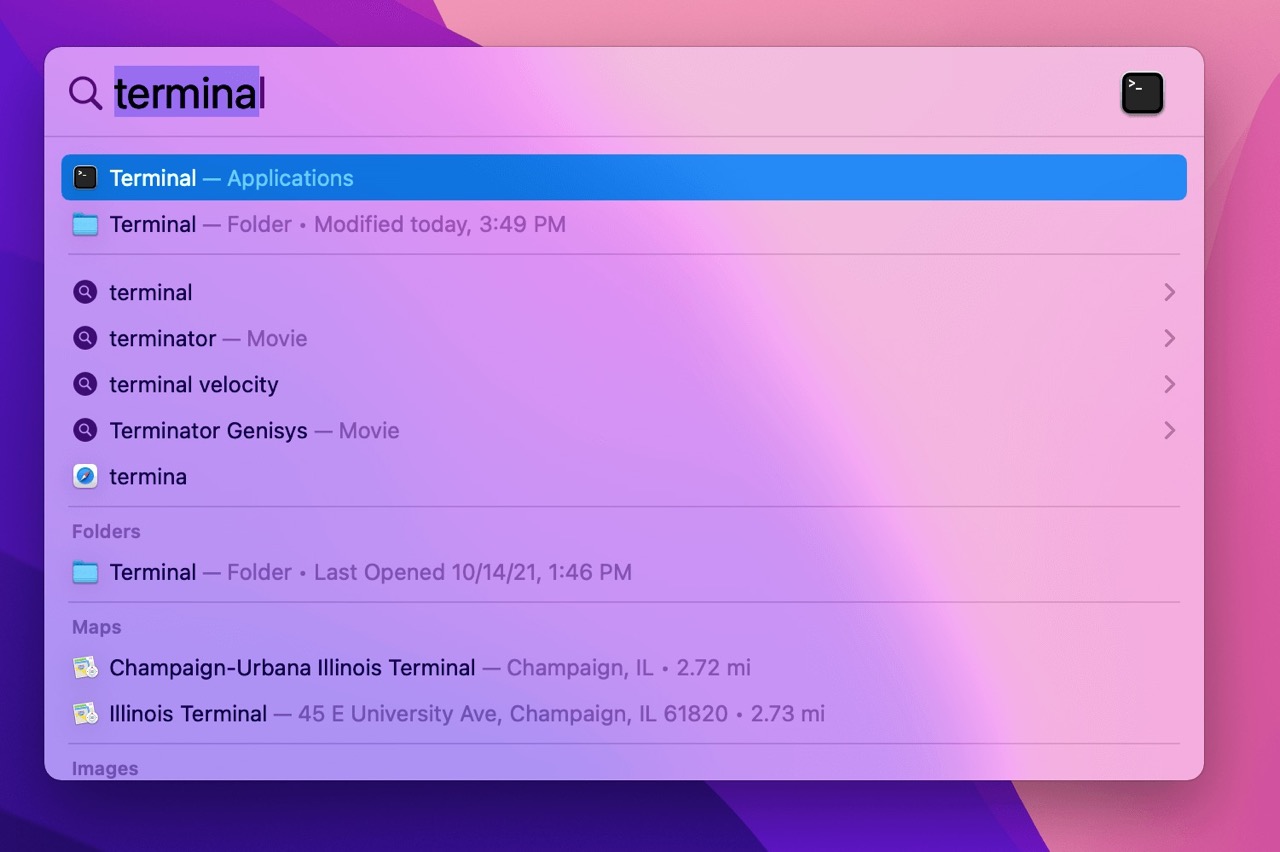
4. Use the Mac Terminal to Recover Your Files
The little trashcan icon in your graphical user interface (GUI) isn’t the only way to find items in the Trash Bin folder. In fact, you can also use Terminal to access everything currently in your trash.
Admittedly, most users will find navigating to the Trash icon easier than going through Terminal. That being said, there are a few cases where restoring via Terminal makes more sense.
For instance, users who are having difficulty with Finder (for whatever reason) may prefer Terminal. Going this route can also actually be faster than selecting and restoring files from the graphical bin—more on that in a sec.
To recover deleted files on Mac with Terminal:
- Go to Terminal by using Spotlight (Command + Space) or by clicking it in Finder.
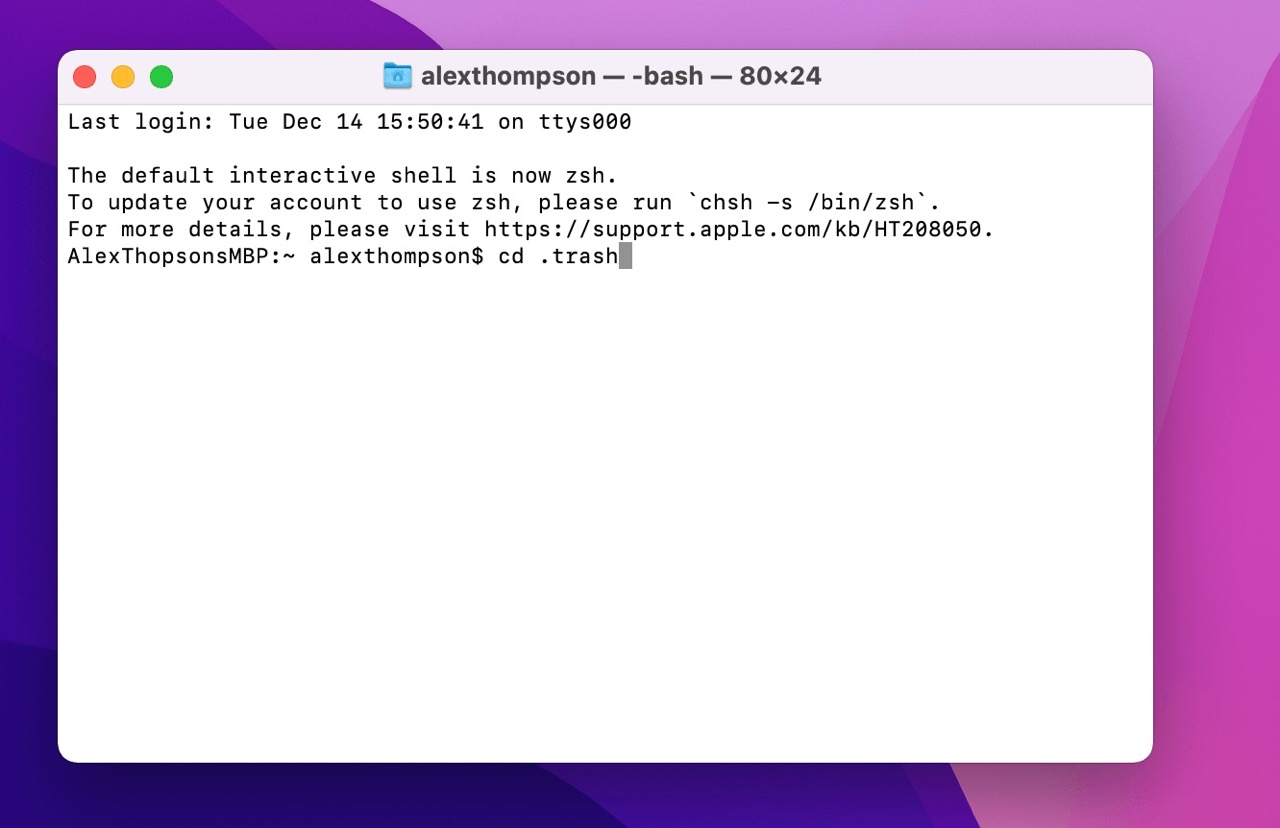
- You’ll need to navigate to the Trash folder by entering the following command:
cd .Trash
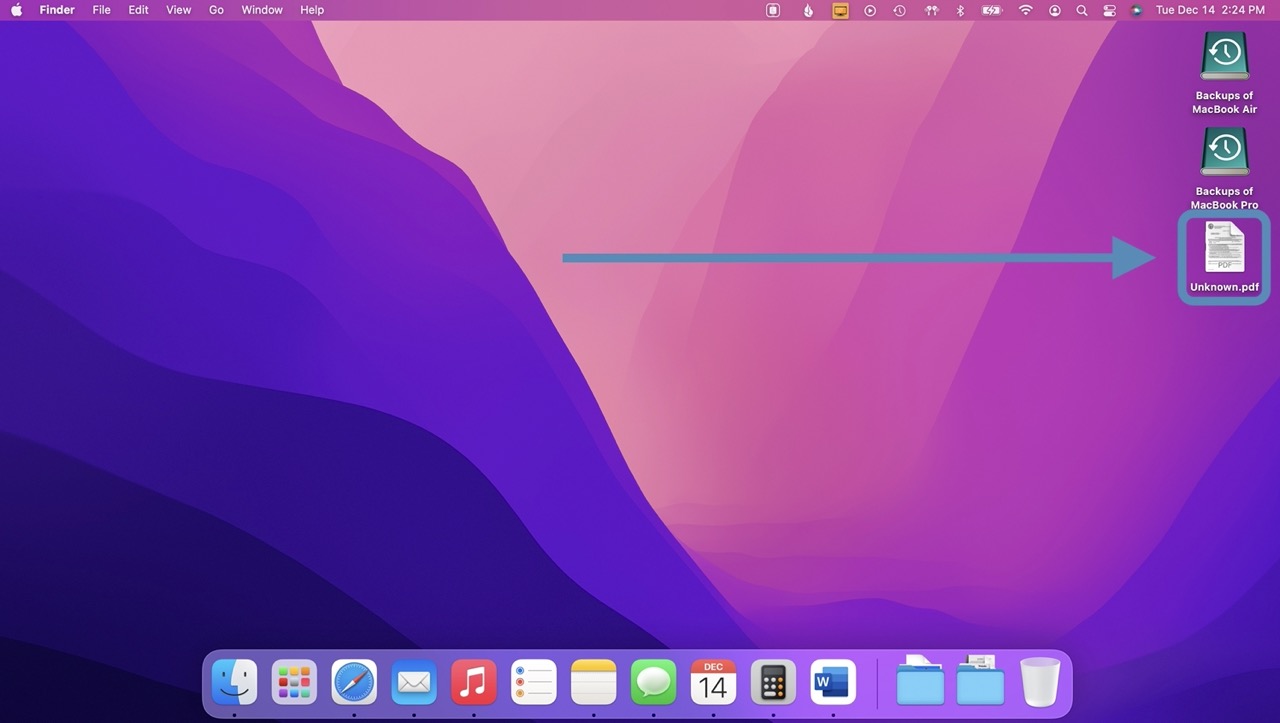
- To restore your file from the Trash folder, you’ll need to use a move command (“mv”). You’ll need to use the exact name of the file in question using the following formula: mv (move command) xxx.xxx (your file name and extension) ../ (your desired location, this one is to the Home folder). Your command should look something like this:
Unknown.pdf ../
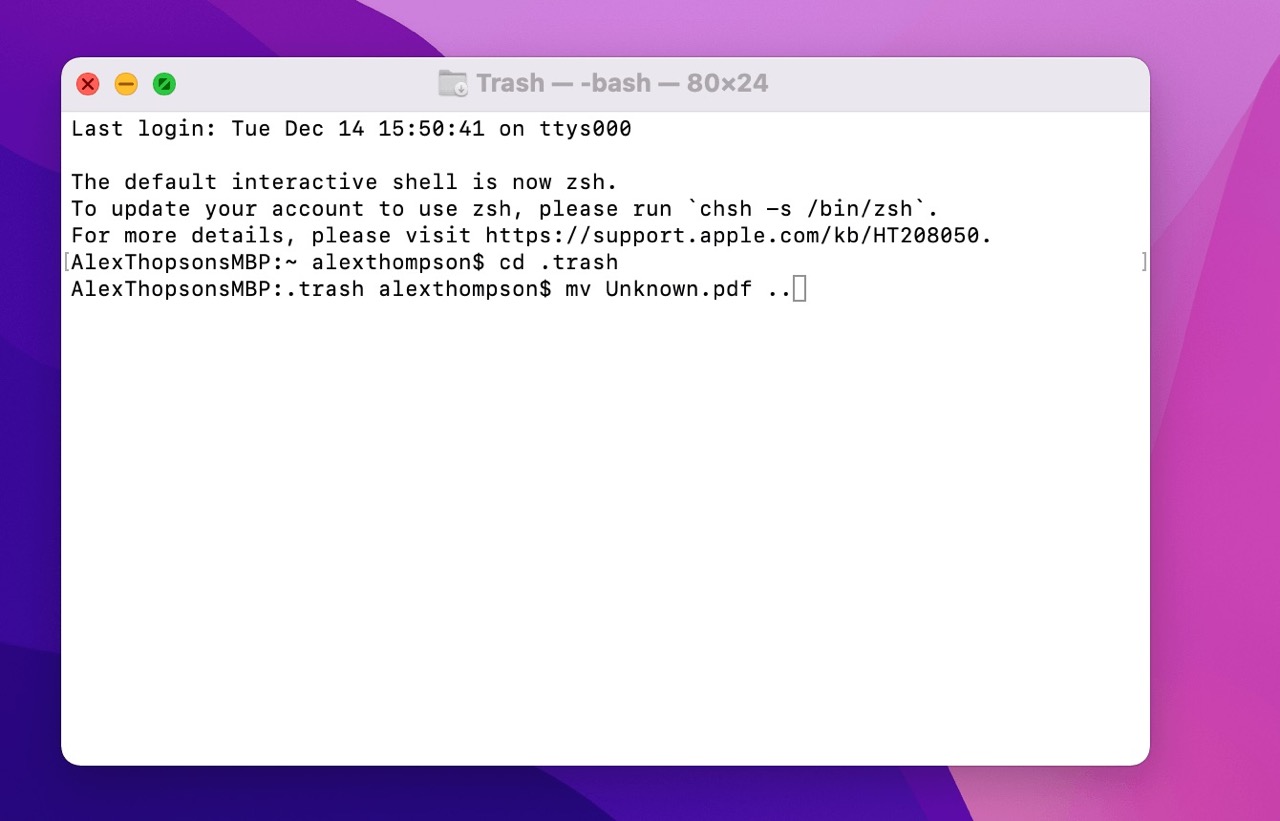
- You can also use the wild character “*” to restore all items in the trash or restore items with specific extensions. For example, to restore all items, use the command:mv * ../To restore all files of a certain type (.jpgs in this example), use:mv *.jpg ../This allows for faster restoration than clicking through files one by one through the trash.
5. Use the “Undo” Command
People make mistakes. In fact, we do it all the time.
That’s why Apple’s built an especially simple yet surprisingly effective recovery command into every Mac. It’s called the “Undo” command. And quite frankly, you’re probably already using it.
With the Undo command, you can essentially wipe clean the previous action you took in the app you’re currently working in.
To restore files using Apple’s Undo command:
- Navigate to the app you were using when you made the mistake.
- Use the Undo command (Command + Z) to redo your previous change. That’s it!


6. Use a Professional Data Recovery Service
Last but not least, the final way you can avoid using software to restore your deleted data is by using a professional data recovery service.
A professional data recovery service specializes in the recovery of data that users can’t typically restore using other means (data recovery software included). These services can help in cases involving logical corruption of the disk, mechanical damage, and accidental deletion that may have resulted in the file being overwritten.
While certainly effective, this method may not be ideal for some as it can be expensive and take quite some time to see results.
How to Prevent Data Loss on a Mac
The absolute best way to prevent data loss on a Mac is to ensure you’re backing up your data regularly.
There’s no steadfast rule on how often you should be backing up your data. But a good rule of thumb is to be creating new backups once a day. If you’re working on especially sensitive or regularly changing information (e.g., working from home, altering a lot of documents regularly), you may want to switch to a more robust backup schedule.
There are a few ways you can back up your files. But two of the best are using your Mac’s built-in backup app Time Machine and using time-tested backup software like Disk Drill.
Using Time Machine to Prevent Data Loss on a Mac
Apple’s Time Machine feature lets you backup your data continually and automatically with little to no hassle on your part. That way,
Time Machine automatically keeps the following backups:
- Hourly backups for the past 24 hours
- Daily backups for the past month
- Weekly backups for all previous months
Time Machine also keeps hourly local snapshots as space permits. Your Mac stores these snapshots on your actual machine, not your backup drive. That way, you still have plenty of backups to work with, even if you’ve disconnected your backup drive. Like other Time Machine backups, your Mac will automatically delete the oldest of these backup files.
The only trick to using Time Machine is you have to make sure you’ve enabled automatic backups in order to prevent data loss.
To prevent data loss using Time Machine:
- Click the Time Machine icon in the toolbar.

- Open Time Machine preferences.

- Turn on automatic backups by clicking the “Back Up Automatically” option.

- For the best results, keep your backup drive connected to your computer so Time Machine can automatically run backups every hour.
Using Disk Drill to Prevent Data Loss on a Mac
Disk Drill is an easy-to-use and powerful software that lets users recover permanently deleted files on Mac. It’s one of the best tools for Apple deleted files recovery available today.
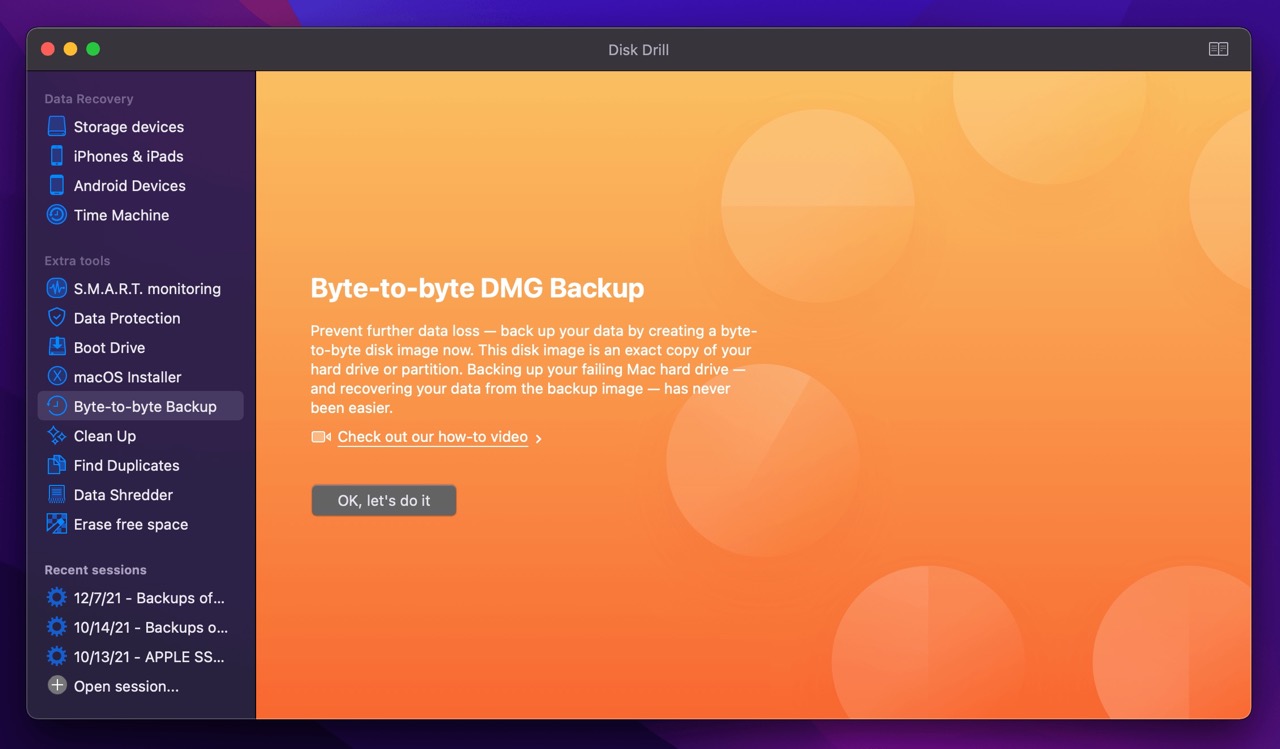
But beyond just data recovery, Disk Drill also has plenty of other tools and features to keep your data protected. One such feature is Byte-to-byte Backup. This feature lets you create an entirely new byte-by-byte disk image (DMG file) of your troubled disk.
If you’re dealing with a damaged hard disk and lost files, you can then run a recovery against the image rather than the damaged disk. Thus, you’ve prevented permanent data loss on your Mac should something go wrong.
Plus, the process is simple.
To prevent data loss on a Mac using Disk Drill:
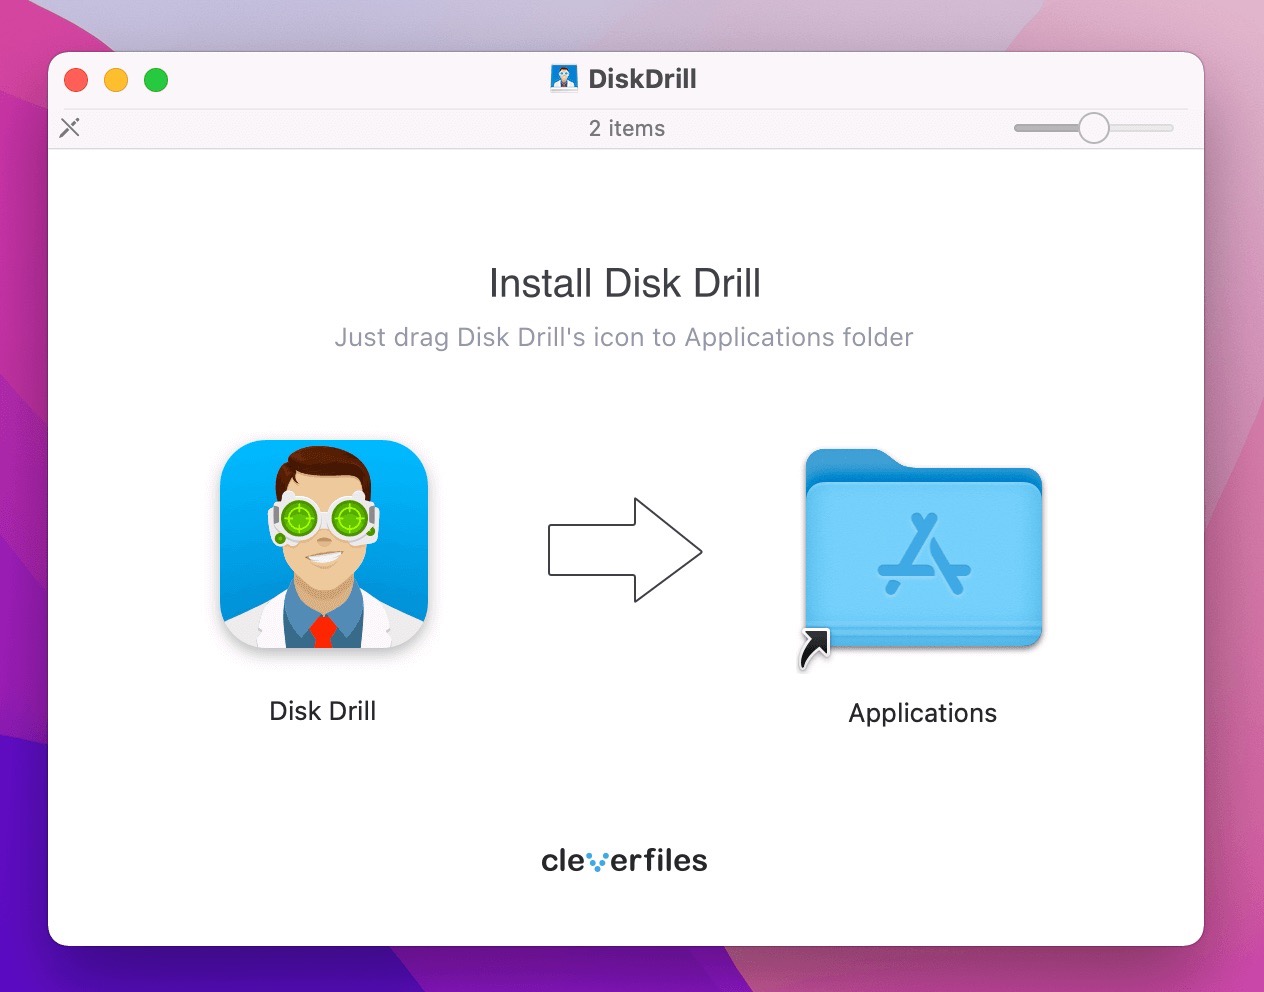
- Download Disk Drill and install the application.
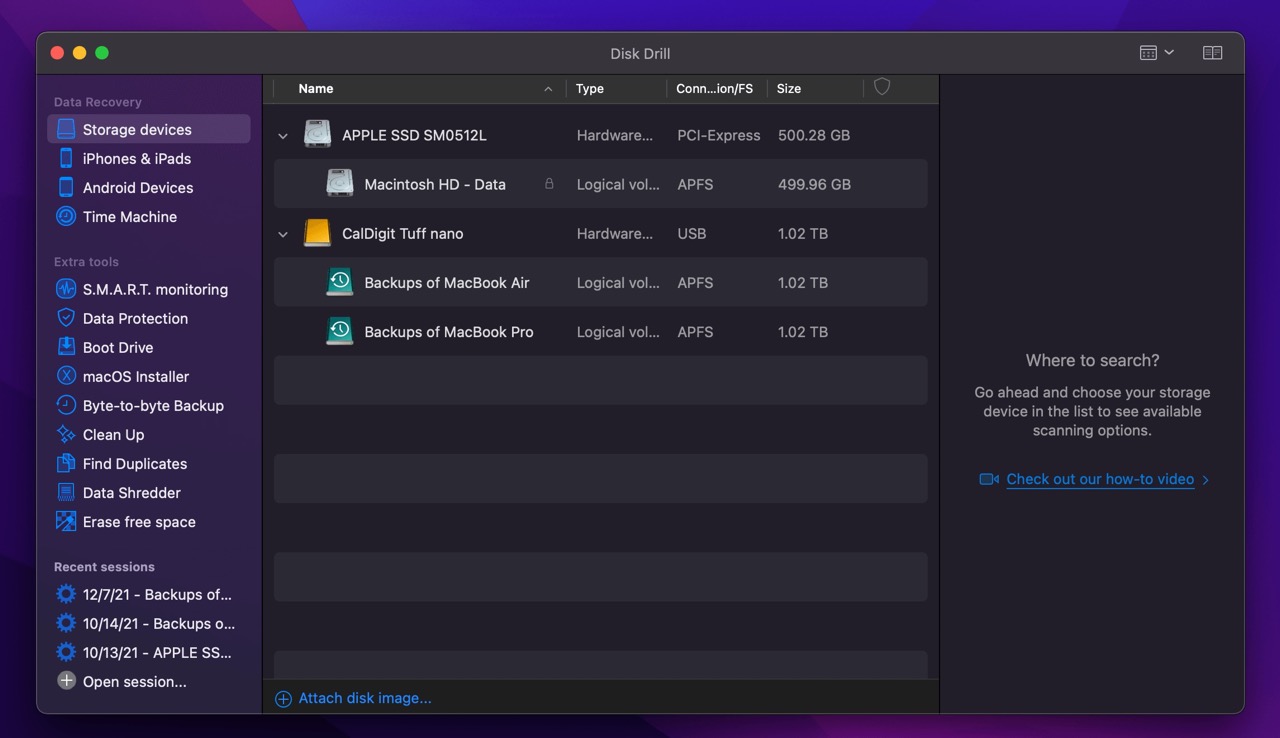
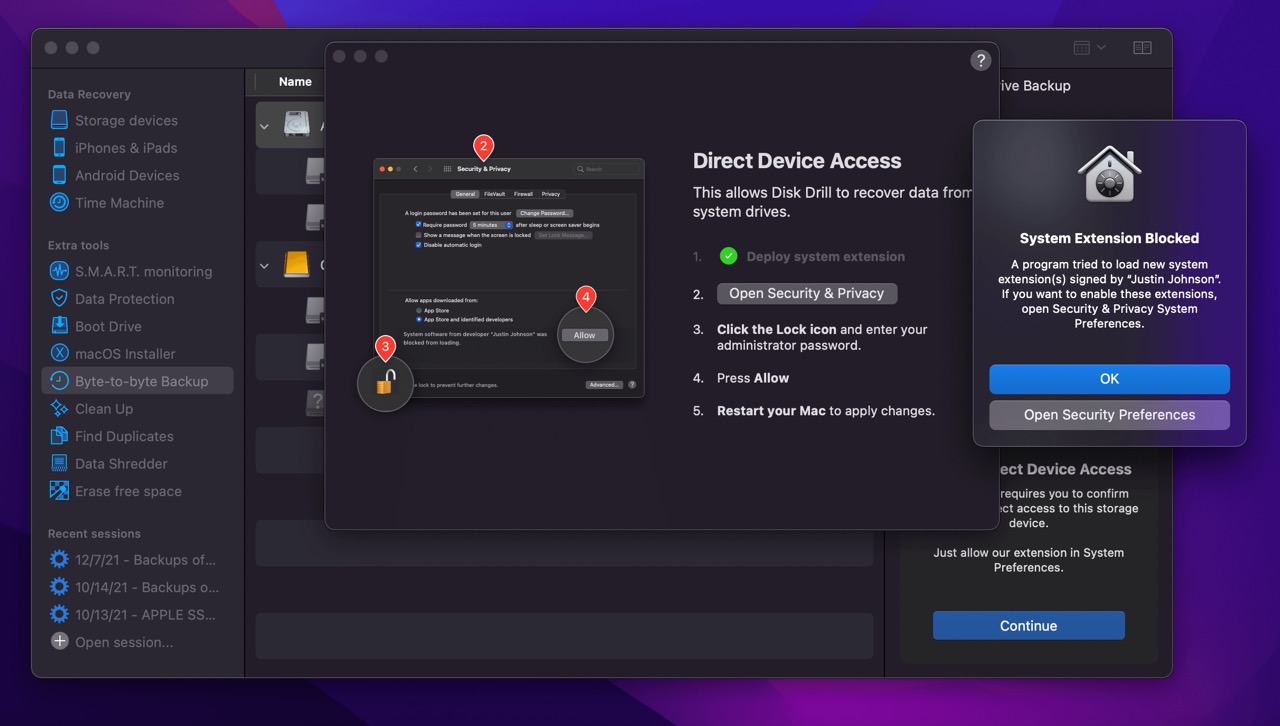
- Grant Disk Drill access to your disk drives (you’ll only need to do this once).

- Make sure you connect the drive you’d like to backup and select “Byte-to-byte Backup” from the sidebar.
- You’ll see a brief explanation of the Disk Drill backup process. You can also view a quick demo from this page that runs you through the process.
- Select the drive you’d like to backup and click “Create backup” or “Continue.” If you’re backing up your Mac’s hard drive, you’ll need to grand disk direct device access before starting your backup.
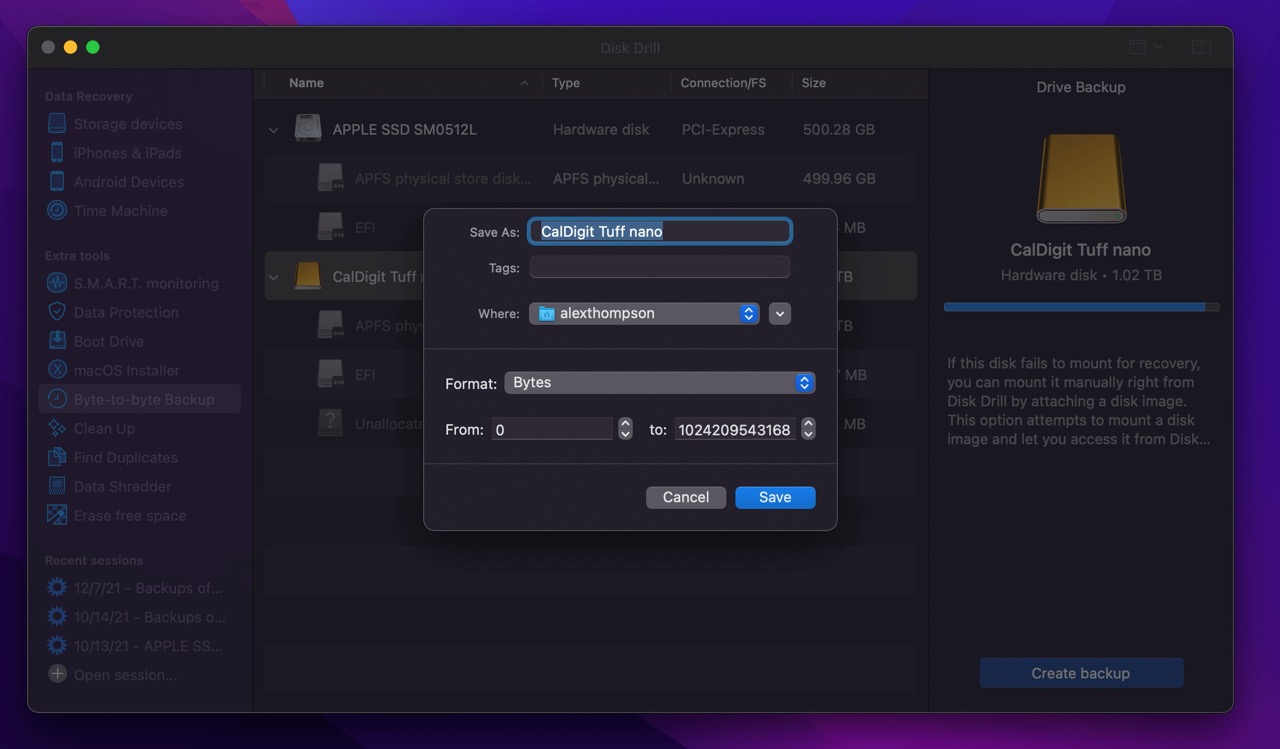
- Choose where to save the backup and create a new name. You can also specify the start and end positions for the backup image. This is a handy feature in case you know where your damaged drive is corrupted, so you can skip that section.
Conclusion
Whether you’re dealing with lost video files, deleted photos, or suddenly missing important documents, there are ways of recovering your files without using data recovery software.
The six methods in this guide make getting your data back simple. And with them, you can get back to normal in a snap.
FAQ
Below are just a few of the most frequently asked questions when it comes to how to recover deleted files on a Mac without software.
There are a few ways to recover permanently deleted files from a Mac outside of Time Machine. The best methods are:
- Using the “Put Back” option from inside your Trash Bin.
- Restoring your recently deleted files from iCloud Drive.
- Retrieving your data using the Mac Terminal.
- Utilizing the “Undo” command.
- Taking advantage of a data recovery tool like Disk Drill.
- Partnering with a professional data recovery service.
If you want to recover permanently deleted files without software, you can use one or more of the following methods:
- Using the “Put Back” option from inside your Trash Bin.
- Taking advantage of Time Machine to recover your files.
- Restoring your recently deleted files from iCloud Drive.
- Retrieving your data using the Mac Terminal.
- Utilizing the “Undo” command.
- Partnering with a professional data recovery service.