How to Recover Replaced Files on Mac
Table of Contents
Accidentally replacing or overwriting a file can happen in many ways. The most common cause is mistakenly replacing it with another file having the same file name. If you’re experiencing this problem and are now wondering how to undo or recover overwritten files on Mac, you’ve come to the right place.
Fortunately, there are several methods to bring back your replaced files. In this article, we’ve included three effective ways to do this on your Mac.
Can you Recover Replaced Files on Mac?
Yes, you can recover and restore replaced files on Mac as long as the new data did not completely overwrite the old file. In some cases, you might even be able to retrieve the whole original file instead of just a part of it.
In other situations, however, your file can be completely overwritten or destroyed if left in the system for too long. This is why time is crucial when restoring data to prevent possible harm or change.
Methods to Recover Replaced Files on Mac
There are a few methods that you can try to recover overwritten files on Mac. We will be talking about how to undo your replaced file using a prior version, a cloud backup, and a reliable third-party software.
Method 1: Recover Replaced Files on Mac Using Time Machine
Time Machine is a built-in feature in Mac that creates backups of your data. It works by automatically backing up files on an hourly, daily, and weekly basis. It keeps local snapshots in the form of the Apple File System (APFS) of your folders and files. You can then use them to recover previous versions of your file, including those that have been replaced.
These local snapshots are stored in the same disk as your local files, and are saved for up to 24 hours or until extra space is needed on your Mac.
To use Time Machine to recover your overwritten files, just follow these steps:
- First, open the folder where your replaced file is located.
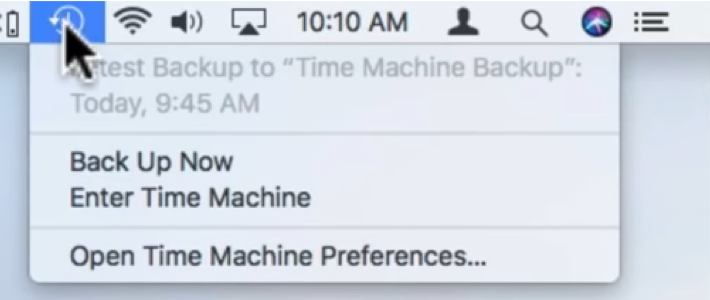
- Click the Time Machine icon on the Taskbar. It looks like a clock with an arrow rotating in a counterclockwise direction.
- Select Enter Time Machine.
- The app will now show you a preview and timeline of all snapshots available in that folder. By default, it will show an hourly screenshot of that folder.
- Use the arrow keys to navigate through the different versions until you reach the version that contains the original file that was accidentally replaced.
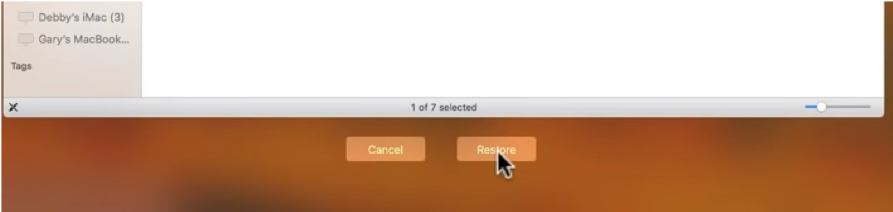
- To restore, select the file and click on the Restore button found below the folder window.
- It will pull the file and transfer it to the present version of the folder, where you will now be able to view it.
Method 2: Recover Replaced Files With Data Recovery Software
You can also try to use data recovery software like Disk Drill to recover accidentally replaced files. This tool is a proven solution that is really easy to use. It scans your drive for the overwritten file and lets you save it at a location of your choice. It can even tell you how likely it is for your file to be recovered.
Disk Drill works on most versions of macOS, and can also be used to recover deleted, lost, and corrupted files. While it’s not a 100 percent guarantee that you’ll get your files back, Disk Drill will nonetheless try to bring it back as long as the file is in a recoverable state.
Here are the steps in installing and using Disk Drill to recover replaced files on Mac:
- Download Disk Drill from their official website onto a Mac with OS X 10.6 or later.

- To install, double-click the Disk Drill image in your downloads folder, then drag the app icon to your Applications folder.
- Open Disk Drill and select the drive that contains the replaced data. Then, click Search for lost data.
- When the scan is complete, select Review found items.
- Find the file you want on the list. Once you find it, tick the checkbox next to it, and select Recover.
- Select where you want to restore your file, then click OK. Make sure to choose a location that is separate from the original partition to avoid overwriting and corrupting the file you are trying to recover.
- Your file is now available at the location you have selected.
Method 3: Using Cloud and Local Backups
As part of the pre-installed applications in macOS, you’ll have easy access to Time Machine and iCloud. Both of them work by creating backups of your data, which includes apps, media files, and document files. You can easily access these backups in order to recover deleted or overwritten files on your Mac.
Setting Up Time Machine
As mentioned, Time Machine is a built-in local backup feature of Mac. But you can also configure it to create external backups on separate storages like an external hard drive. This way, you’ll be able to recover lost files even if your internal disk gets damaged.
Here’s how to set up and create a Time Machine backup on an external storage device:
- Connect your external storage device to your Mac via USB or Thunderbolt cable.
- Click the Time Machine icon, or go to Apple Menu > System Preferences > Time Machine.
- From the Time Machine Menu, choose and open Time Machine Preferences.
- Click on Select Backup Disk…
- Choose the name of your external disk, then click Use Disk. Time Machine will now automatically create regular backups onto your external drive.
To view the latest backup, click the Time Machine icon. At the top of the menu, you will see the time and date the backup was created on the external drive.
Recovering Replaced Files via iCloud Drive
Once you create backups in iCloud, you will be able to access them on other iOS devices that you own.
To recover accidentally replaced files using iCloud, do the following:
- Go to the iCloud official website and log in using your Apple ID.
- Go to the Settings app.
- At the bottom of the screen, you’ll see the Advanced options, then the Restore Files option.
- From the file restoration window, you’ll be able to see all the files you can restore and their previous locations. Search for the original file and select Restore.
- Once successful, you can now access the original version of the file in its original location.
Where do Replaced Files Go?
When you accidentally replace a file, you might think it was completely overwritten, but it’s not. Both old and new versions will still be available on your computer, with the new file being just a reference to the original. In other words, both files will still exist, unless the original file has been overwritten with new data, or deleted due to a lack of disk space.
Conclusion
Whether you accidentally saved files with the same name or have overwritten a file, they can still be recovered using various methods. Most of them are free and easy to use. You just need to have a stable internet connection to successfully try the methods above.
FAQ
You can recover a file you accidentally replaced on a Mac by using three main methods: Time Machine, iCloud, or data recovery software such as Disk Drill.
For detailed steps on how to recover replaced files using these methods, just refer to the steps in this article.
Yes, you can recover a file you replaced since both the old and new versions are stored in your backup drives. But time is crucial in bringing back your original file since old backups do get deleted when space is running low. So, make sure you have a stable internet connection, then follow the methods listed above to recover your files.
To recover a file replaced by another file with the same name, you can use Time Machine on Mac and search for the previous version of your file there. You can also bring the file back using your iCloud account. But if you don’t have any of those set up yet, you can use Disk Drill to recover it for you.
For you to recover an overwritten word document on Mac, you can use Time Machine. It will bring back the previous version of the file that’s stored in a backup folder. Logging in to your iCloud account will also work in recovering the previous version of the word document.